Automatic plugin deployment for Rhino and Grasshopper using Visual Studio.
This post is essentially some notes I jogged down from Long Nguyen’s C# Scripting and Plugin Development for Grasshopper, as it is very helpful when setting up build environment for Rhino using Visual Studio. This post was written based on Visual Studio 2019, Windows 11, and Rhino 7, at the time of writing.
Automating Grasshopper plugin deployment
Visual Studio’s Default Nature of Building a GH Plug-In
The default nature of building a Grasshopper component using a solution (In this post, I will refer to this solution as MyComponent.sln) in Visual Studio is that it generates a MyComponent.gha file under the project local folder.
Namely, for example, .\MyComponent\bin\Debug\net48\MyComponent.gha, where the net48 can vary, and such file might exist in .\MyComponent\bin\MyComponent.gha for older versions of Rhino.
Rhino’s Default Nature of Loading a GH Plug-In
However, in order for Rhino to correctly recognize the custom plug-in we wrote and load it so we can see it in Grasshopper shelf, the plug-in should be placed inside a special folder. Such folder can be found by going to Grasshopper Window - File - Special Folders - Component Folders, and most likely, something like this:
C:\Users\YOUR_USER_NAME\AppData\Roaming\Grasshopper\Libraries
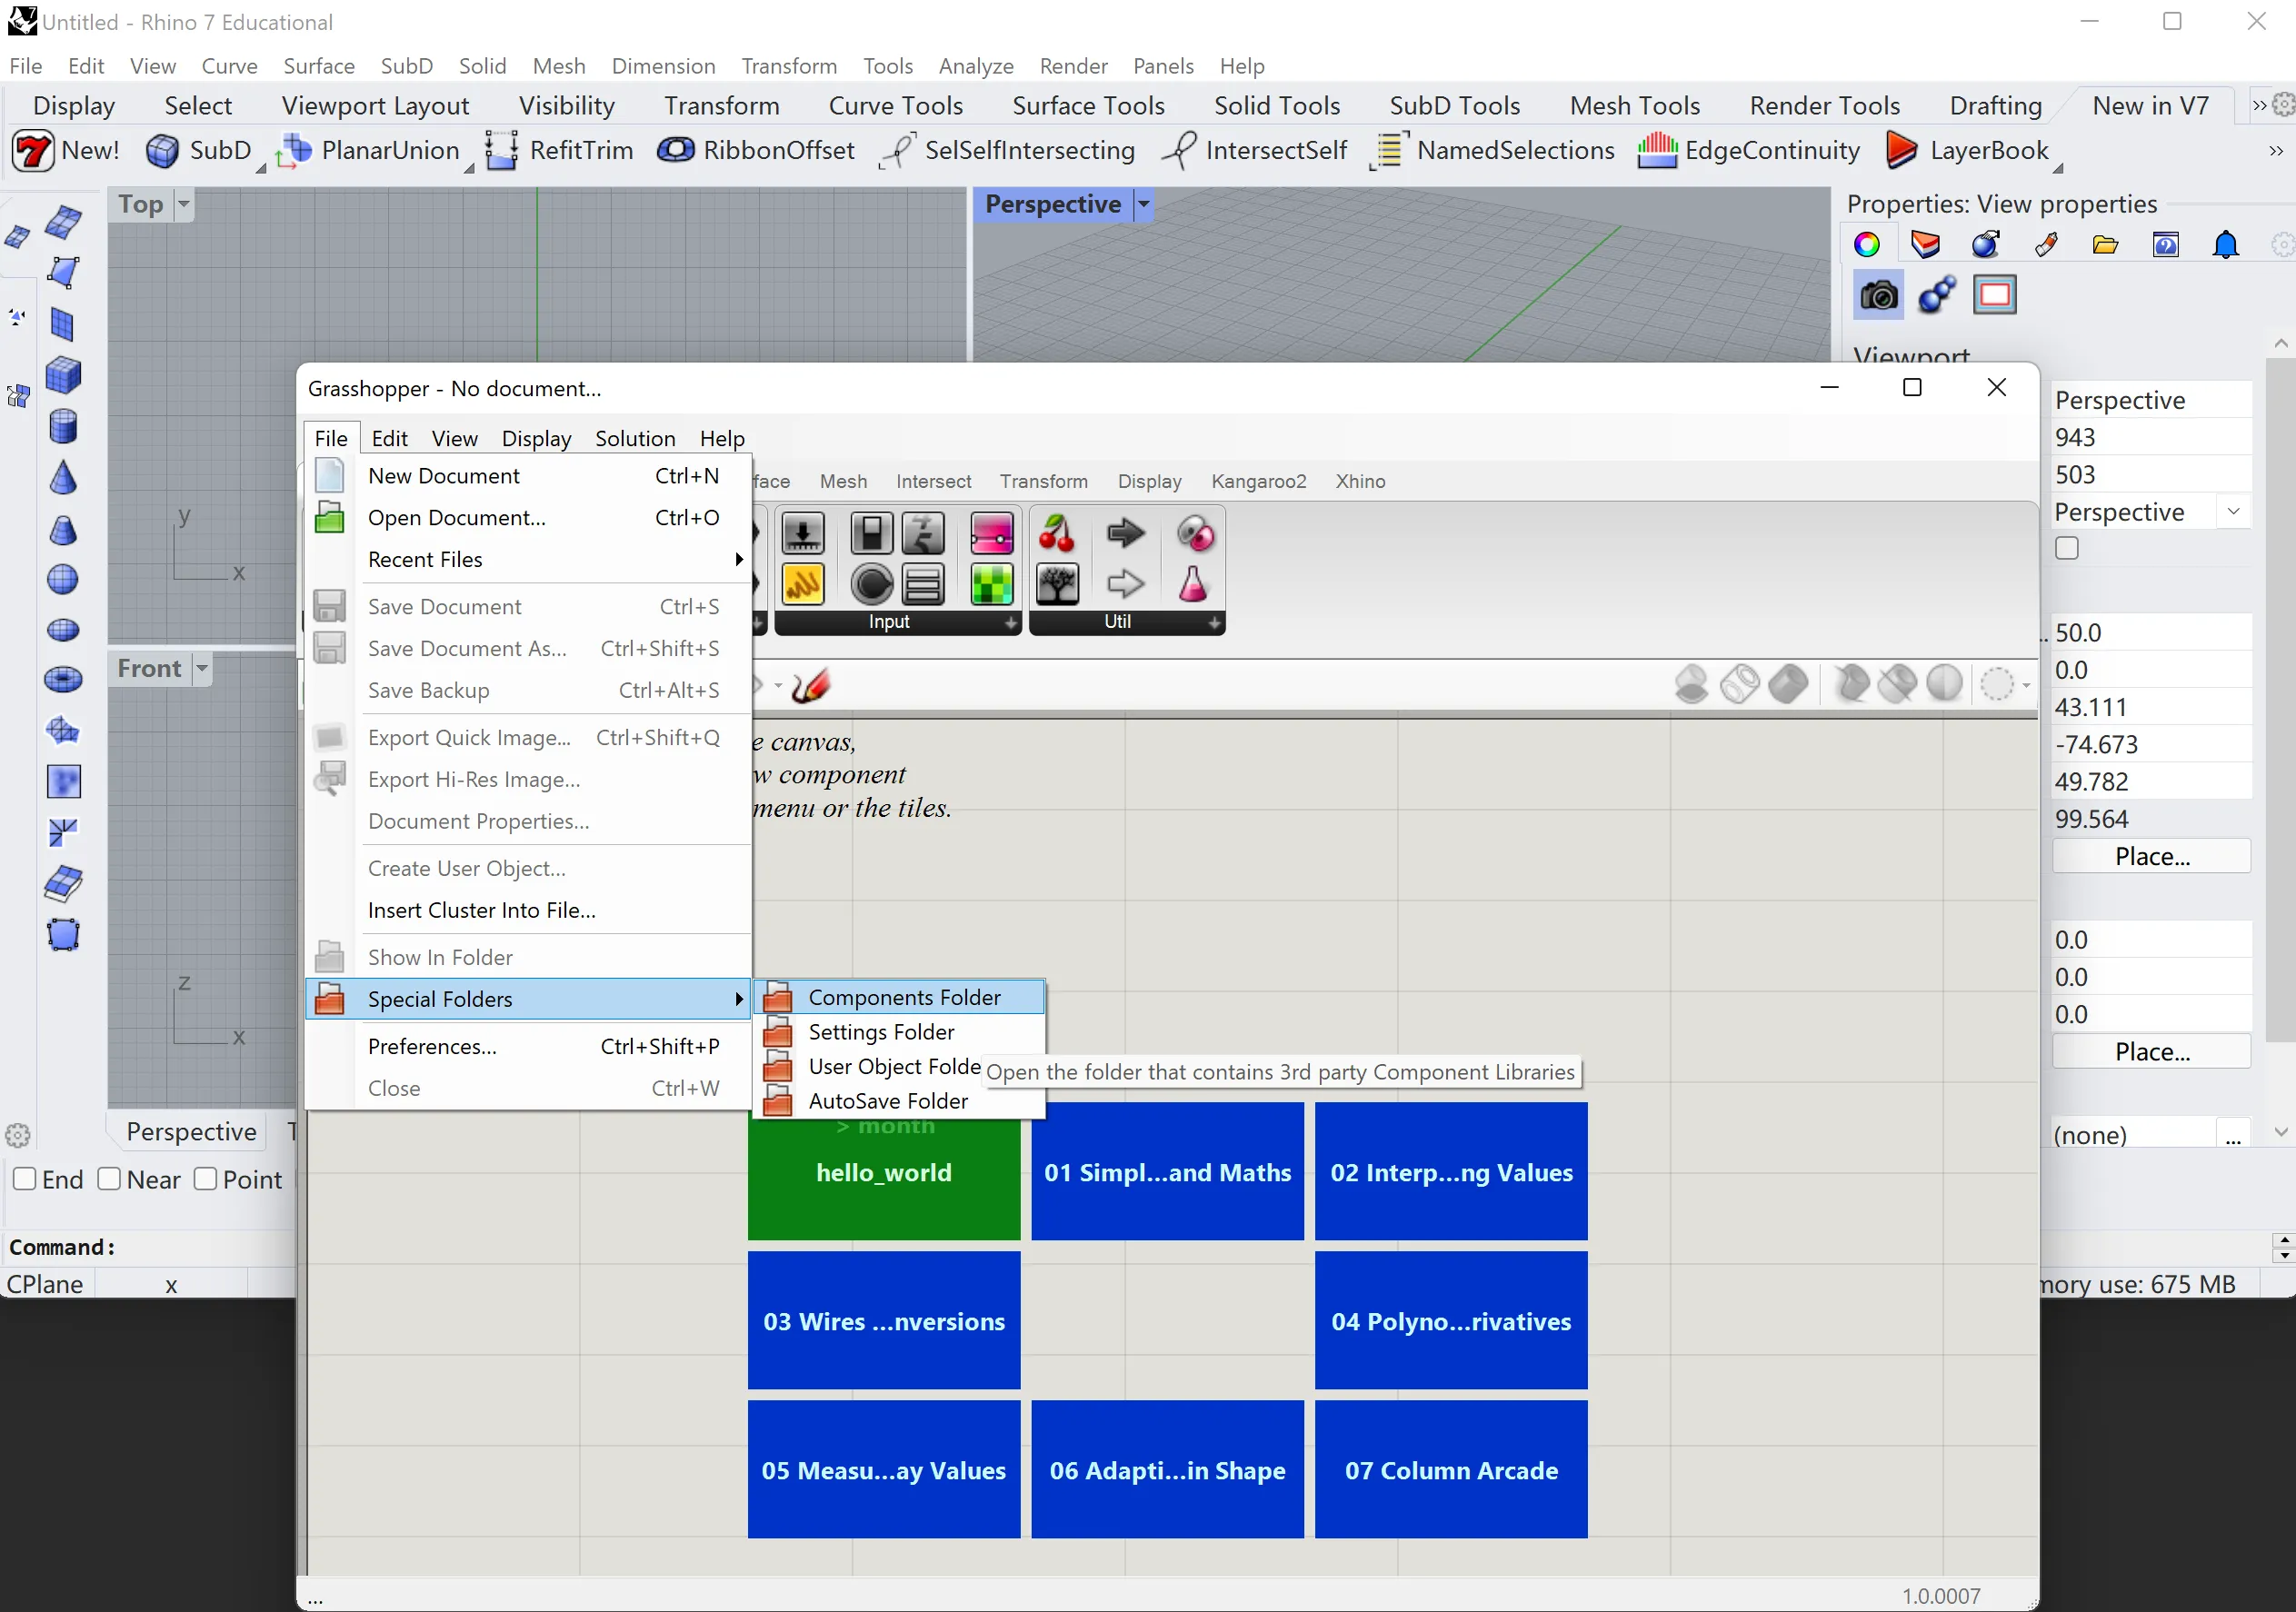 Grasshopper Special Folder
Rhino and Grasshopper (Which runs in the background even when one closes the Grasshopper window) will load the newly developed plug-in at the next restart of the main Rhino software.
The Naive Deployment Procedure
The naive way, then, for one who is developing their own plug-in for deploying it, is to manually copy the generated plug-in after building it to this location and restart Rhino. Such procedure might sound plausible at first, but soon get tedious when a lot of small changes needs to be performed on the same plug-in for a lot of times.
Automating Deployment
Let us automate this process, let’s sum up what we wish to do above: we want to build a file using Visual Studio, then copy that file to a new directory. Since we want this to happen after we finish building the plug-in, Visual Studio allows us to write scripts (In PowerShell on Windows, macOS unknown) to let VS do things after complete build.
We can navigate to the solution’s properties by right clicking on the solution, and select Properties.
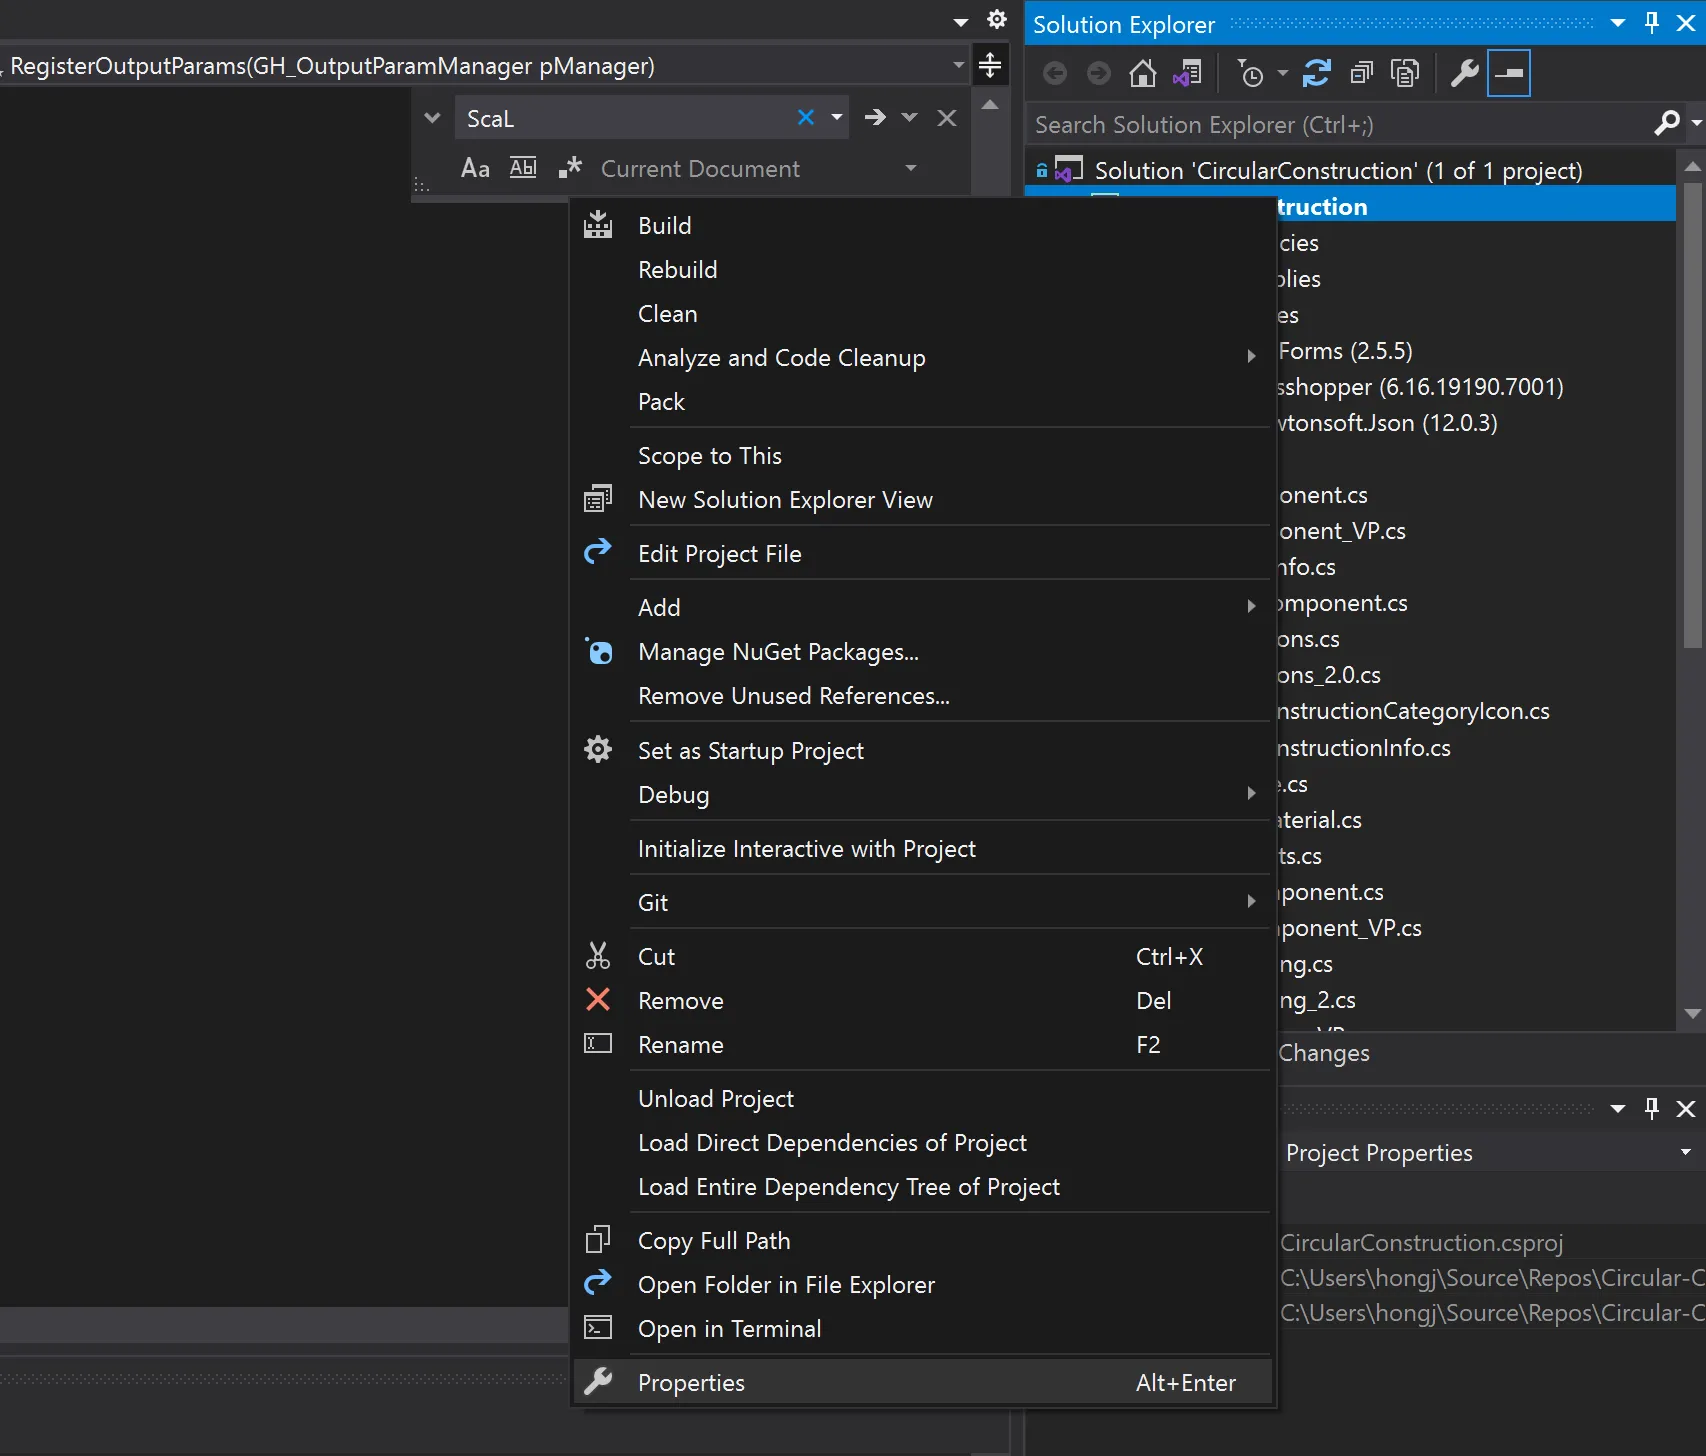 Visual Studio Properties
Then, go to Build Events, where we can set scripts to run after build in Post-build event command line, where I denoted as INPUT_COMMANDS.
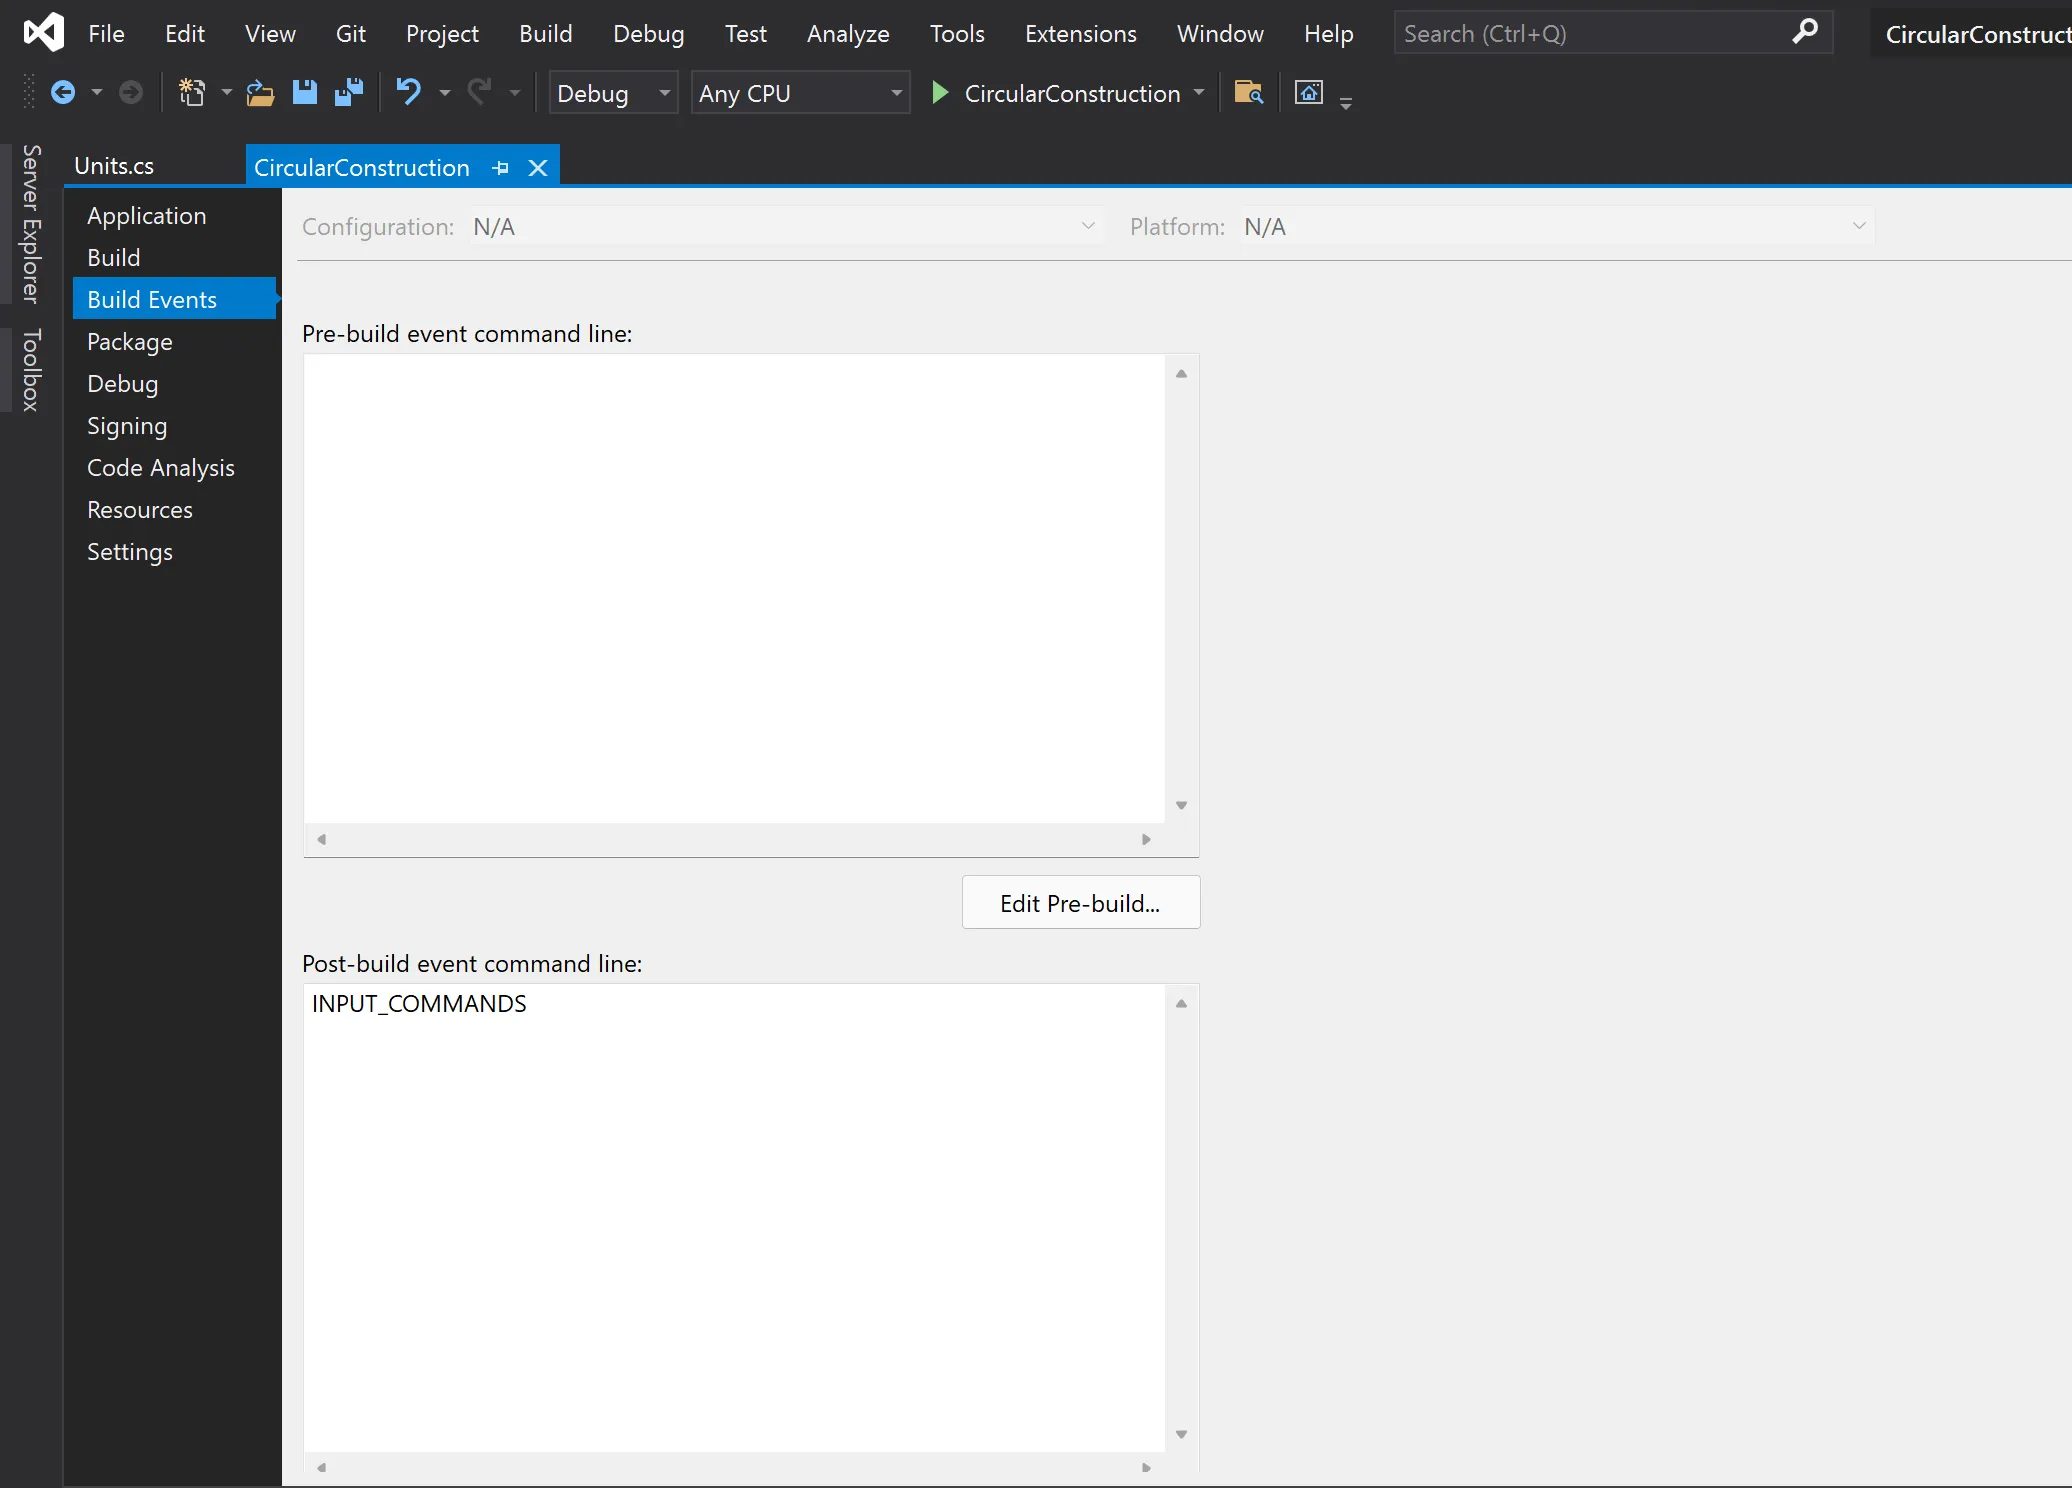 Visual Studio Build Events
Now, let’s automate this copy and paste process. We will be modifying the following scripts into the command box above.
Copy "$(TargetPath)" "ComponentFolder\MyComponent.gha"

Erase "$(TargetPath)"
It should be fairly straight forward, but I will still provide a brief explanation.
Line 1 does the copy work. It takes the file that was built by Visual Studio, namely, MyComponent.gha, and copy that into the special path that Rhino will load plug-ins for grasshopper.
You should customize this link based on your machine’s component folder, for example, your link might look like this:
Copy "$(TargetPath)" "C:\Users\YOUR_USER_NAME\AppData\Roaming\Grasshopper\Libraries\MyComponent.gha"
Line 2 is functionally optional.
It erases the plug-in binary that just got generated by Visual Studio, since it is not necessary to keep that file once we copied our plug-in to the correct location.
Make sure to save your commands by pressing CTRL+S. We have now finished automating this deployment procedure.
Reload Grasshopper Plug-In in Rhino
The Problem
Another problem still persists. It takes a full restart of Rhino for the newly installed Grasshopper plug-in to take effect. Closing the Grasshopper window and re-open it will not help, since GH will still silently run in the background.
Again, restarting Rhino will be the naive way to reload plug-in, but it soon becomes tedious once a lot of changes are made incrementally.
Enable Memory Load Assemblies
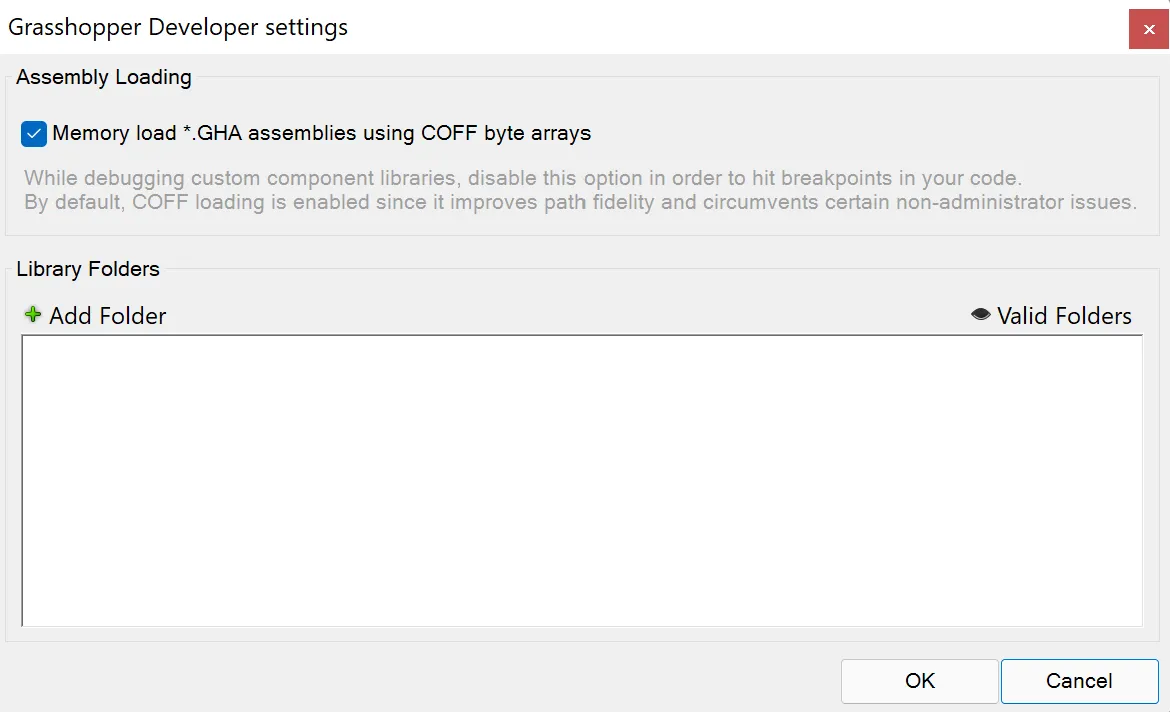
Before we continue, there is a setting we will need to turn on. That is, we need to allow Rhino to dynamically load plug-ins.
Go to Grasshopper Development Settings by typing GrasshopperDeveloperSettings in the Rhino Command, and Enable the option Memory load *.GHA assemblies using COFF byte arrays.
This prevents Rhino from not allowing Visual Studio to overwrite plug-ins. (Note: This line might be incorrect, but does not effect the outcome.)
 Enable Memory Load
Reload Grasshopper plug-in using command
In order to reload Grasshopper commands, you first need to Close the Grasshopper file and save any unsaved changes.
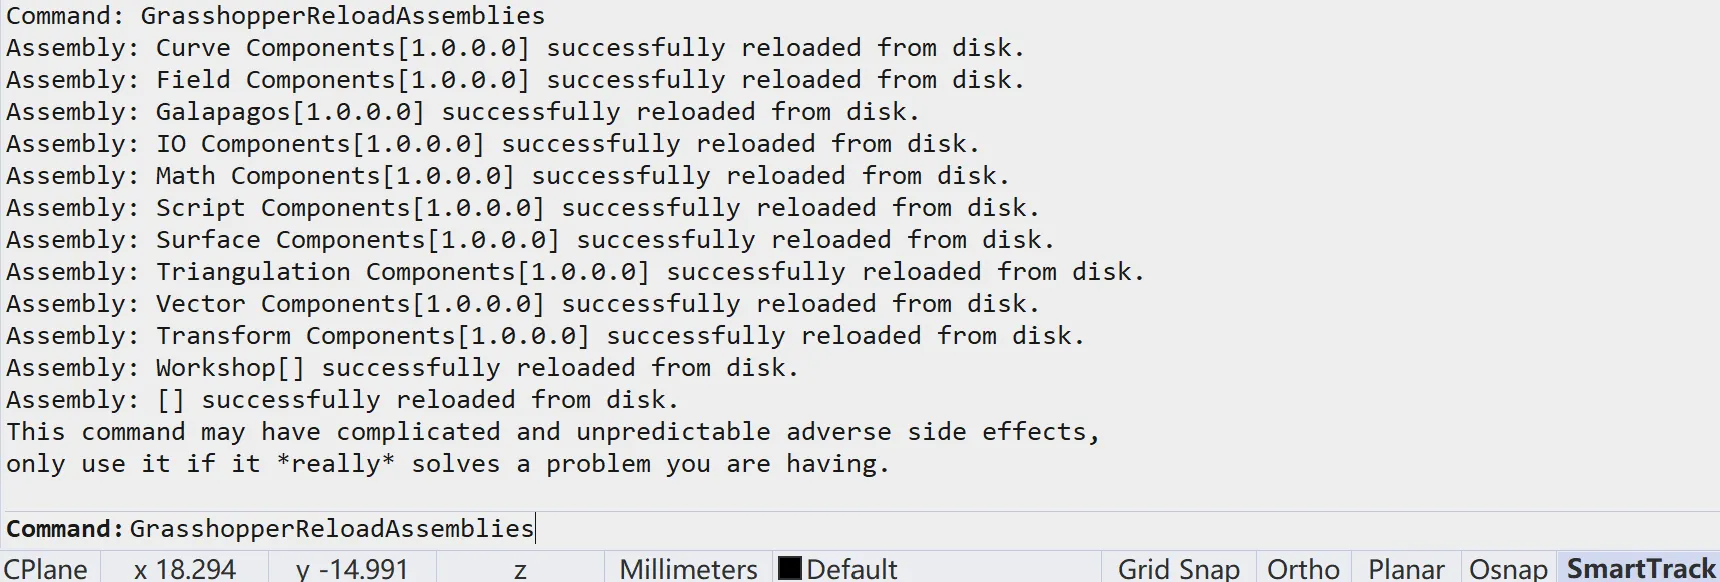
We will need a secret command to reload the assemblies. How secret is it? It won’t even appear in the Rhino auto-complete. The command is:
GrasshopperReloadAssemblies
 The effect of GrasshopperReloadAssemblies
This will reload all the plug-ins available to Grasshopper. Among all the outputs (Which will differ from your machine), you should see a line indicating that your plug-in was also loaded.
Make a Button for Reloading
Since this command is long, and not even in the auto-complete, it is still too much work to type this command in every single time. You have two choices, either bind a hotkey to this command, or create a button that will run this command. As a Maya user, I find buttons more convenient.
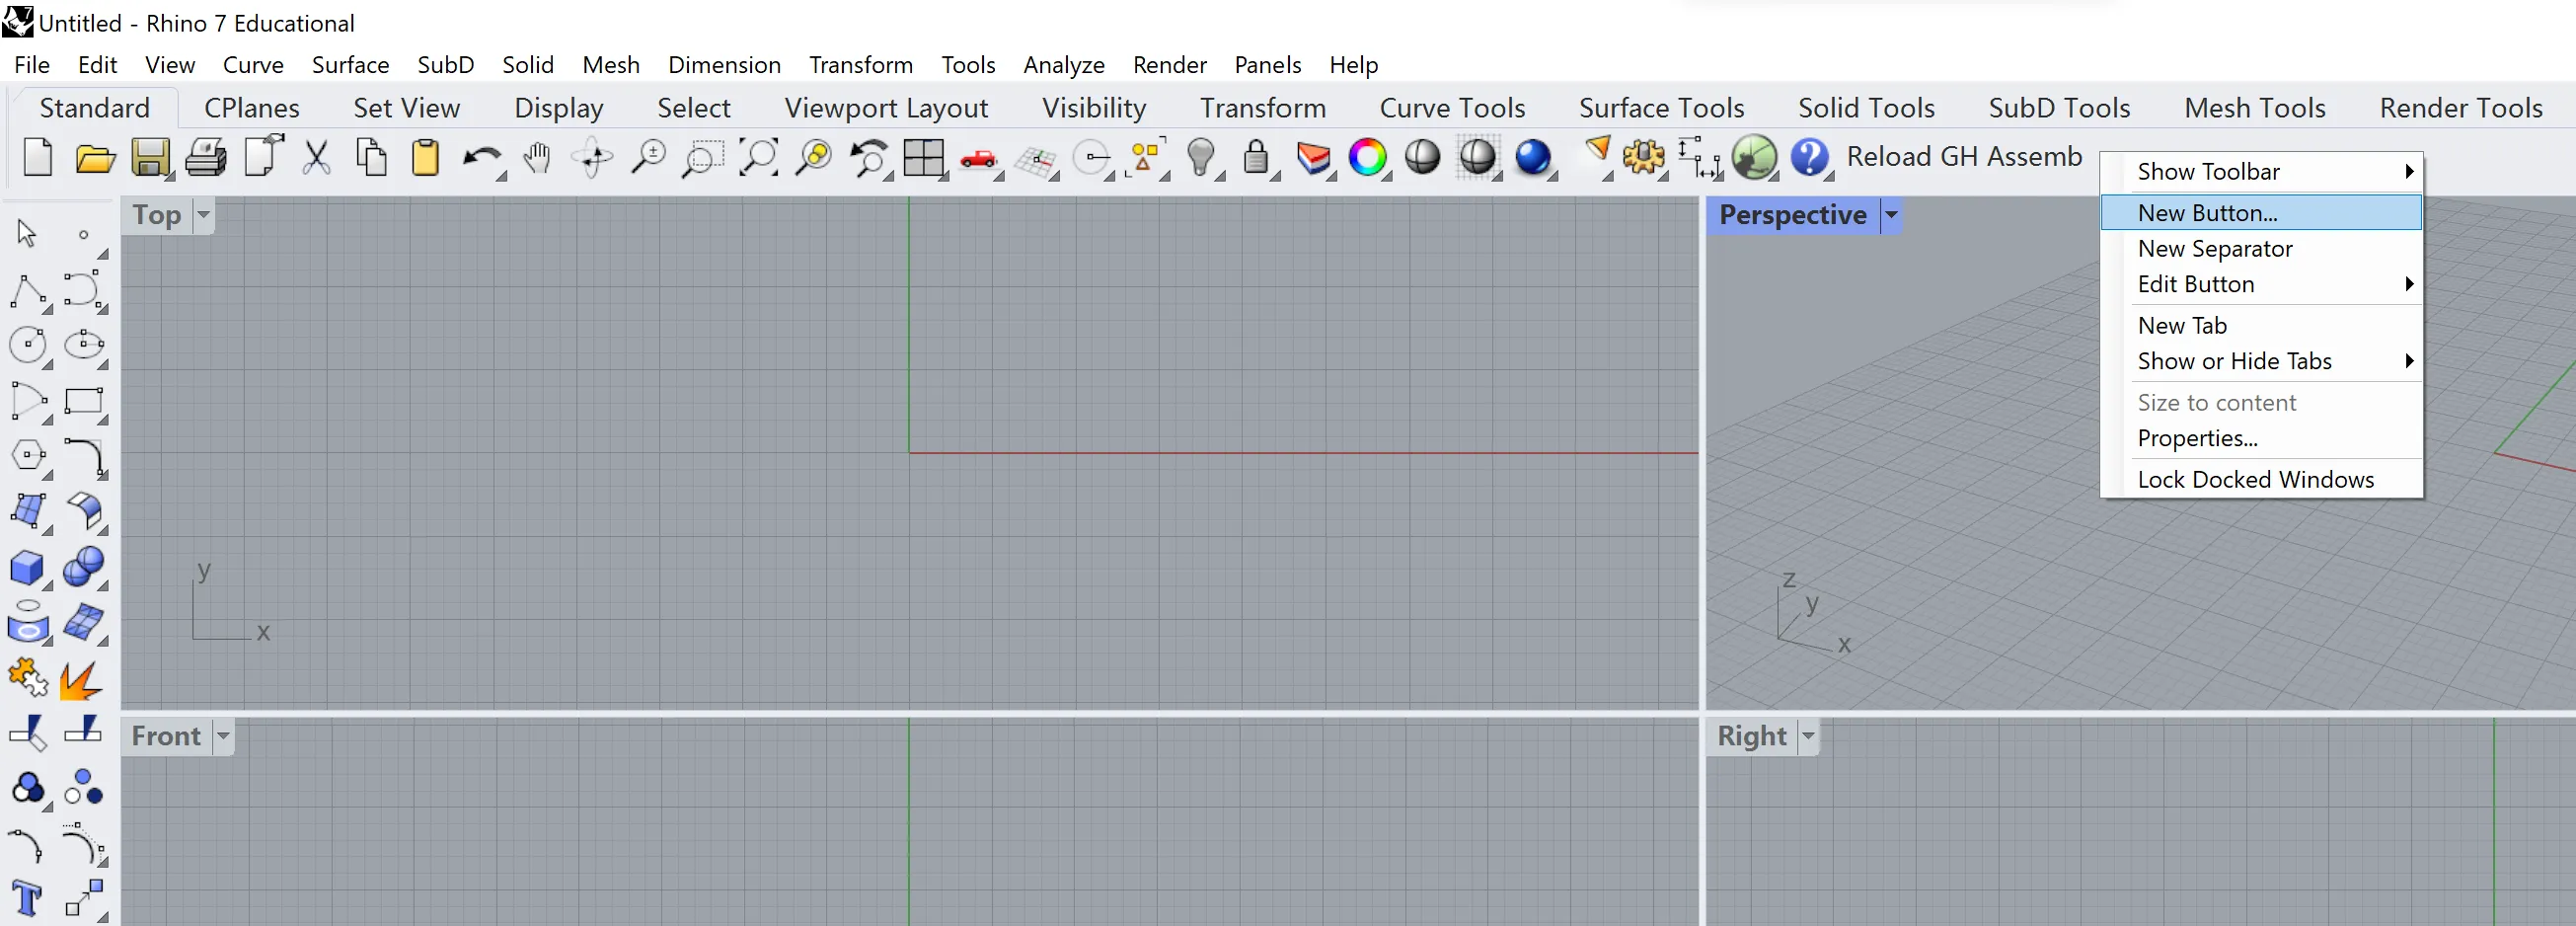
Navigate to a shelf that you want to add the button to, right click on the shelf, and select New Button.
 New Button
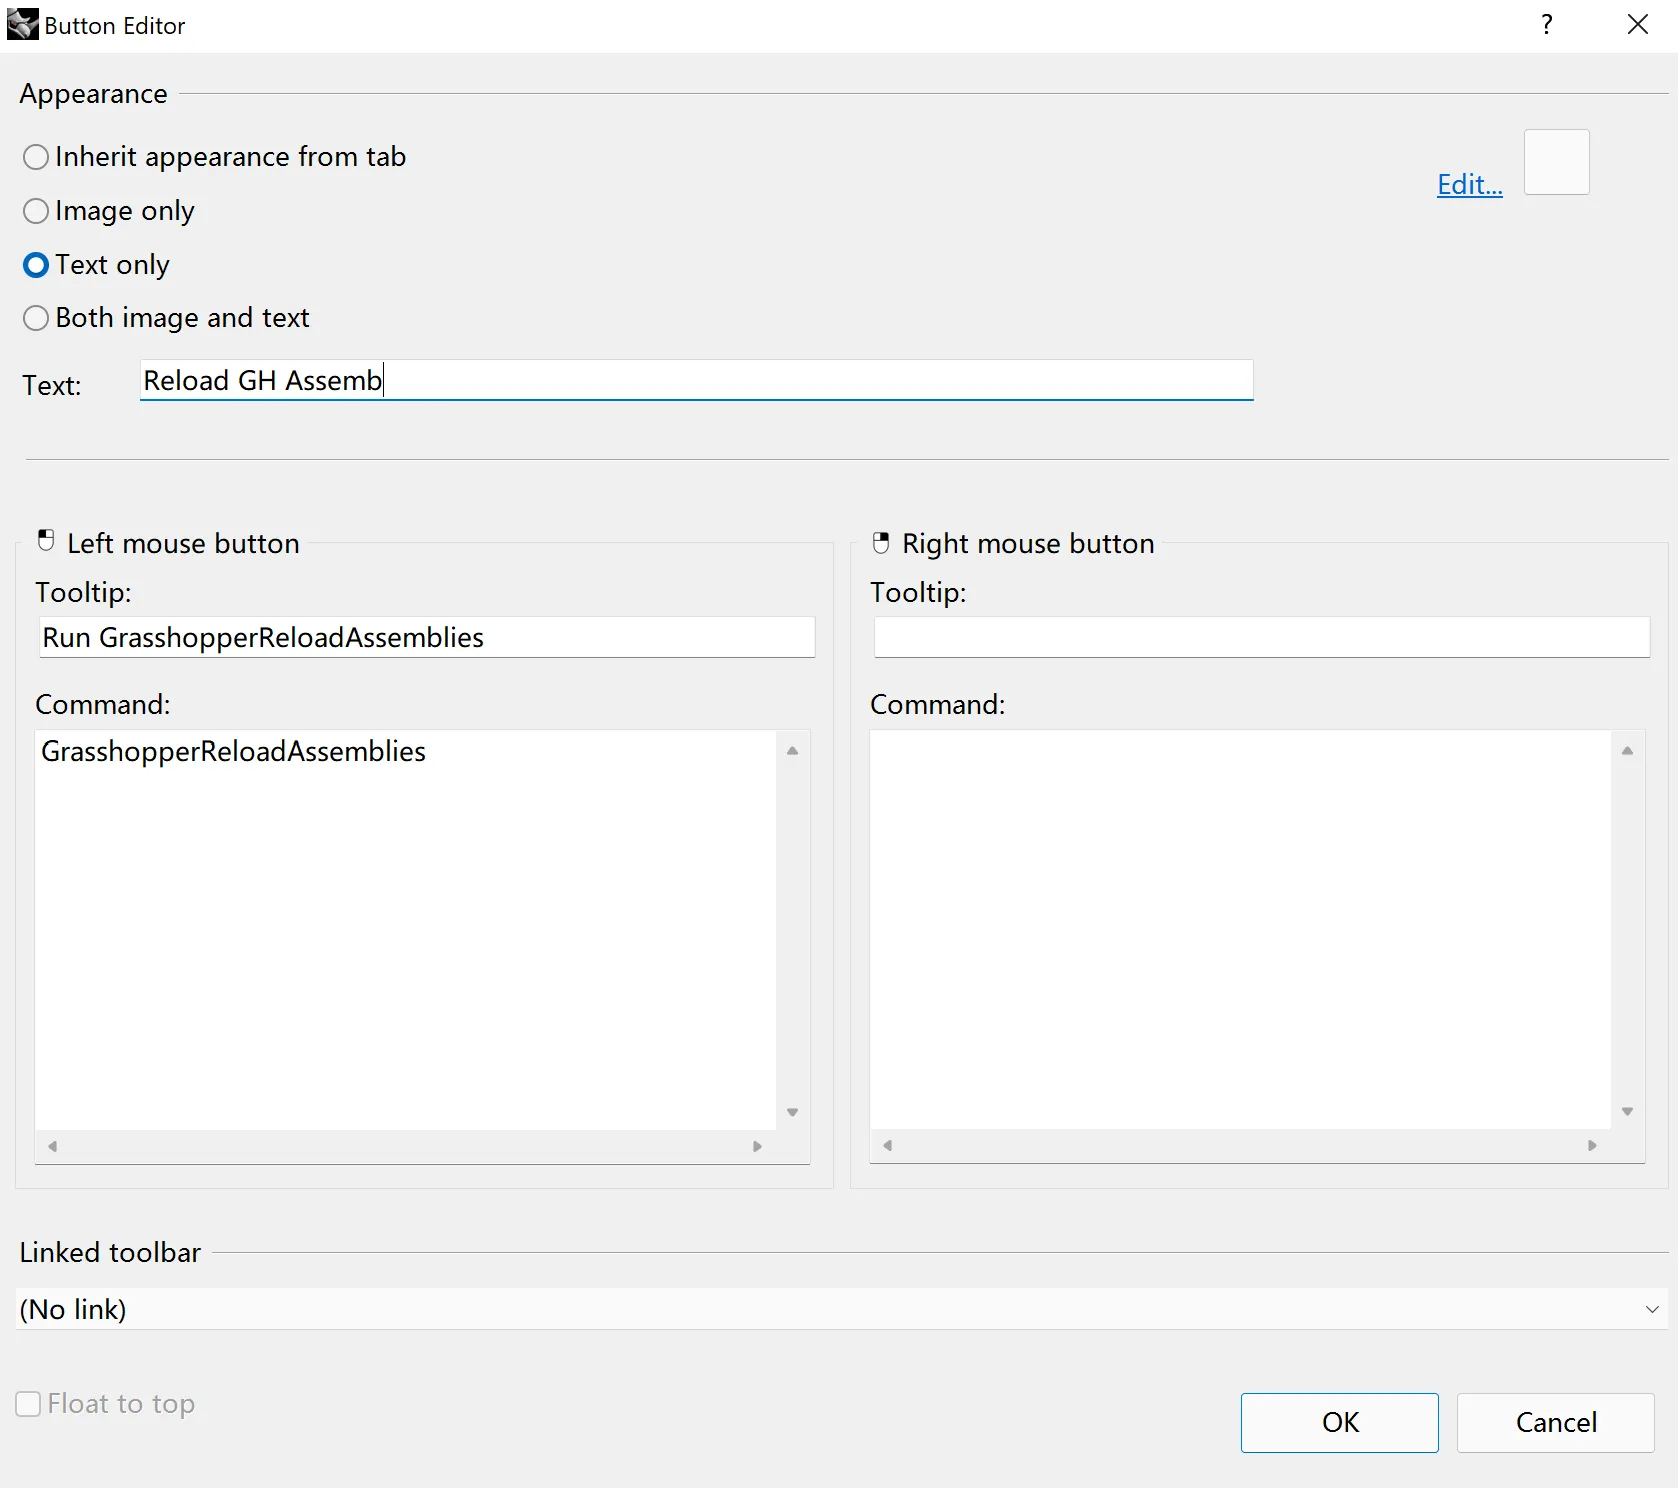
A button editor will appear. You have options to customize the button with icon or text, first, I will use a button with text only.
In the Tooltip section, you can input some hints for what this button will do, and it will appear when your mouse hovers onto the button. For example, “Run GrasshopperReloadAssemblies”.
In the Command section, type in GrasshopperReloadAssemblies.
 Button Editor
Obviously, we try to be perfectionists, so a button without icon is not acceptable. Luckily, an icon I made for my Maya plug-in will work great in this scenario.

If you like this icon, right click and save it to your computer, but you can also use any image you want.
Go ahead and right click on an empty space on the target Rhino shelf, and go to Edit Button, and edit the button we want.
 Edit Button
Change the option of button from Text Only to Both image and text, and click on Edit.
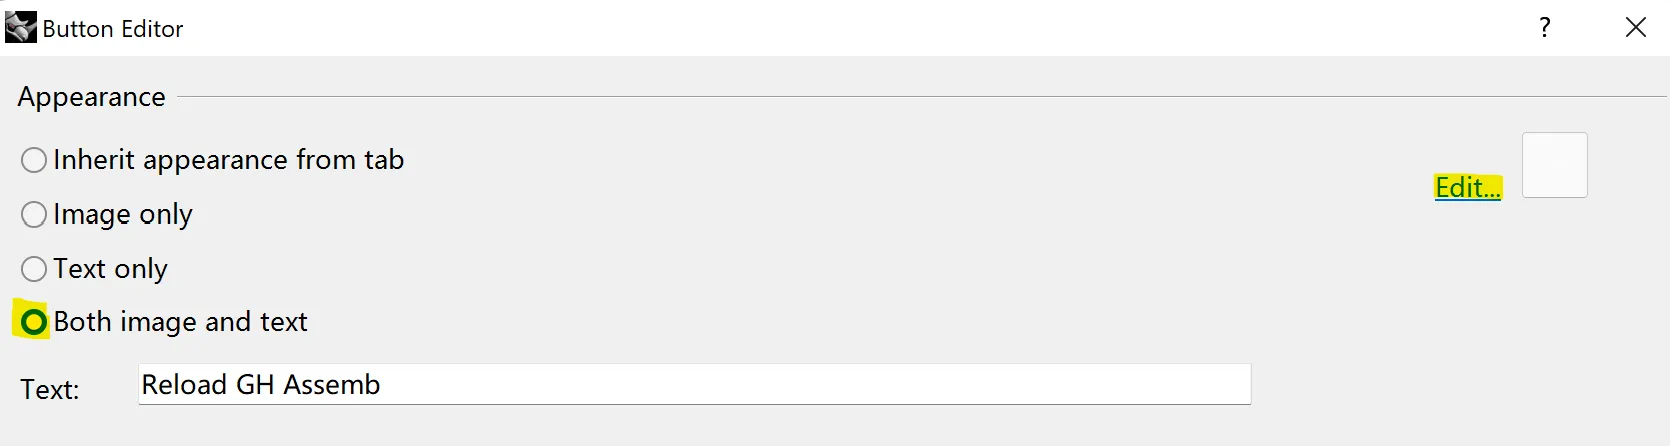 Button Editor Options
Then, click Import Bitmap to Fit, and import the icon image that you prefer.
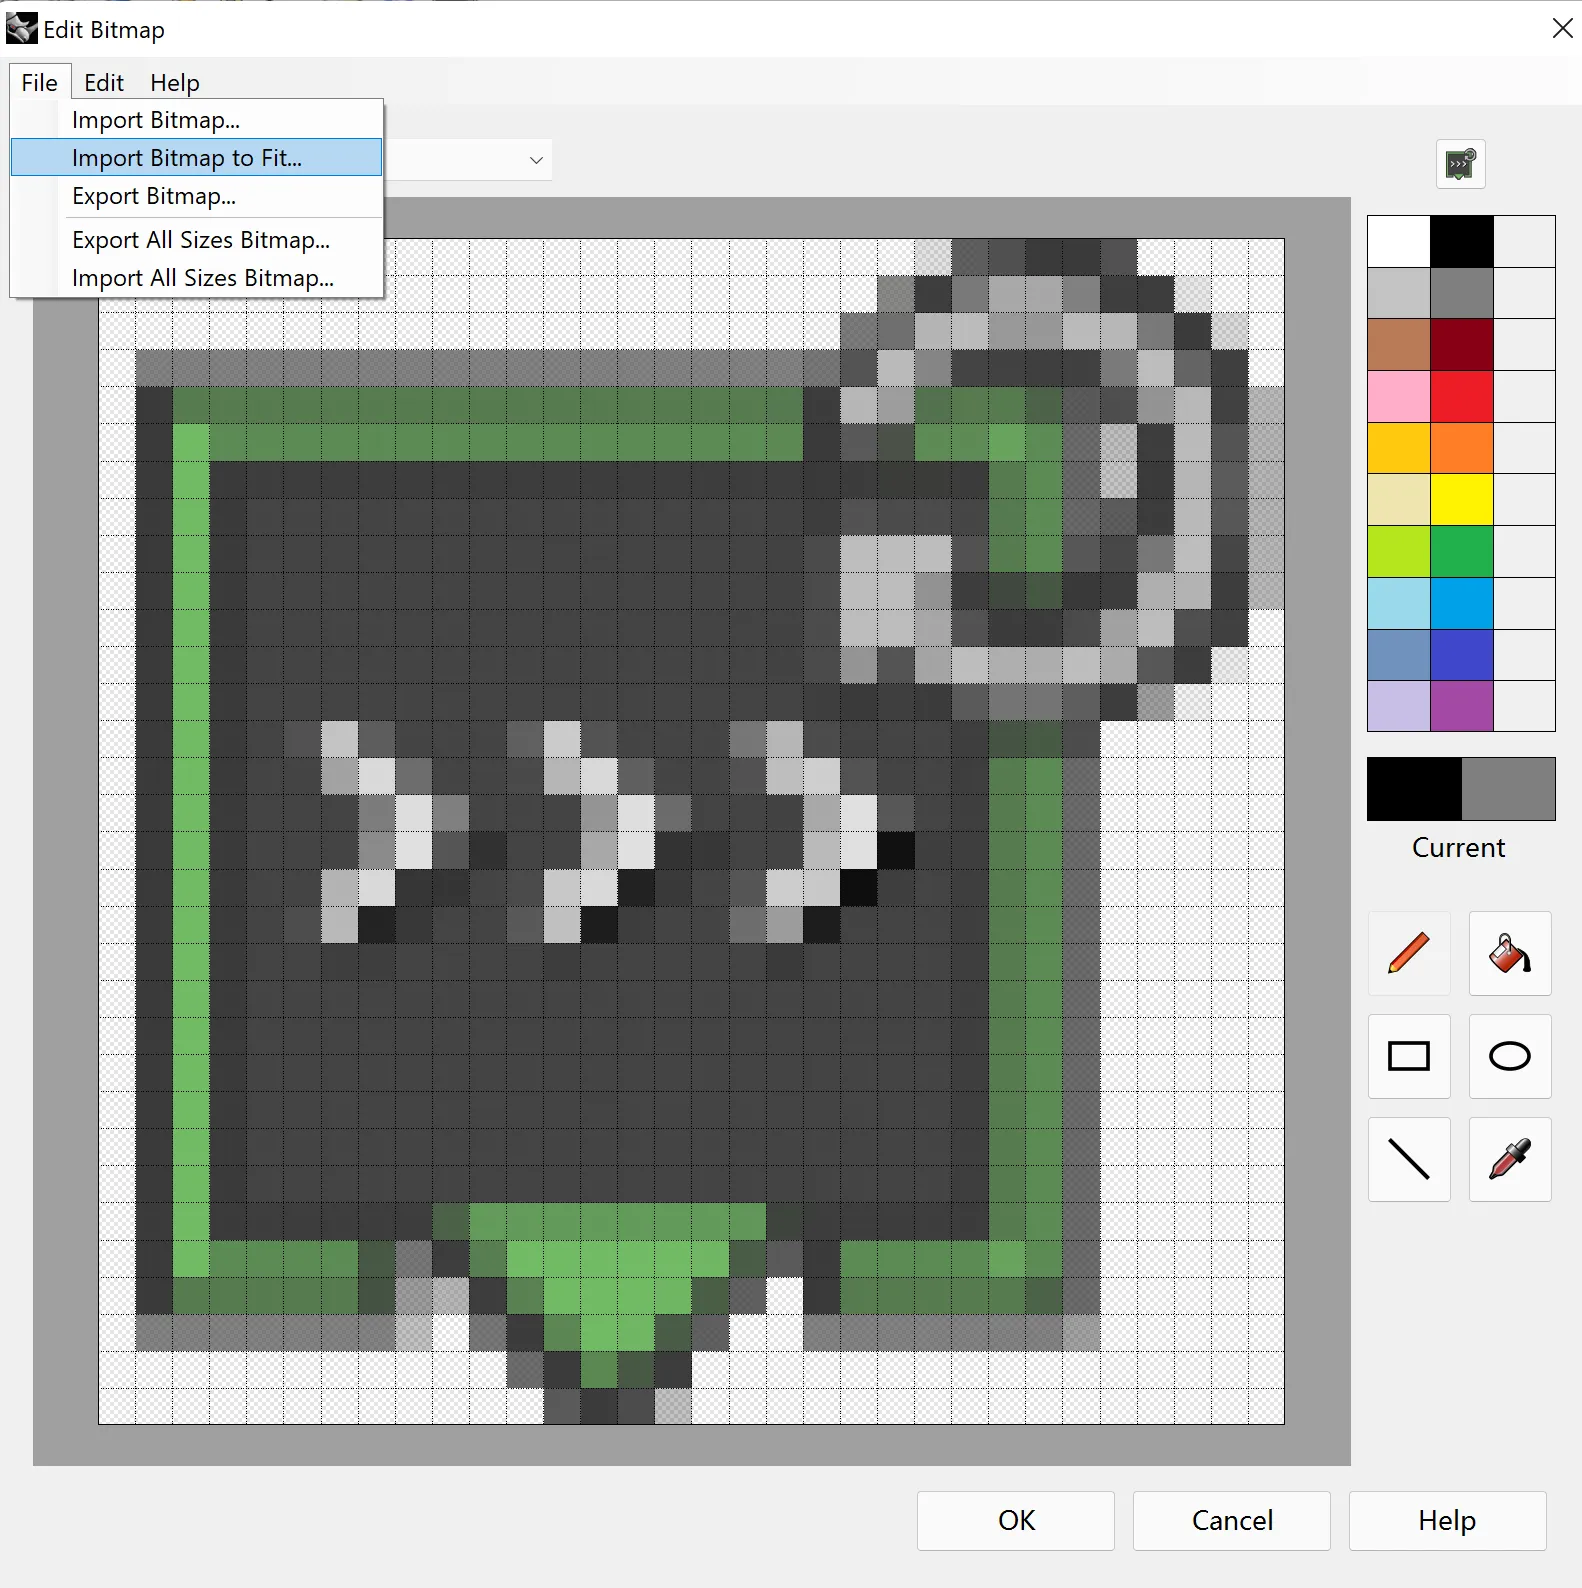 Import Bitmap to Fit
The button will behave as shown below, and left-clicking will run the command GrasshopperReloadAssemblies and reload all GH assemblies.
 Button Behavior
Conclusion
I hope this is helpful.
If you want to quickly say hi just shoot me a message using the contact portal.


