
My film negative digitization pipeline.
Introduction
My family lives in a very humid and hot place next to the sea in southern China, where things simply don’t last long.
One day, I asked my mom, “Why don’t you send all the films at home to a shop so we can get digitized scanned electronic copies?” And my mom said, “It is too expensive. Also, I don’t care about old negatives that much, since most of them are already in our album. You can take them to a scanner in the future when you make money on your own.” Then I thought, I have a camera! I can probably do it on my own, with a little help from the internet.
It turned out to be a very wild exploration into photography in general, and I will write several posts on different aspects of this project. For this article, I will focus on outlining the equipment and workflows I find the most helpful.
After you finish reading this post, you will learn how I do digitization, and ready to apply that to the world.
Hardware
There are several things that made up my simple rig. You don’t necessarily have to have the exact same setup as me, but you should have the components in your setup.
Camera
- A camera that can output digital image is required of course.
- My camera is a Fujifilm X-S10, but any modern digital camera from any brand will do.
- Your camera needs to support remote trigger shutter.
- By not touching your camera when pressing down the shutter, you reduce shake movement and therefore can achieve a clearer image using a slower shutter speed, smaller aperture, and lower ISO.
- I use the free Fujifilm Cam Remote App on my iPhone for this purpose.
- If your camera does not have a phone app to remotely trigger the shutter:
- Some cameras, like the Fujifilm X-T5, can screw in a physical Shutter Cable Release which serves the same purpose.
- Many cameras (including my X-S10) also support Digital Remote Shutter Release devices by plugging into the microphone jack.
- Additionally, a camera that supports tethered shooting is not required but would be very helpful.
- Tethered shooting means that when you connect your camera to your computer using a USB cable, every time it takes a photo it also transfers that file directly to your computer’s harddrive.
- For Fujifilm, you can use the free and very easy to use Fujifilm X Acquire.
Lens
Ideally, you will need a lens that focuses really closely, also referred to as a “macro lens”. The below are some of my recommendations, feel free to go with any one of them.
Setup 1. Professional (My Final Setup) [Expensive, Best image quality, Auto Focus]
-
Fujifilm XF 60mm F2.4 R Macro. (MSRP
$649,$285 on eBay)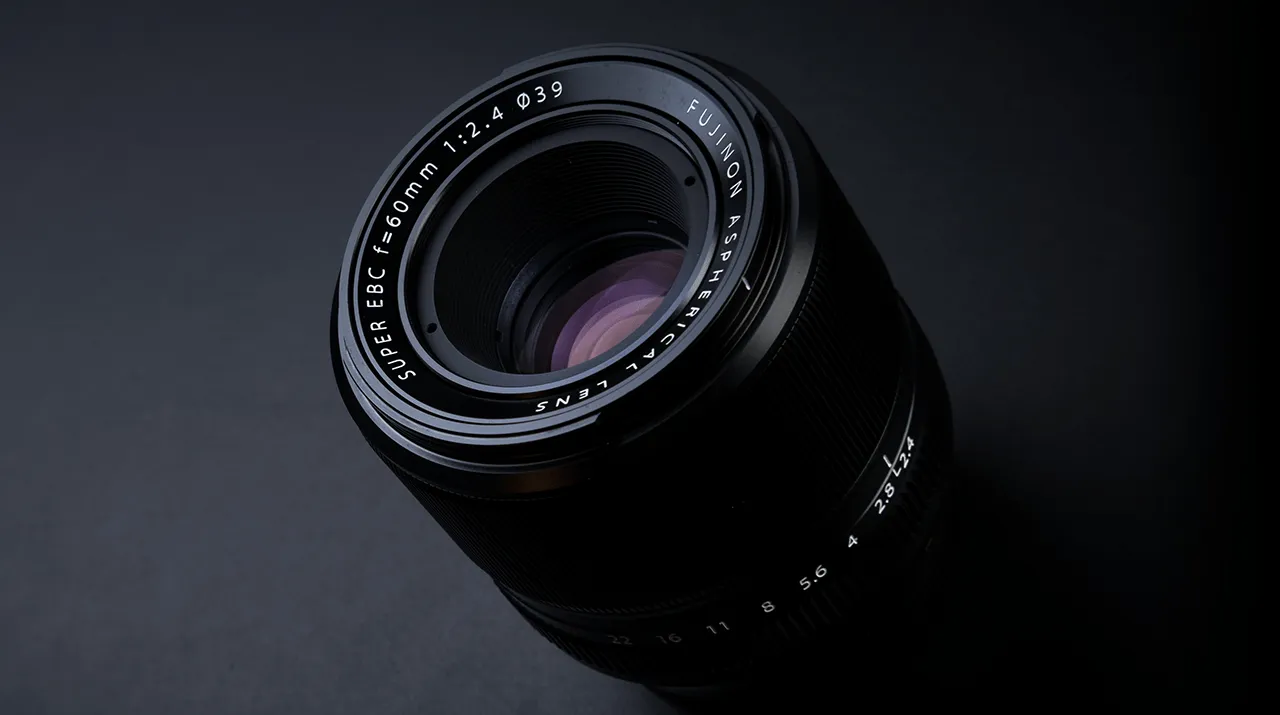
-
Fujifilm MCEX-16 Extension Tube. (MSRP
$100,$70 on eBay)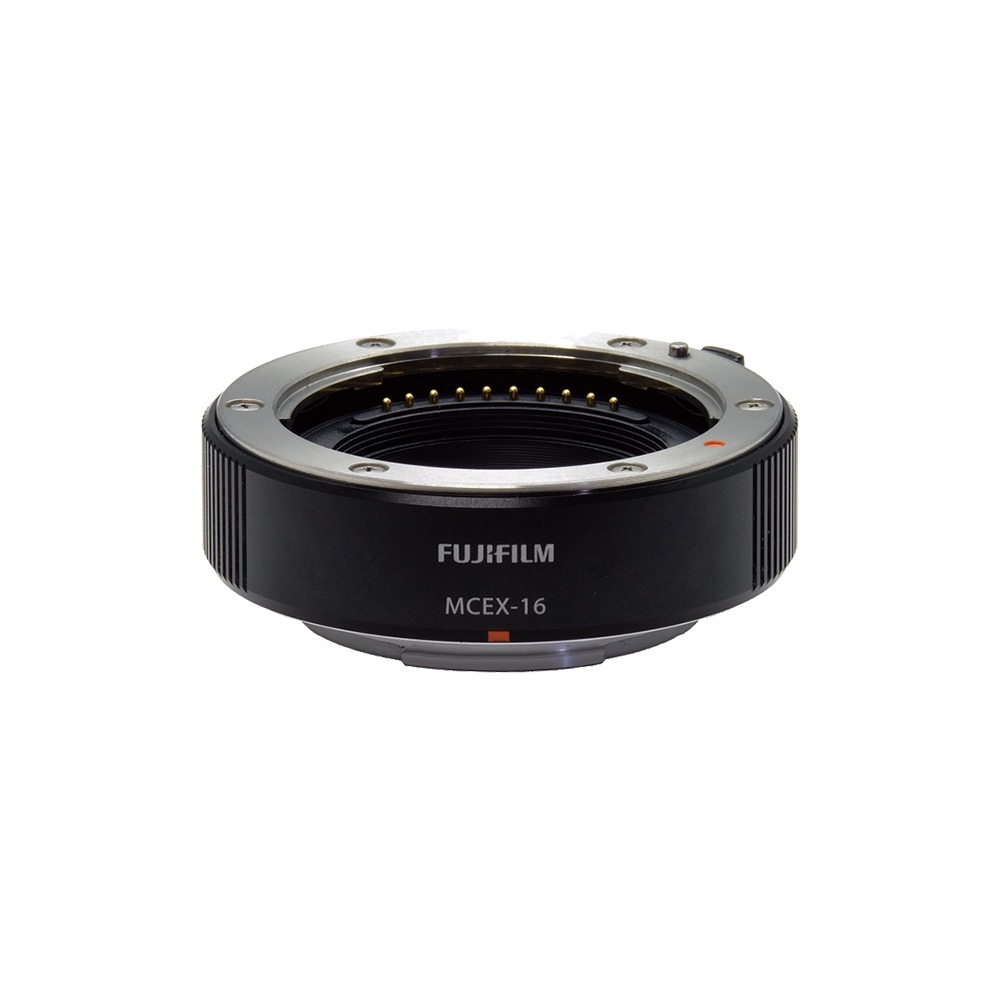
- In my opinion, you should not buy this lens in new condition, nor should you buy the extension tube new. Second hand market can give you a pretty good deal on them.
Setup 2. Modern Macro [Expensive, Better IQ, No Auto Focus]
-
Laowa 65mm f/2.8 2x Ultra Macro APO (MSRP
$400). - This is a great modern manual focused lens for this project and can be used without an extension tube, however it is not that much cheaper in the used market.
Setup 3. Vintage Lens (My Experimental Setup) [Affordable, Good IQ, No Auto Focus]
-
Canon nFD 50mm F3.5 Macro. (
$40 on eBay) - Fotasy FD-FX Adapter. (
$15 on eBay) - Canon FD25-U Extension Tube (
$15 on eBay but I used the MCEX-16).
Setup 4. Extension Tube Only [Affordable, Worst but still usable IQ, Auto Focus Depends]
- Or, just buy an extension tube (For example, MCEX-16) and use a ~50mm equivalent or higher lens you already own.
- I tried Fujifilm XF 35mm F1.4 for my experiment. It mostly works, but far from perfect.
My verdict: I have a lot (~30 rolls which has ~1000 photos) of old film negatives to scan, investing in a macro lens with good image quality and can automatically focus is justifiable.
Further Reading: Modern Lens vs. Vintage Lens
There are some differences between modern macro lens and vintage lens, but they are relatively small. These differences are usually:
- Modern lenses have higher color contrast over vintage lenses.
- Modern lenses can auto focus and manual focus, but vintage lenses can only be focused manually.
- Modern lenses have better corner sharpness over vintage lenses.
- Modern lenses can resolve higher resolution better.
However, I’d say vintage macro lens is 80% image quality compare to modern lens like a XF 60mm macro, but much cheaper (5X). If you are just experimenting, I strongly suggest you start with the vintage lenses which will not break your bank.
Further Reading: Extension Tube
One way to best utilize your kit is to use an extension tube, which allows many lens to focus to subjects even closer. It is usually needed even with a macro lens, but it can also use it to make your regular lenses (For example, Fujifilm XF 35mm F1.4) focus really closely.
If you wonder when to and not to use an extension tube in this project, a rule of thumb is that you want to make your lens setup to achieve roughly a 1:1 magnification ratio.
According to the Magnification of the macro extension tube sheet from Fujifilm, Using a extension tube (MCEX-11 or MCEX-16), which gives an extra gap between the sensor and the lens mount (11mm or 16mm), will enable a lens to focus a lot closer and increase the maximum magnification ratio.

| Lens Configuration | Max Magnification | Working Distance (mm) | Shortest Shooting Distance (mm) |
|---|---|---|---|
| 35mm F1.4 R | 0.17 | 211 | 280 |
| 35mm F1.4 + MCEX-16 | 0.61 | 55 | 140 |
| 60mm F2.4 R Macro | 0.50 | 185 | 267 |
| 60mm F2.4 + MCEX-16 | 0.76 | 143 | 241 |
On paper, the 35mm with an extension tube even beats the spec of the 60mm F2.4 Macro by simply adding a tube, but there is a caveat.
On one hand, you lose some light, and gain some magnification (The 35mm now behaves more like a 60mm). On another hand, the range of the camera being able to focus is significantly reduced.
Even the 60mm F2.4 Macro cannot produce a 1:1 magnification ratio on its own, it can only do 1:2. However, with the help of a 16mm extension tube, it can achieve a roughly 1:1.3 magnification ratio which is enough for our project.
This is the same case with the vintage Canon nFD 50mm F3.5 Macro, who can also do 1:2 on its own but can do 1:1 with a 25mm extension tube. The reason why companies separate the lens from extension tube is to increase flexibility of the lens, making it smaller, lighter, while being able to focus at further ranges.
Backlight
You need a light source that is universal and bright to serve as a backlight for the film negative. There are many light sources that will produce such a light, such as a copy stand, light table, or even a phone screen with diffusion film.
I’d suggest you get something that is designed to do this job, for example, I am using JJC 35mm Negative Film Scanning Copying LED Light, but other options would work as well.
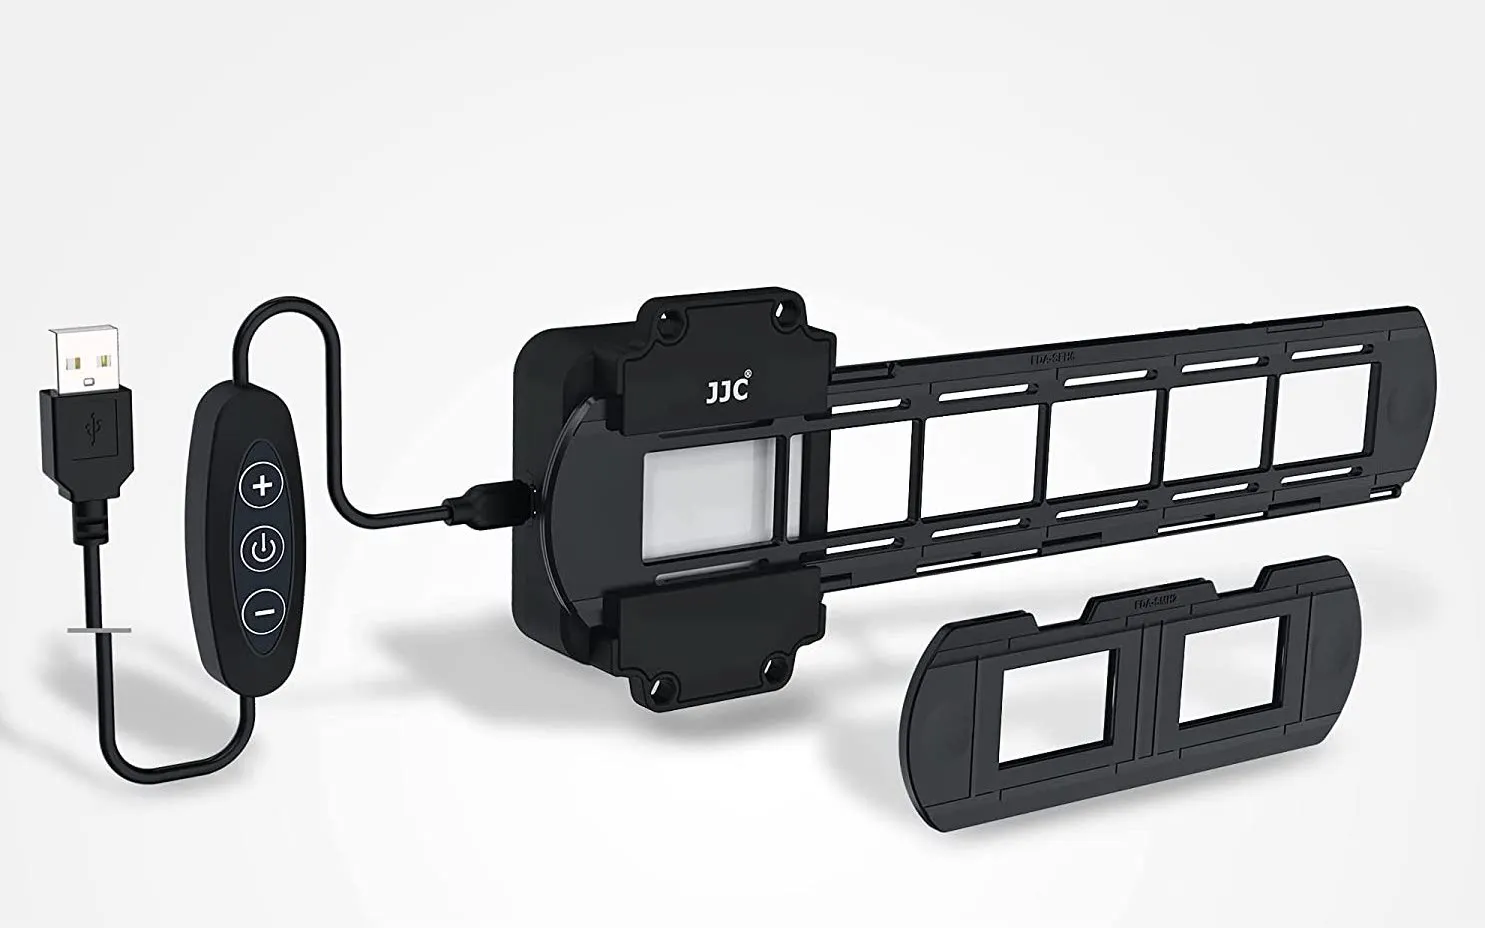
One thing to note is that I do not recommend you only use a phone screen displaying a white image as your backlight. The pixels will become visible in the scan.
Additional Rig
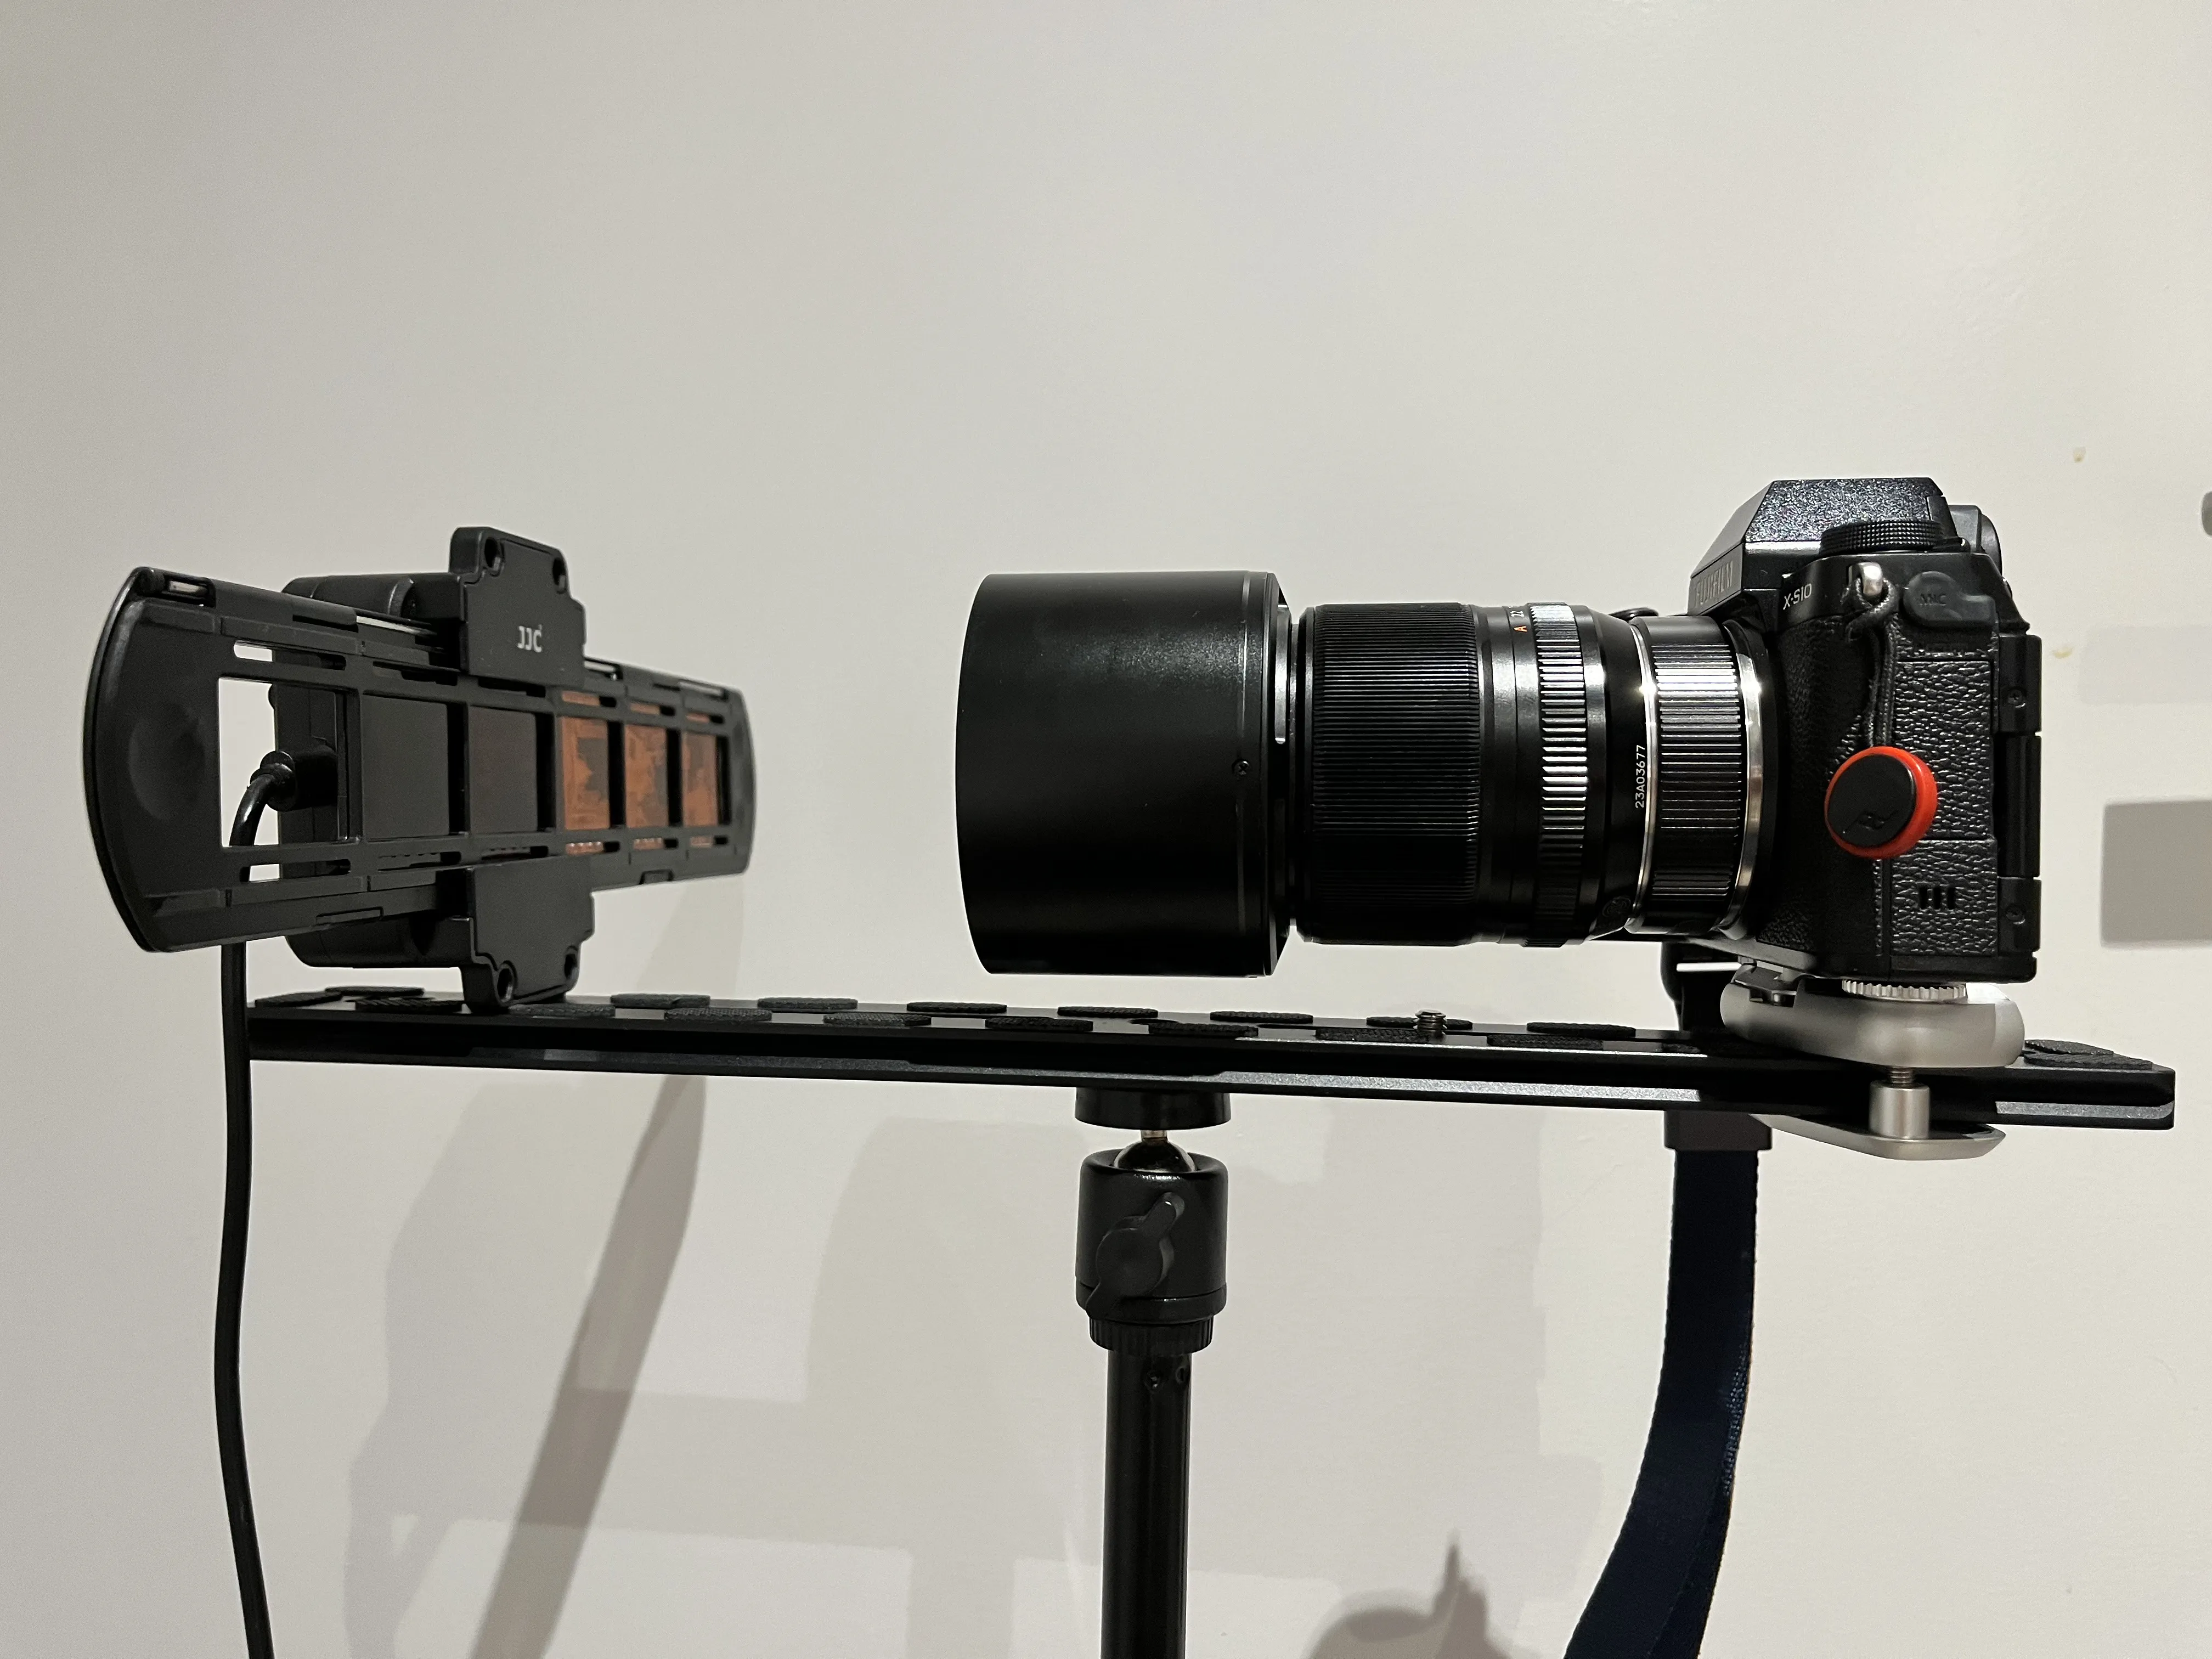
I also purchased additional rigs to better operate and stabilize the setup.
Quick Release
- I am using a Peakdesign Capture to act as a quick release for this rig.
- I do not recommend this since it is intended to be used on backpacks and overly expensive for simply mounting your camera.
- The only reason I am using it is I already have it lying aroud and it gets the job done.
Rail
- A rail is used to mount the camera and light source so it is easier to move them on the same axis when adjusting focus.
- I am using HITHUT PU-350 350mm Universal Long Quick Release Plate Dual Dovetail Slide Rail with D-Ring Screw but any rail that mounts two devices with a 1/4 inch screw mount would work.
Tripod
- I mounted the entire setup on a tripod for better stability.
- Literally any tripod would do the job, and you do not need the most fancy ones.
- Mine is generic and does not have a brand, it came with another camera gear but it does the job I want it to do.
I have now introduced all the pieces of my hardware setup, and it looks something like this for me. I included a photo of this rig down below.
Process
The process can be broken down into the following steps:
- Clean & Load Film Negative
- Take Photo
- Transform to Positive
- Postprocessing
Clean & Load Film Negative
First, you should make sure to clean your film negative free of any residues and dust, since it is much easier to remove them on the negative than trying to touch them up in post-processing.
Some useful things I recommend (although not affiliated) are:
- PEC-12 Photographic Emulsion Cleaner
- PEC-PAD Lint Free Non-Abrasive Wipes
- Additionally, you will need a air blower (like this one)to blow away the dust.
Just clean your negative thoroughly and blow away any dust before you digitize it and this can save you a lot of troubles.
Additionally, you can cut up the wipes to half or quarter if it is too big and wasteful to use a sheet each time. Cut up some and put them into a zip-lock bag and they can last a long time.
It is true that most things can be fixed in post. But “can” does not equal to “pleasurable experience”.
Take Photo
First, turn off all the other lights in your room (Or as many as possible) to reduce unwanted lights.
Next step, make sure your camera is in Aperture Priority(A) mode. You can ignore this if you are using a vintage lens. Make sure you are on a relatively small aperture (F8 or F11 usually works best) to ensure everything is in focus.
Also, make sure you are shooting the RAW format (Straight out of camera JPEG is useless for this application).
Then, make sure to set a new custom white balance using your camera by pointing it directly at the light source. This will ensure you obtain a universal result if the color of the light varies from day to day.
Further Reading: Custom White Balance with Fujifilm X-S10
This is an example of how to set custom white balance on my Fujifilm X-S10 camera, it should be similar for Fujifilm cameras. If you have another brand, a little googling should give you a good answer on how do do it on your camera.
First, press the Menu button on the camera, under Image Quality Setting find WHITE BALANCE.
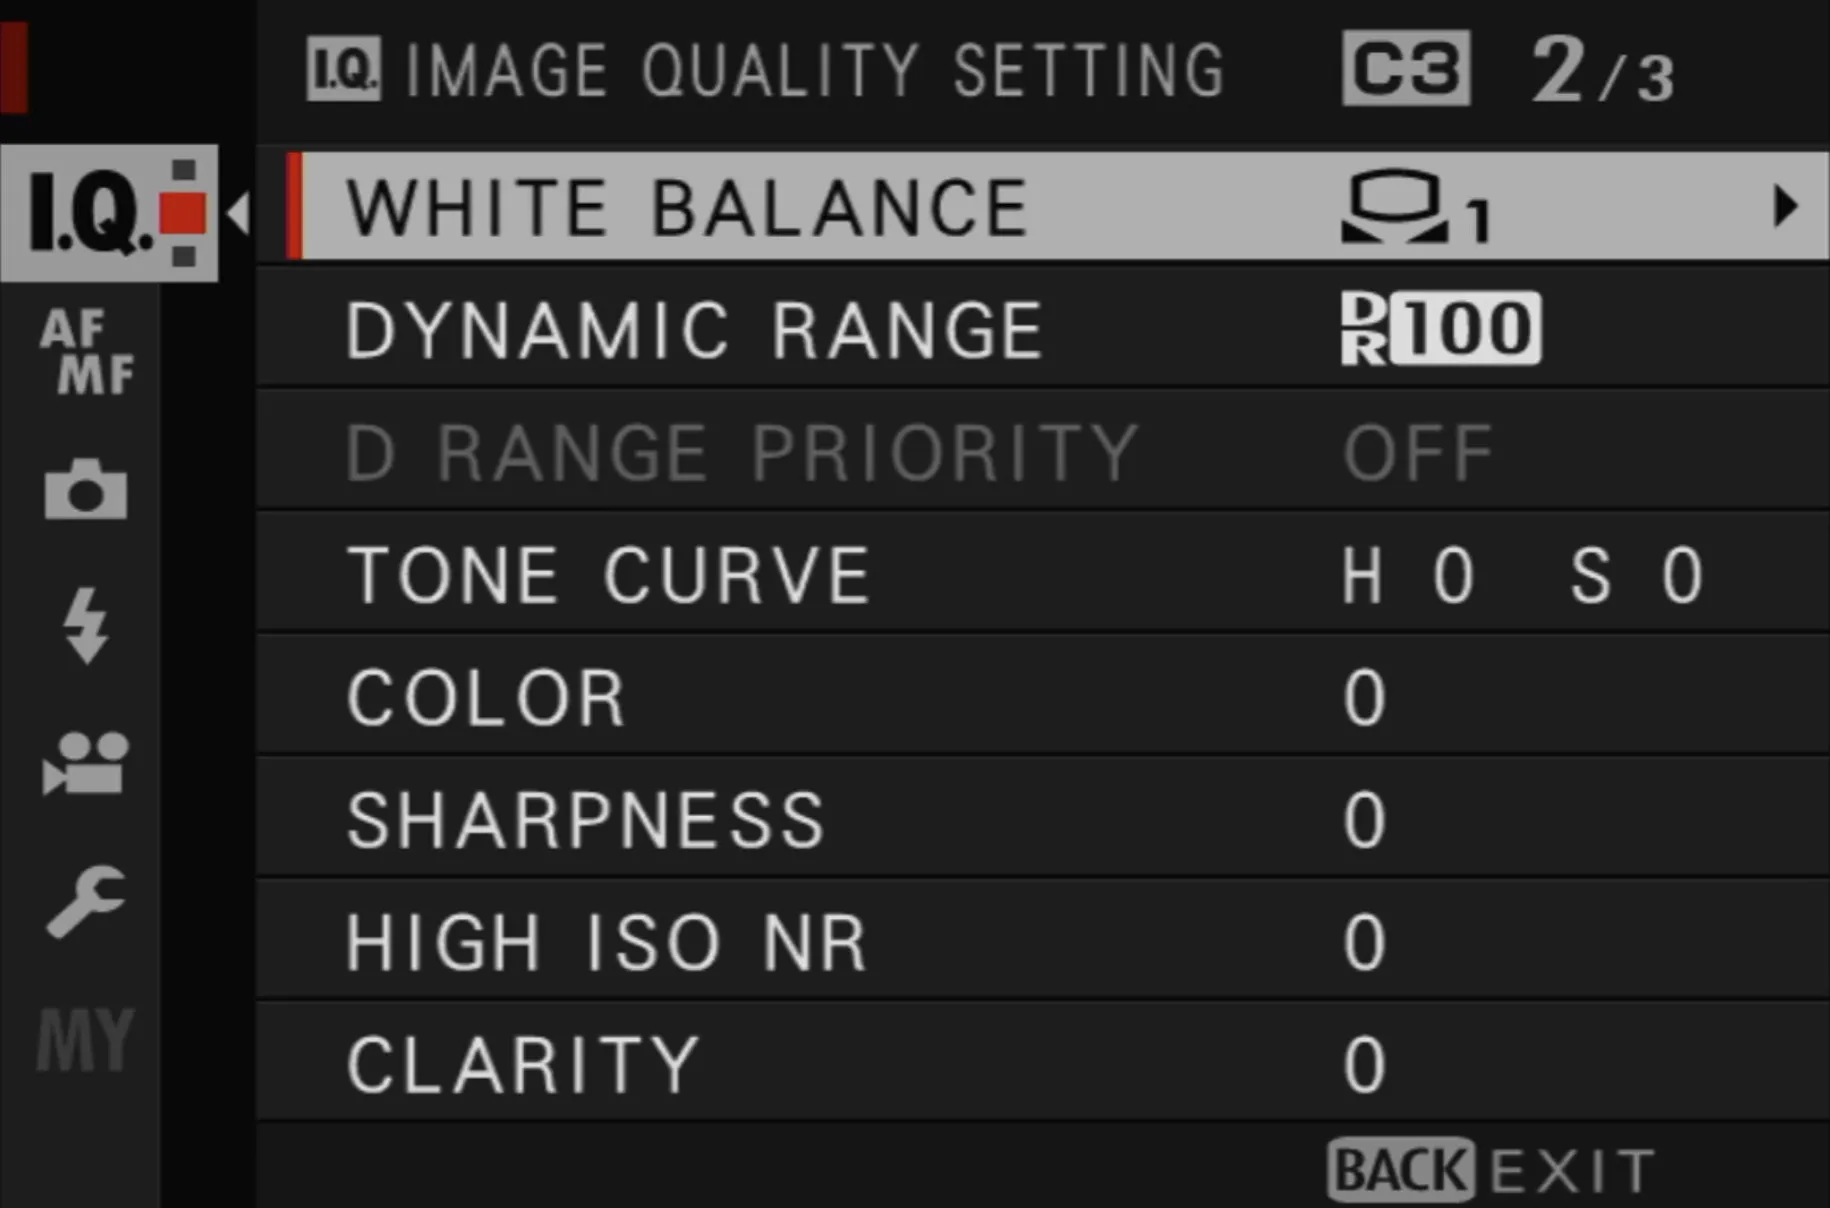
Select a custom white balance setting, like Custom 1.
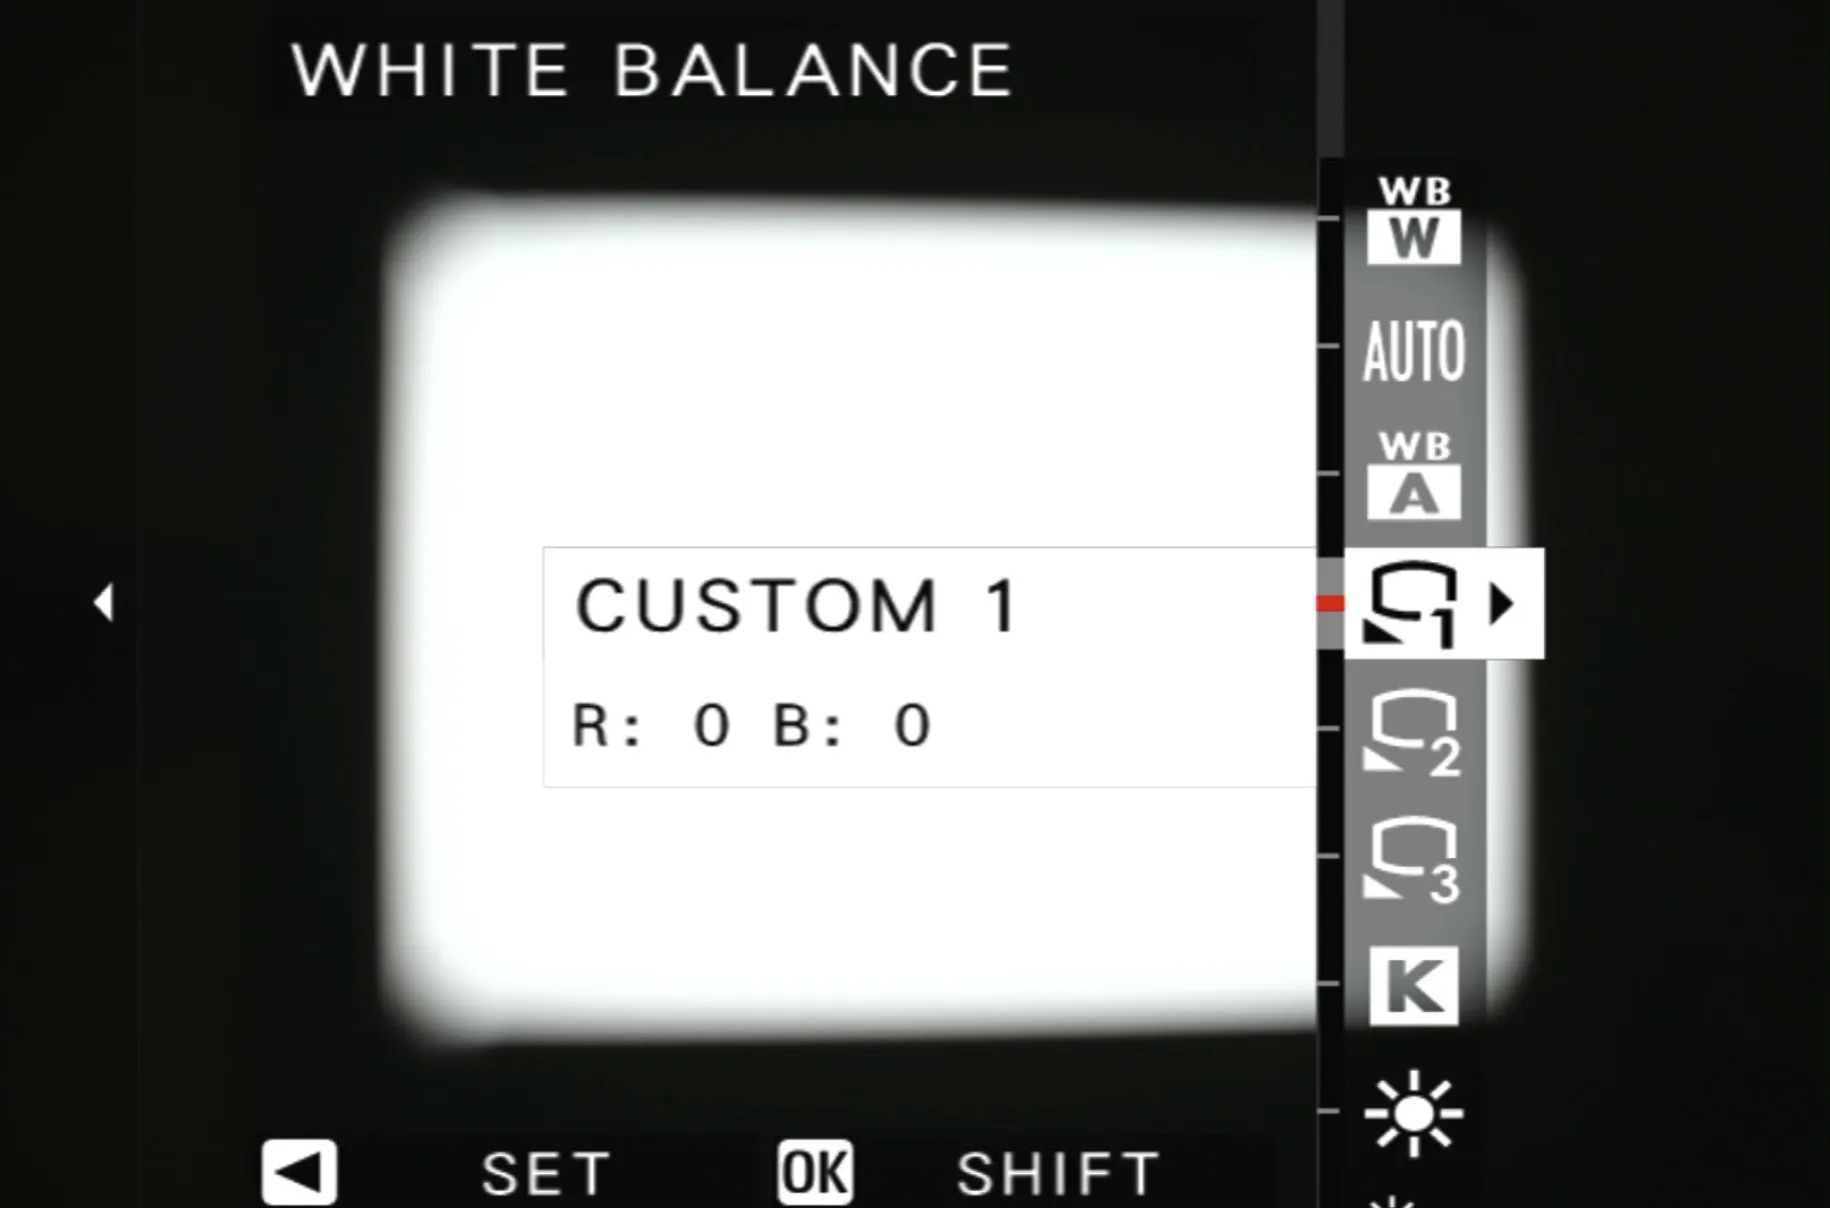
Then point the camera directly at the light source, and press the shutter.
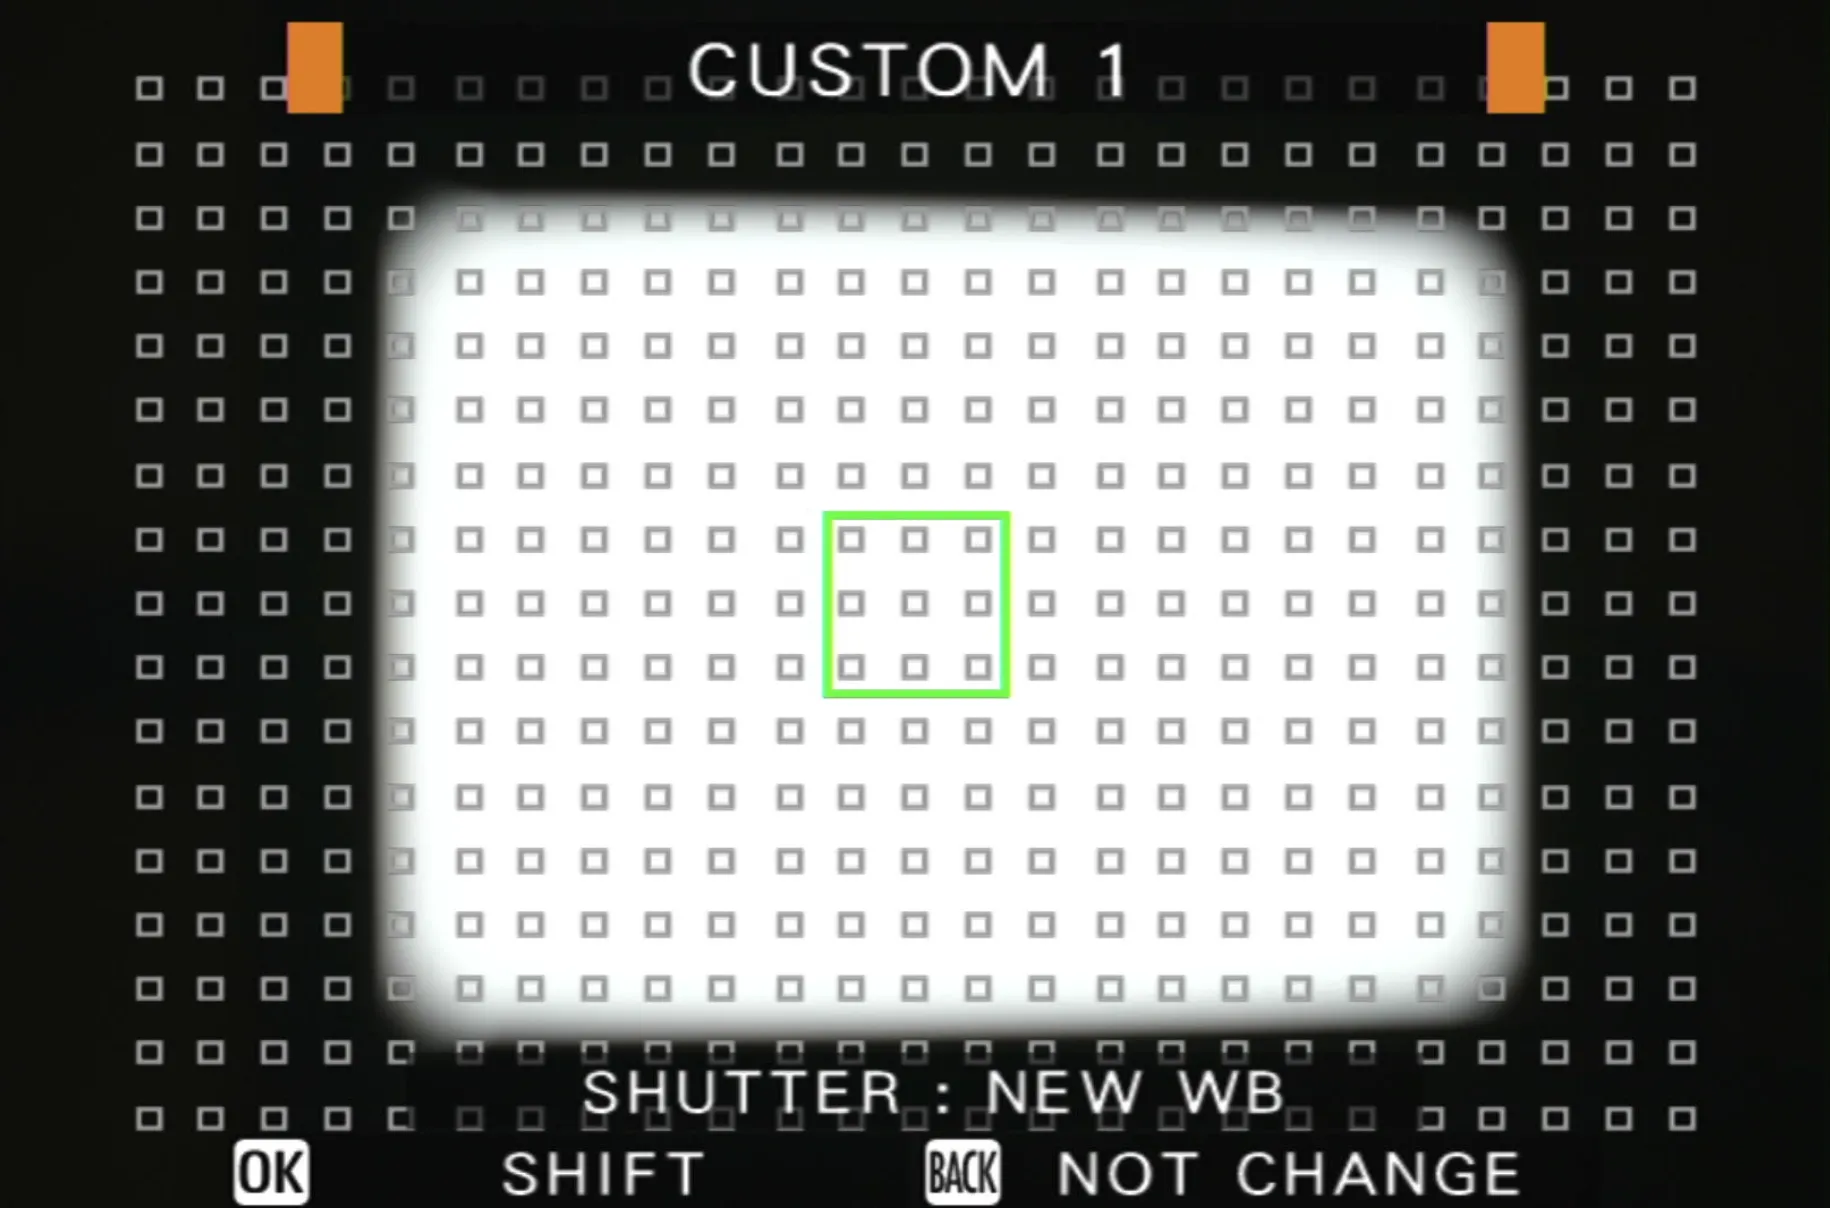
Your new custom white balance should be set.
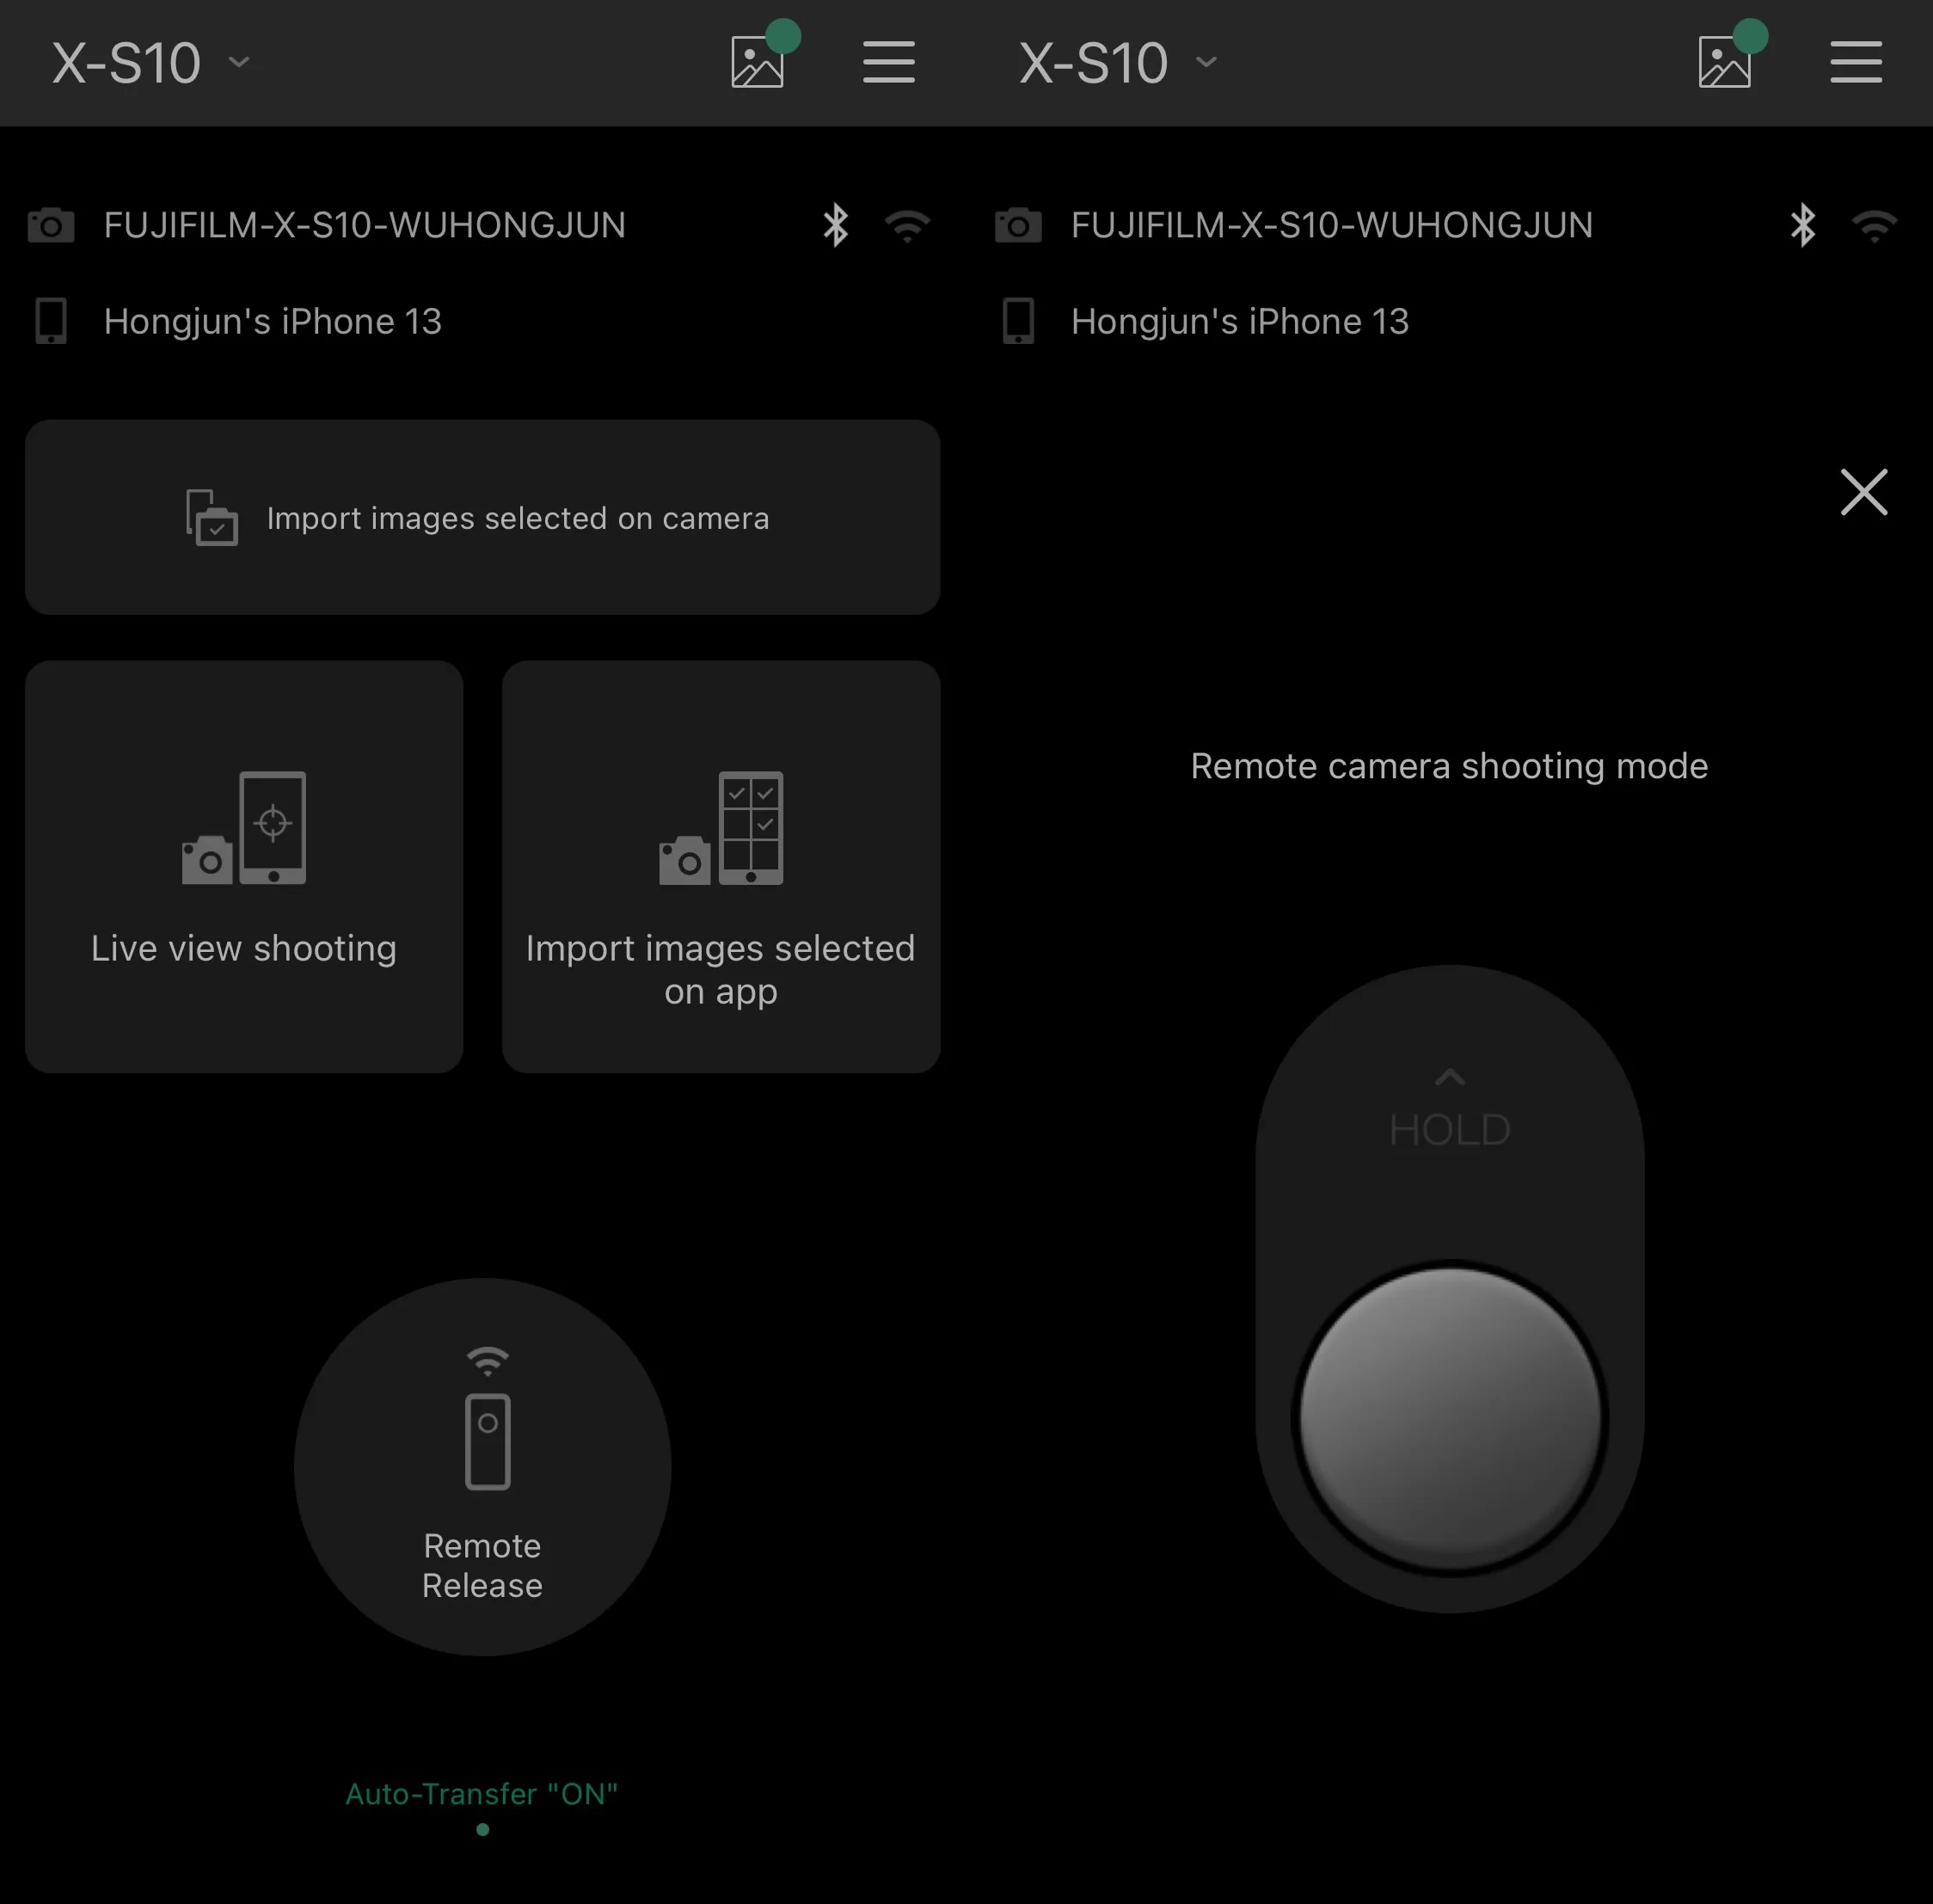
Optionally, you can setup Tether Shooting (If your camera supports it), such as Fujifilm X Acquire, to automatically transfer the image to your computer. But if you don’t have tether shooting, the good old SD card works perfectly fine too.
Now, turn on the backlight, load the film negative, focus on the film negative carefully (I recommend manual focus with focus peeking to make sure the focus is 100% perfect). Note that do not put the film on the backlight or turn on the backlight for too long, since extensive heat might damage the negative. Give the equipments some time to take a break and cool off, or your film negative might deform and wrap under heat.
Finally, take a photo using remote trigger shutter either on your smart phone or use a shutter cable.
Here is a photo I took recently at the Manhattan Tramway Plaza Station on my way home using a Canon A-1.

Transform to Positive
The photo we are getting above is called a negative. We will need to convert it into a positive in order to get a normal looking photo.
There are many ways to convert a negative to positive. I will share my way below which in my opinion is the easiest and produce most accurate color.
You will need:
Both are paid software, but there really isn’t a cheaper way that is similarly efficient in this workflow. What’s more, if you are a student, you can get a student discount on Negative Lab Pro by emailing their admin.
Installing the above software are very easy and already well documented by others, so I will omit from this guide.
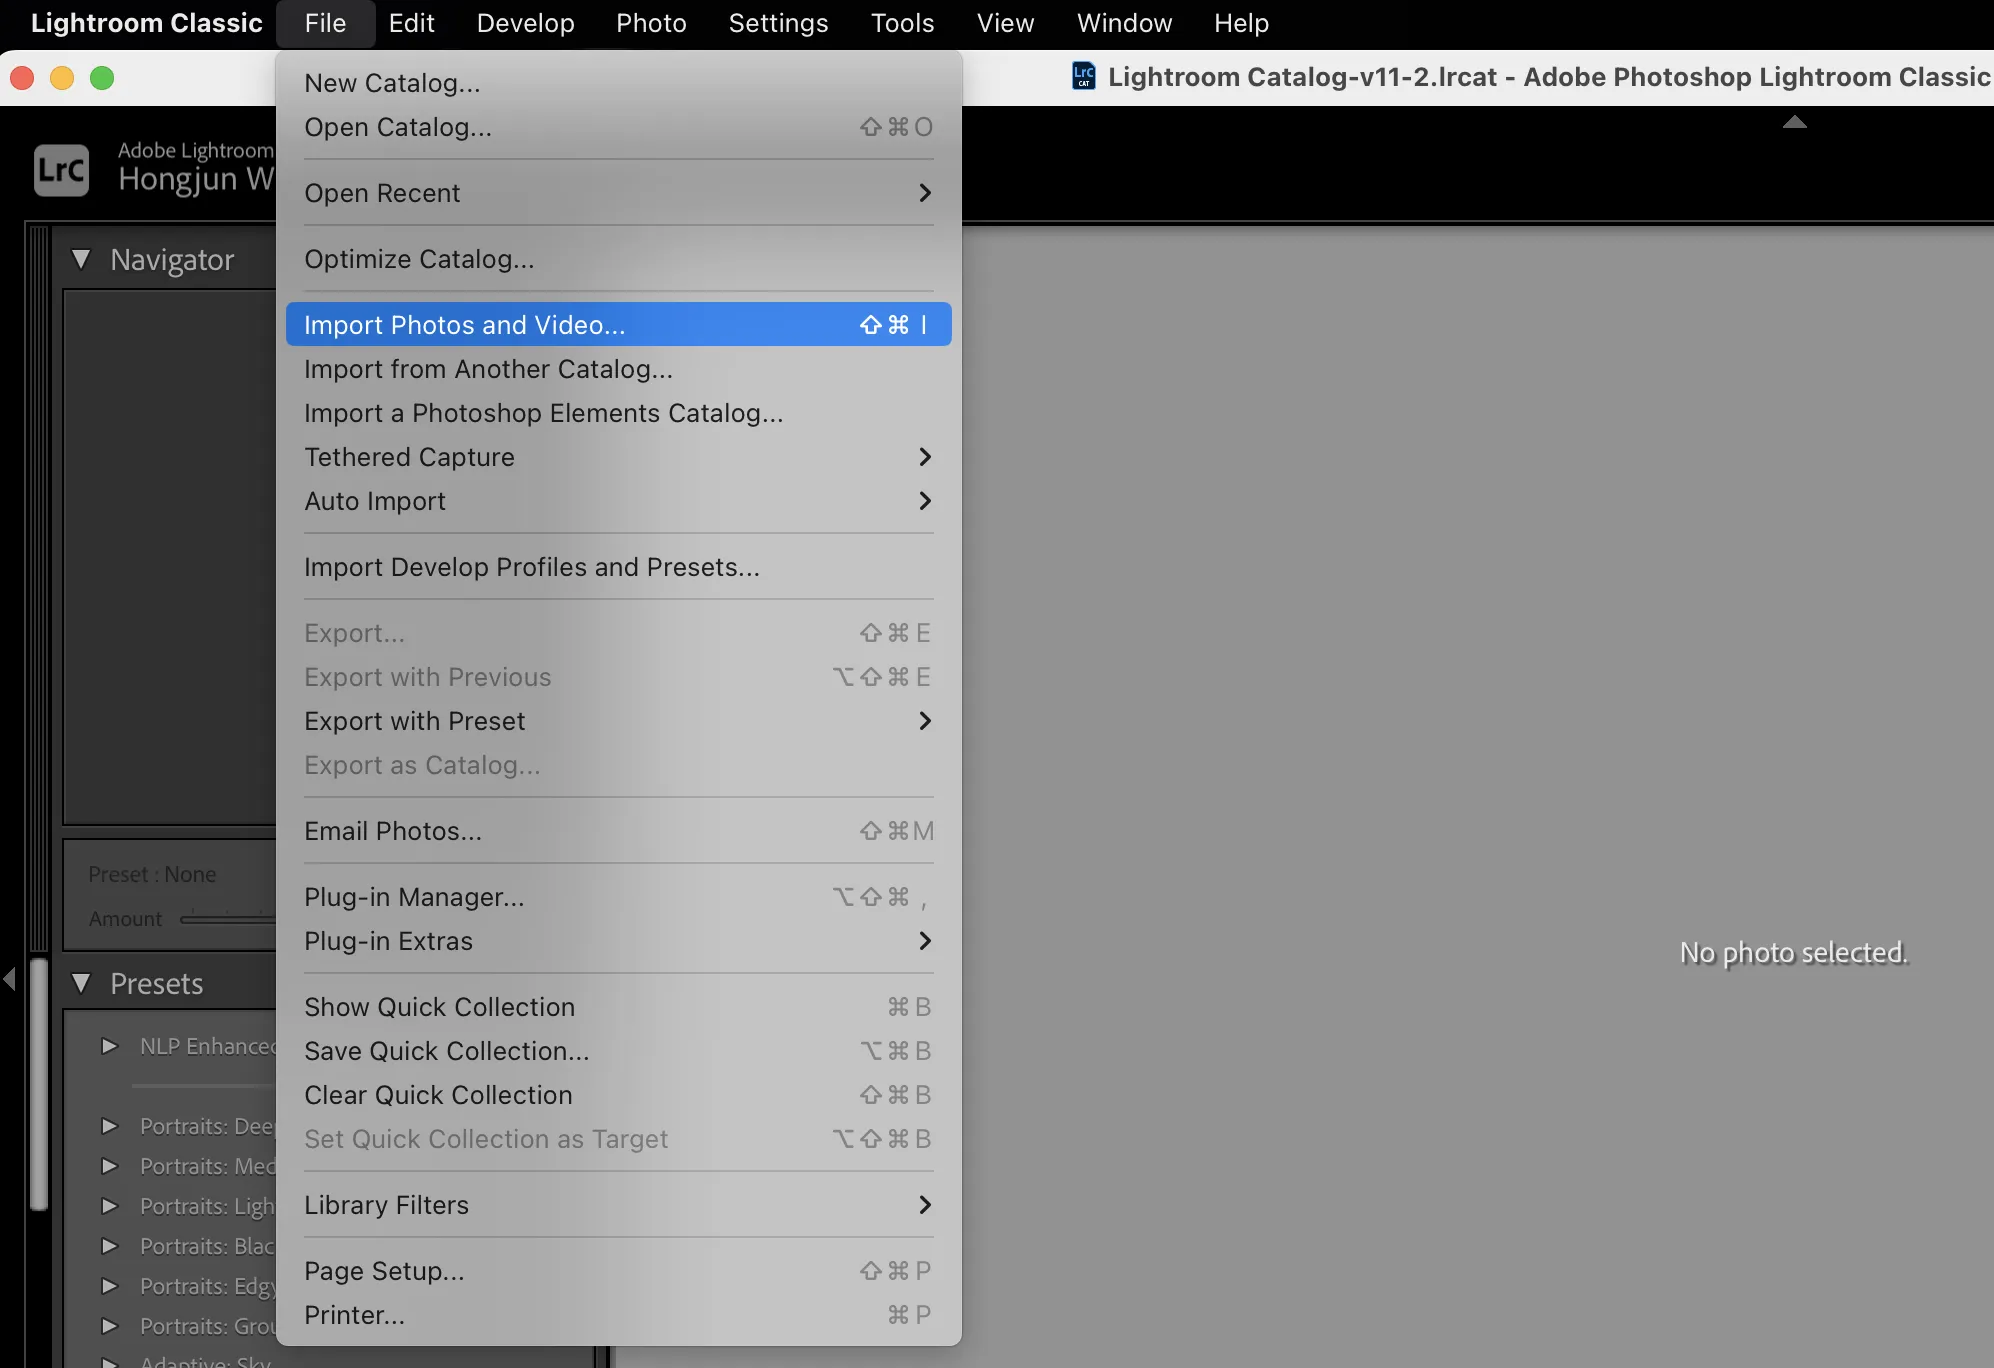
First, open Lightroom Classic, and go to the manu bar: File - Import Photos and Video and import all the RAW files (For example, Fujifim RAW ends with .RAF) you just captured using your camera.
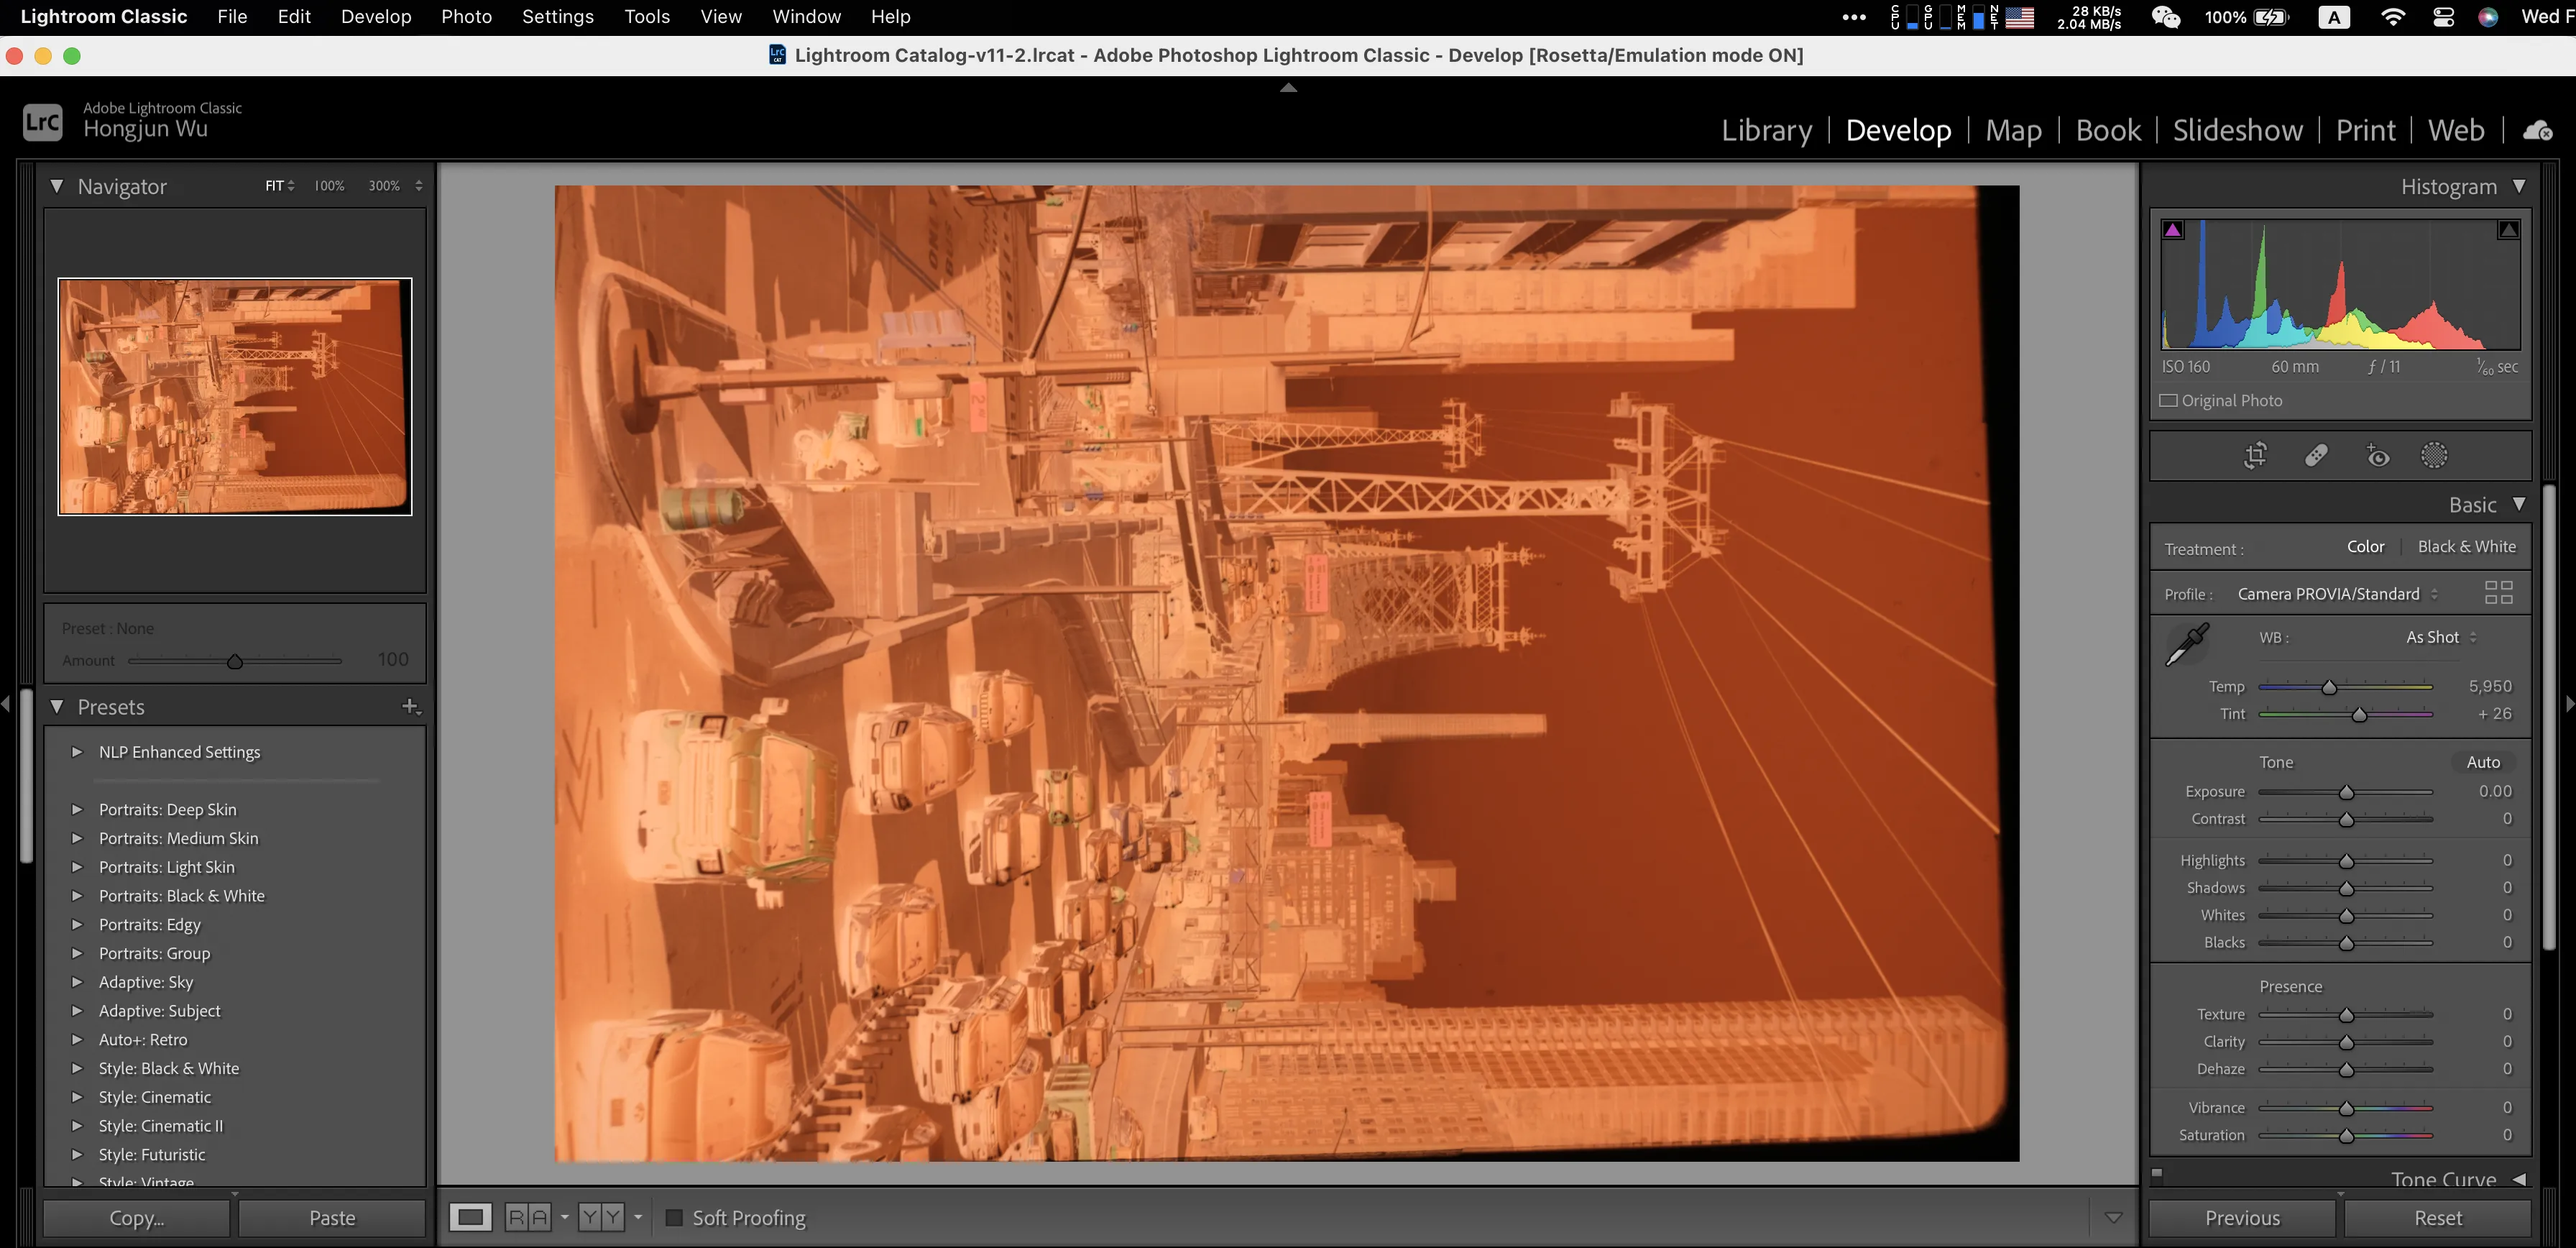
Again, let’s look at the photo I just imported. Clearly there is a border and we should crop before we process further.
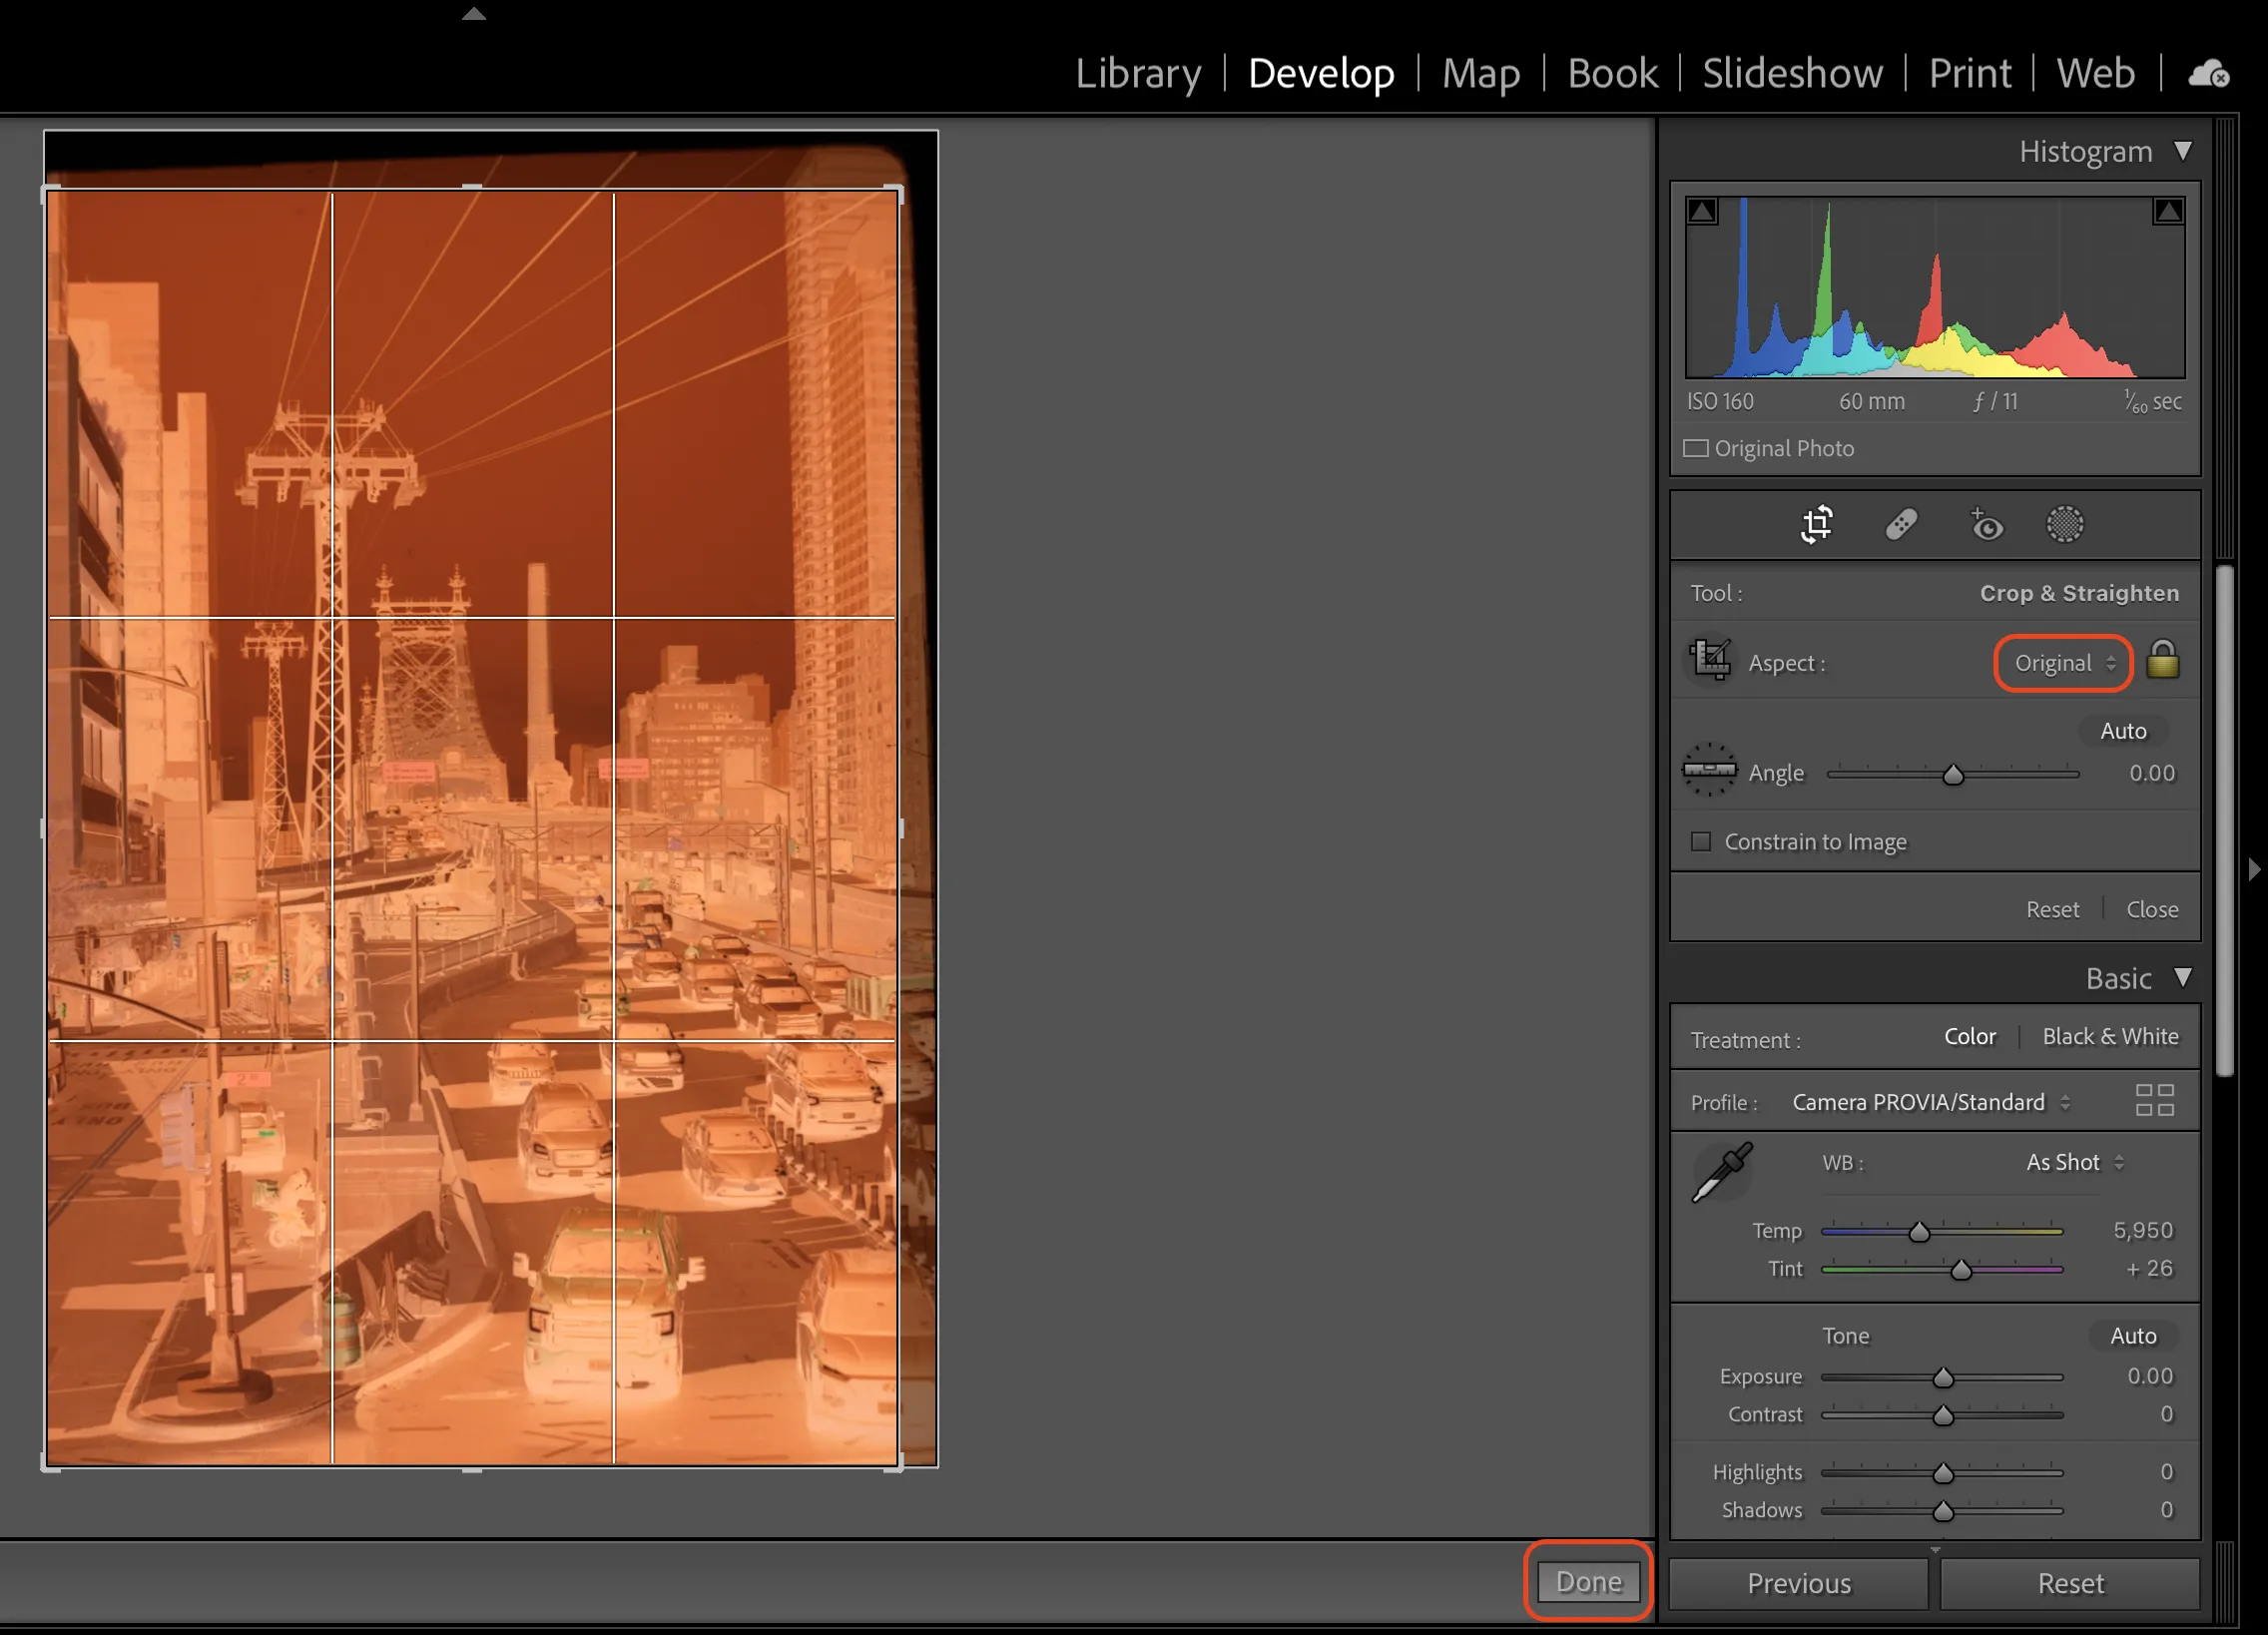
Right click on the photo and rotate the photo if needed.

Go to the Develop tab and find the Crop tool.
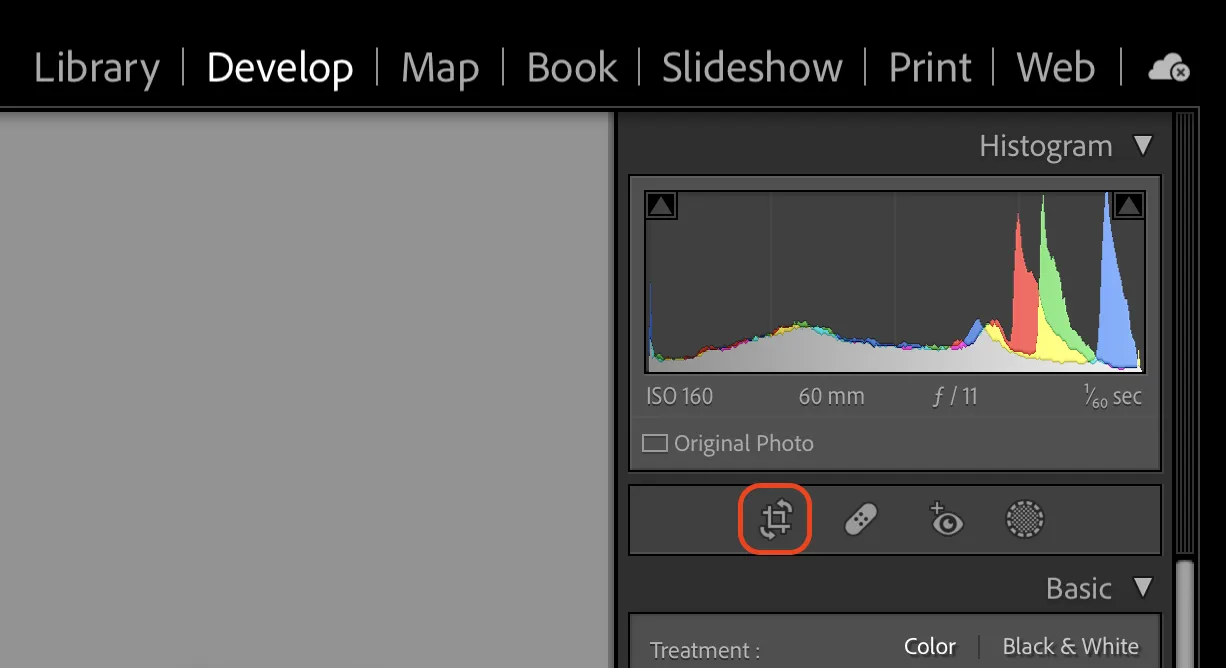
Crop the border out of the photo and rotate it until you are satisfied and no visible border can be seen.
Go to the menu bar, File - Plug-in Extras - Negative Lab Pro and open the Negative Lab Pro plug-in.
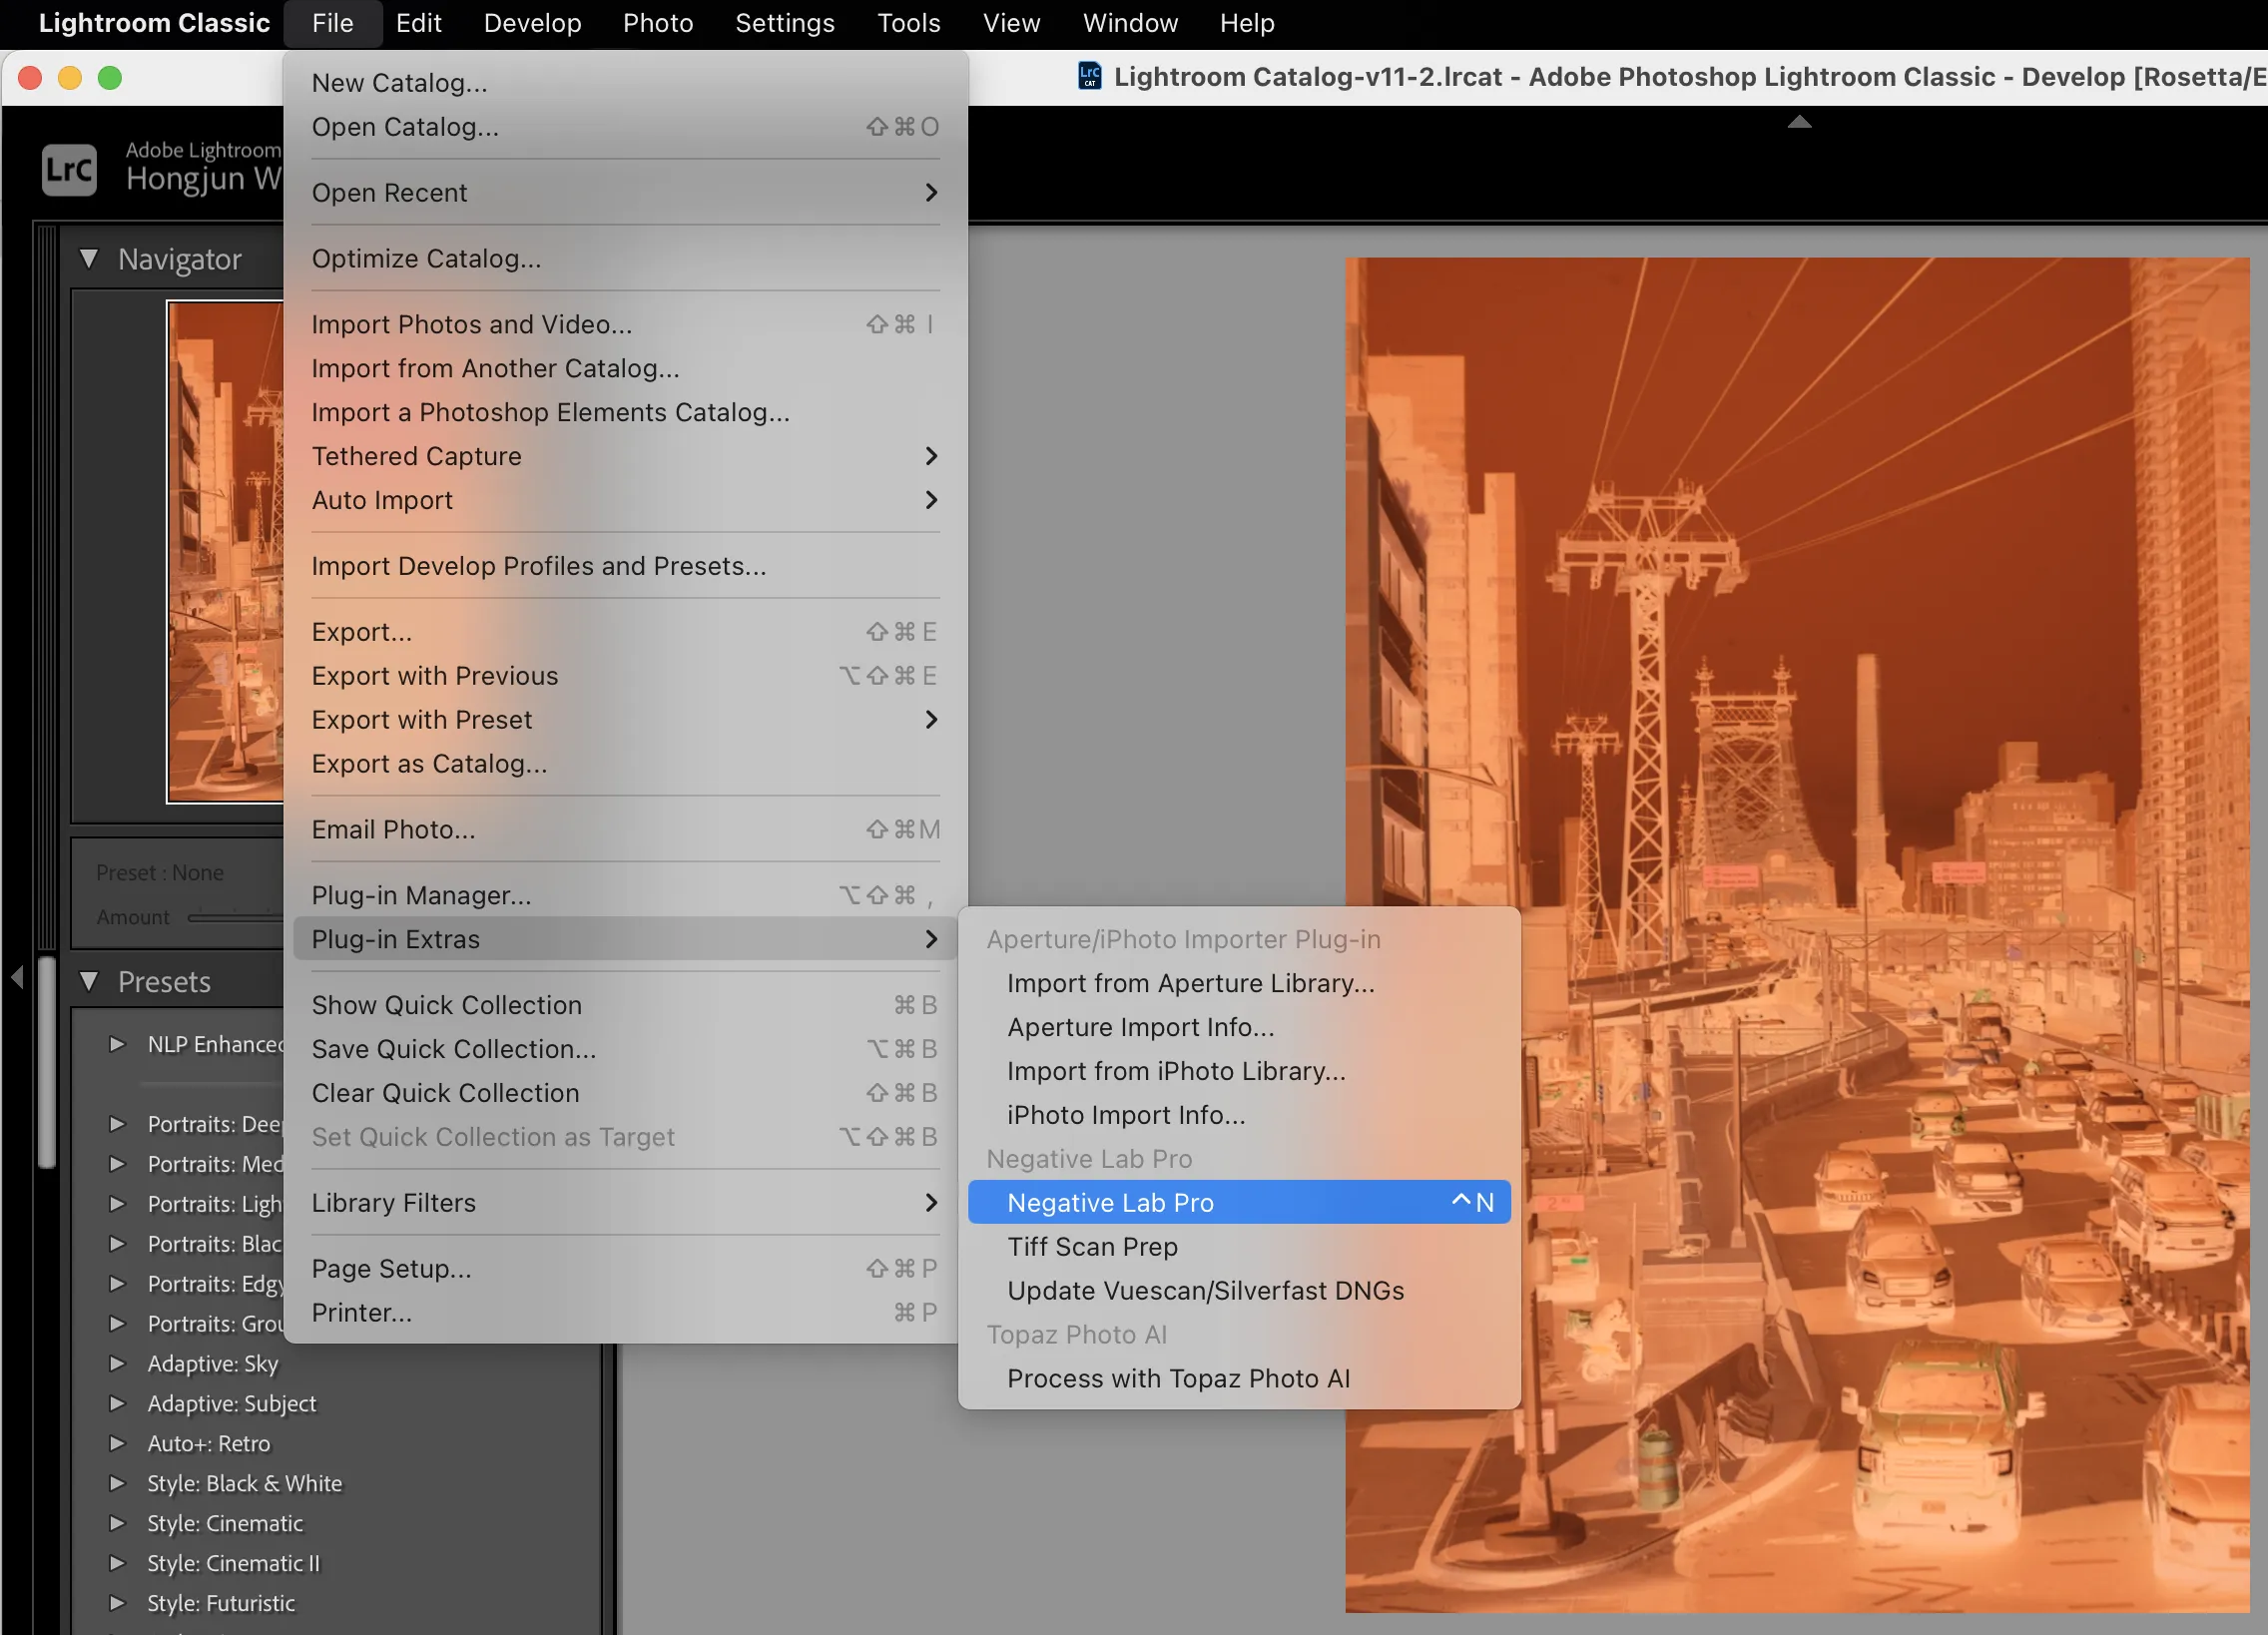
A window of Negative Lab Pro should appear, and suddenly the image of your photo becomes dim. This is normal (the plug-in removed custom color profile and showing the original color of the raw pixels), and just press Convert Negatives.
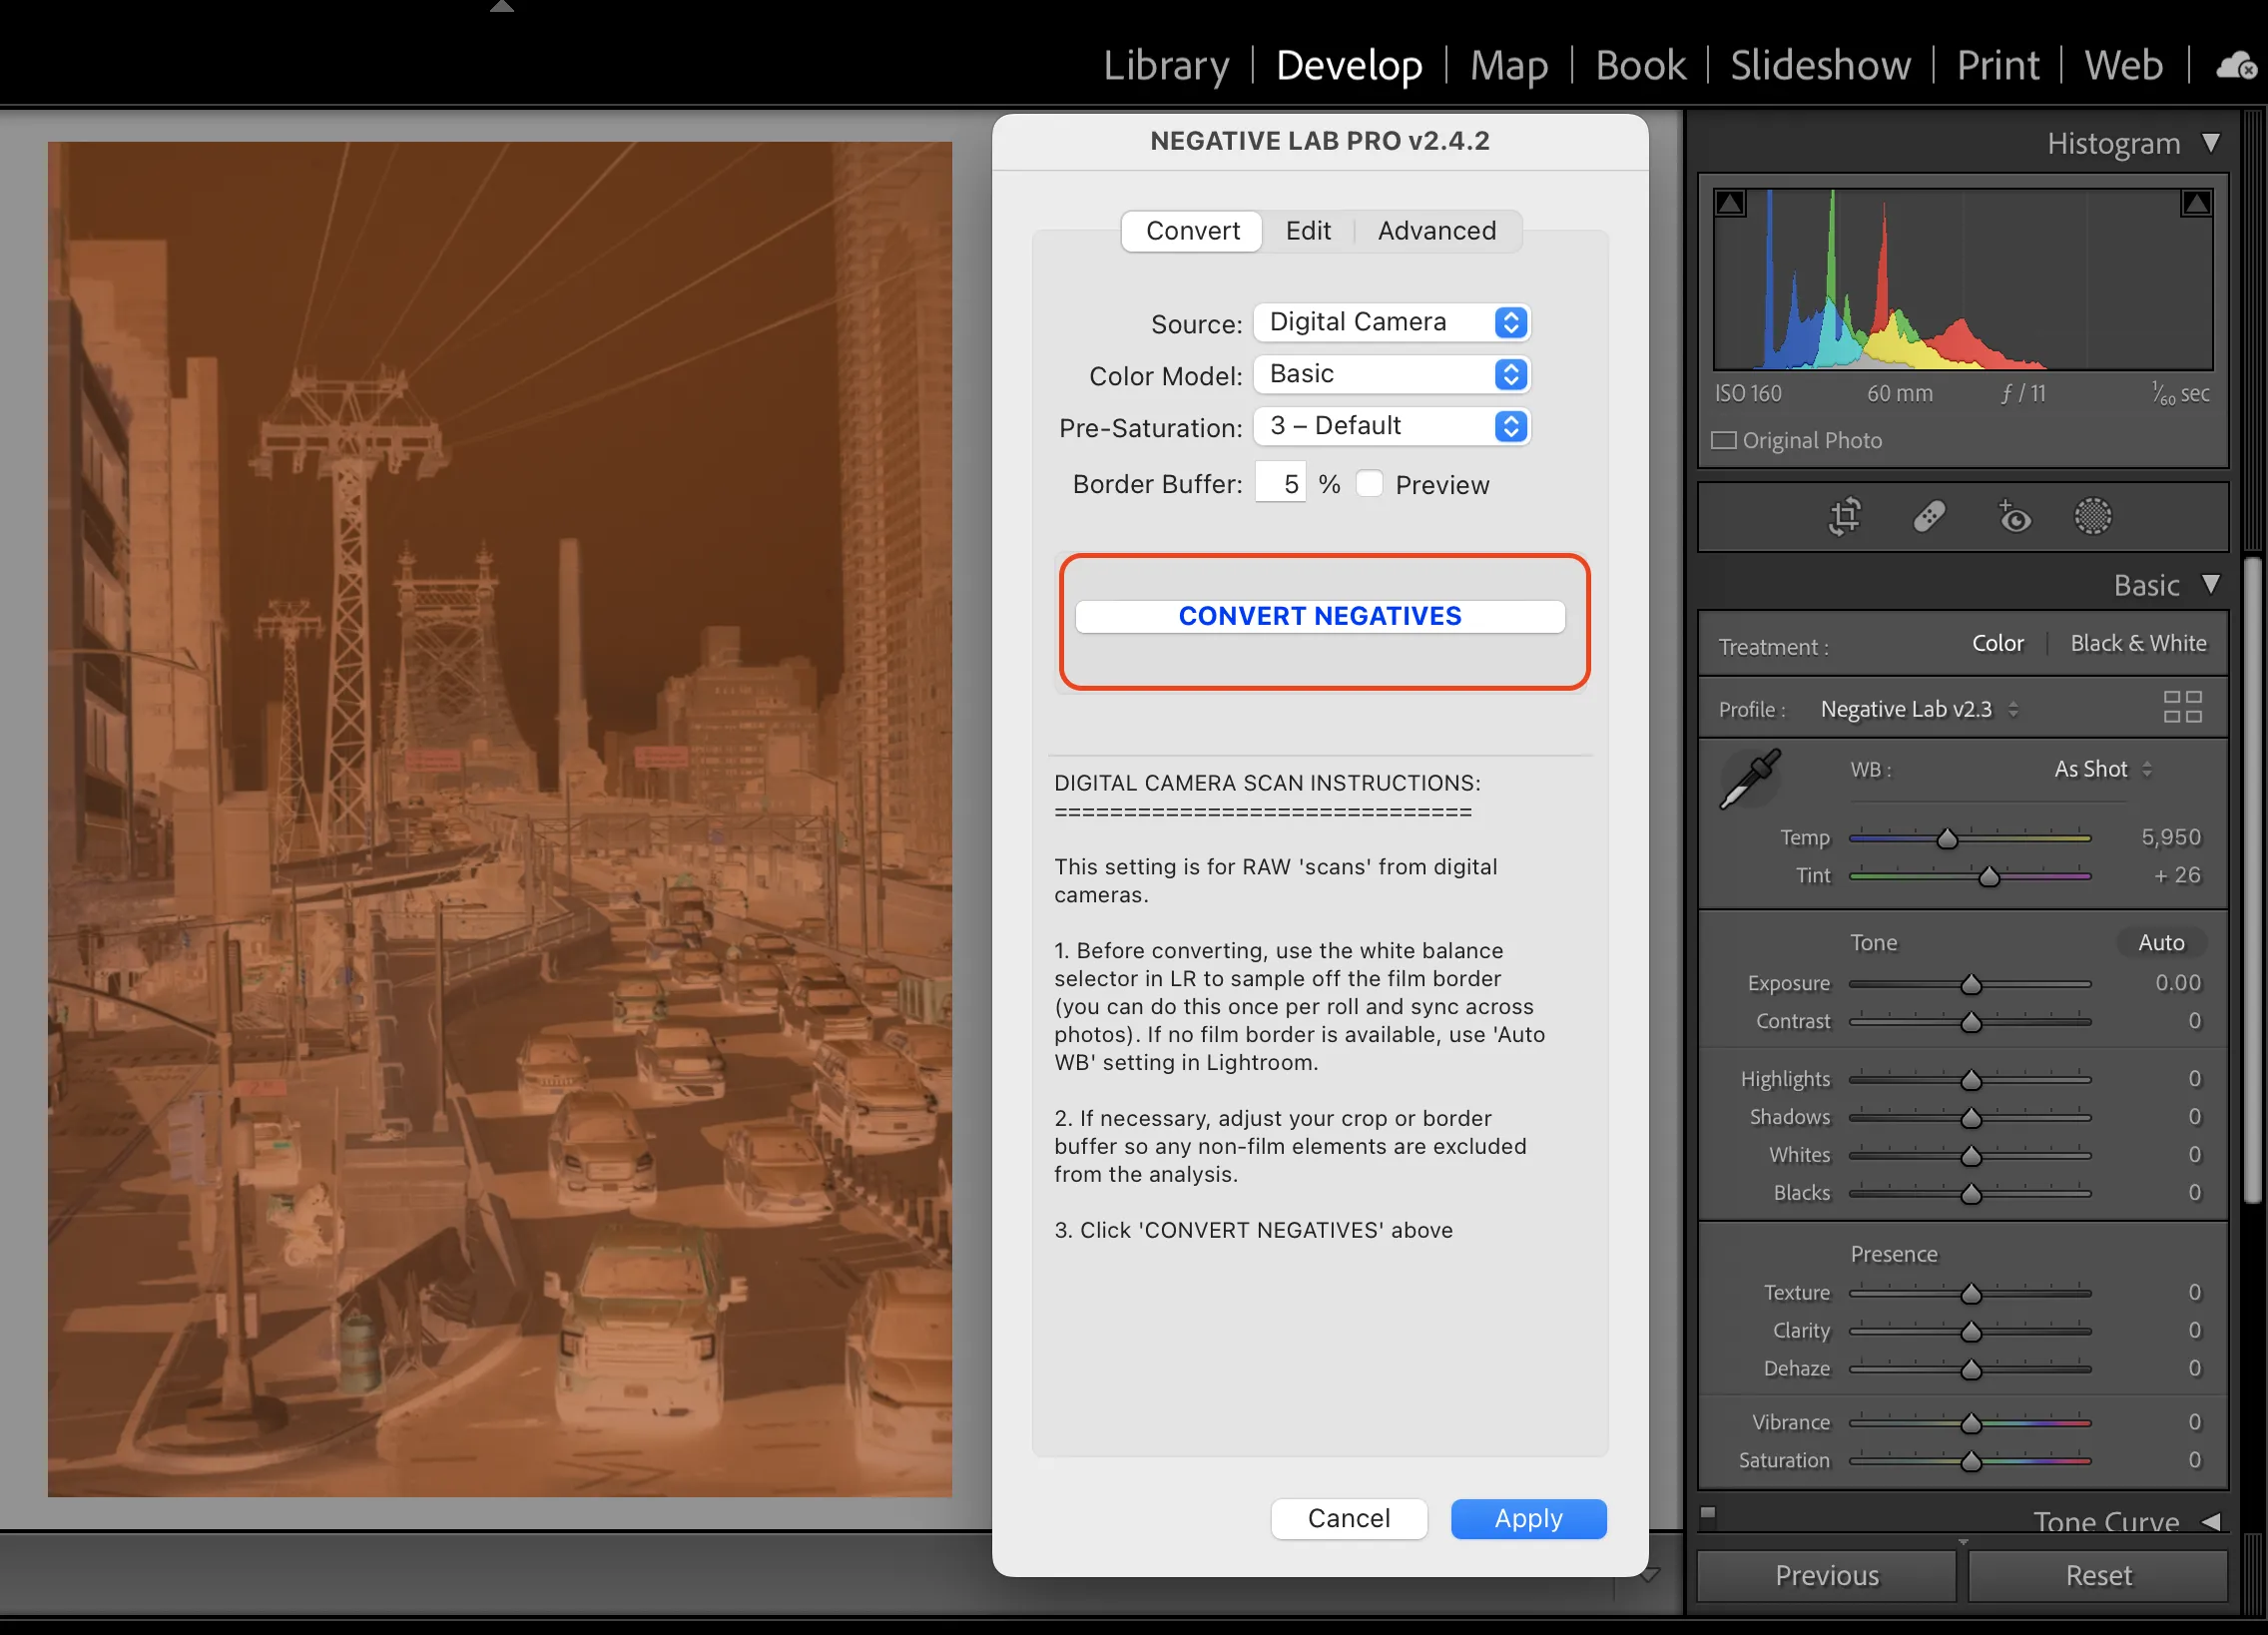
This plug-in uses machine learning to automatically convert the negative to positive, saving at least ten time than doing it by hand. I tried learning to do it by hand in Photoshop, Lightroom, and CaptureOne (and I even got pretty good at it), but this is a much easier way.
If you are curious how to do it by hand, this is the physics behind it: How to Negative a Photo in Photoshop Only in 3 Steps, Dropicts
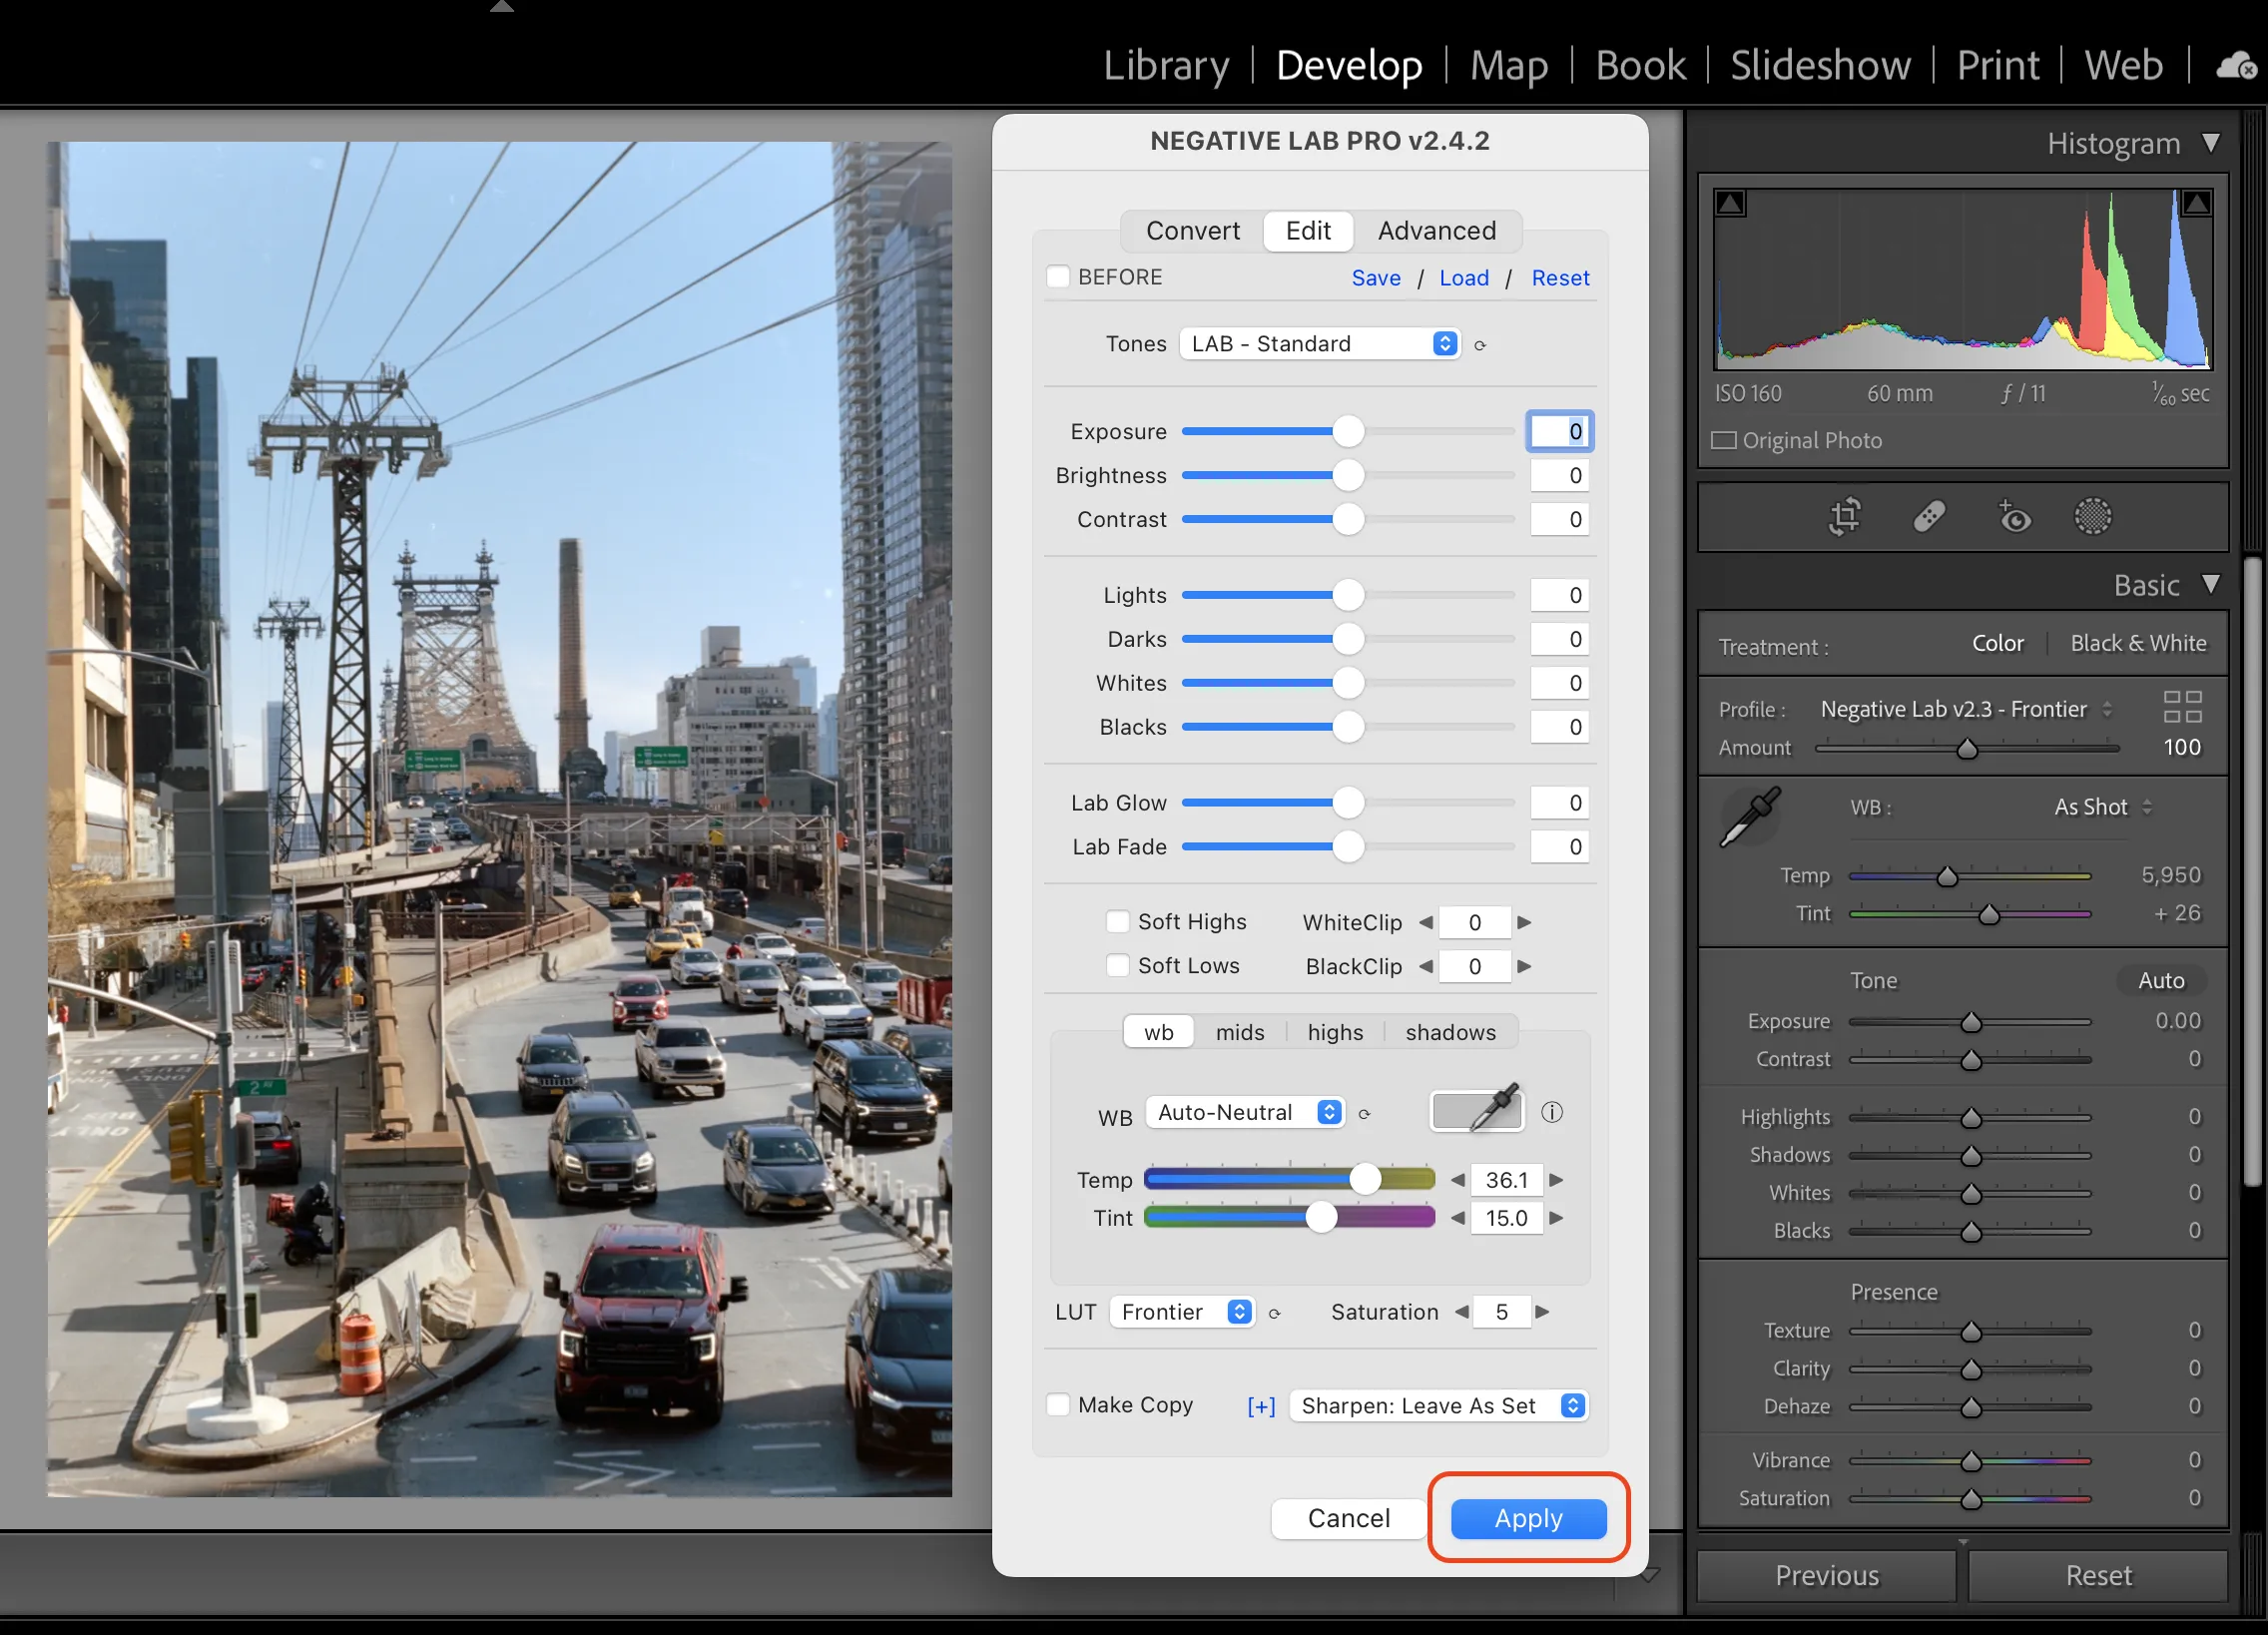
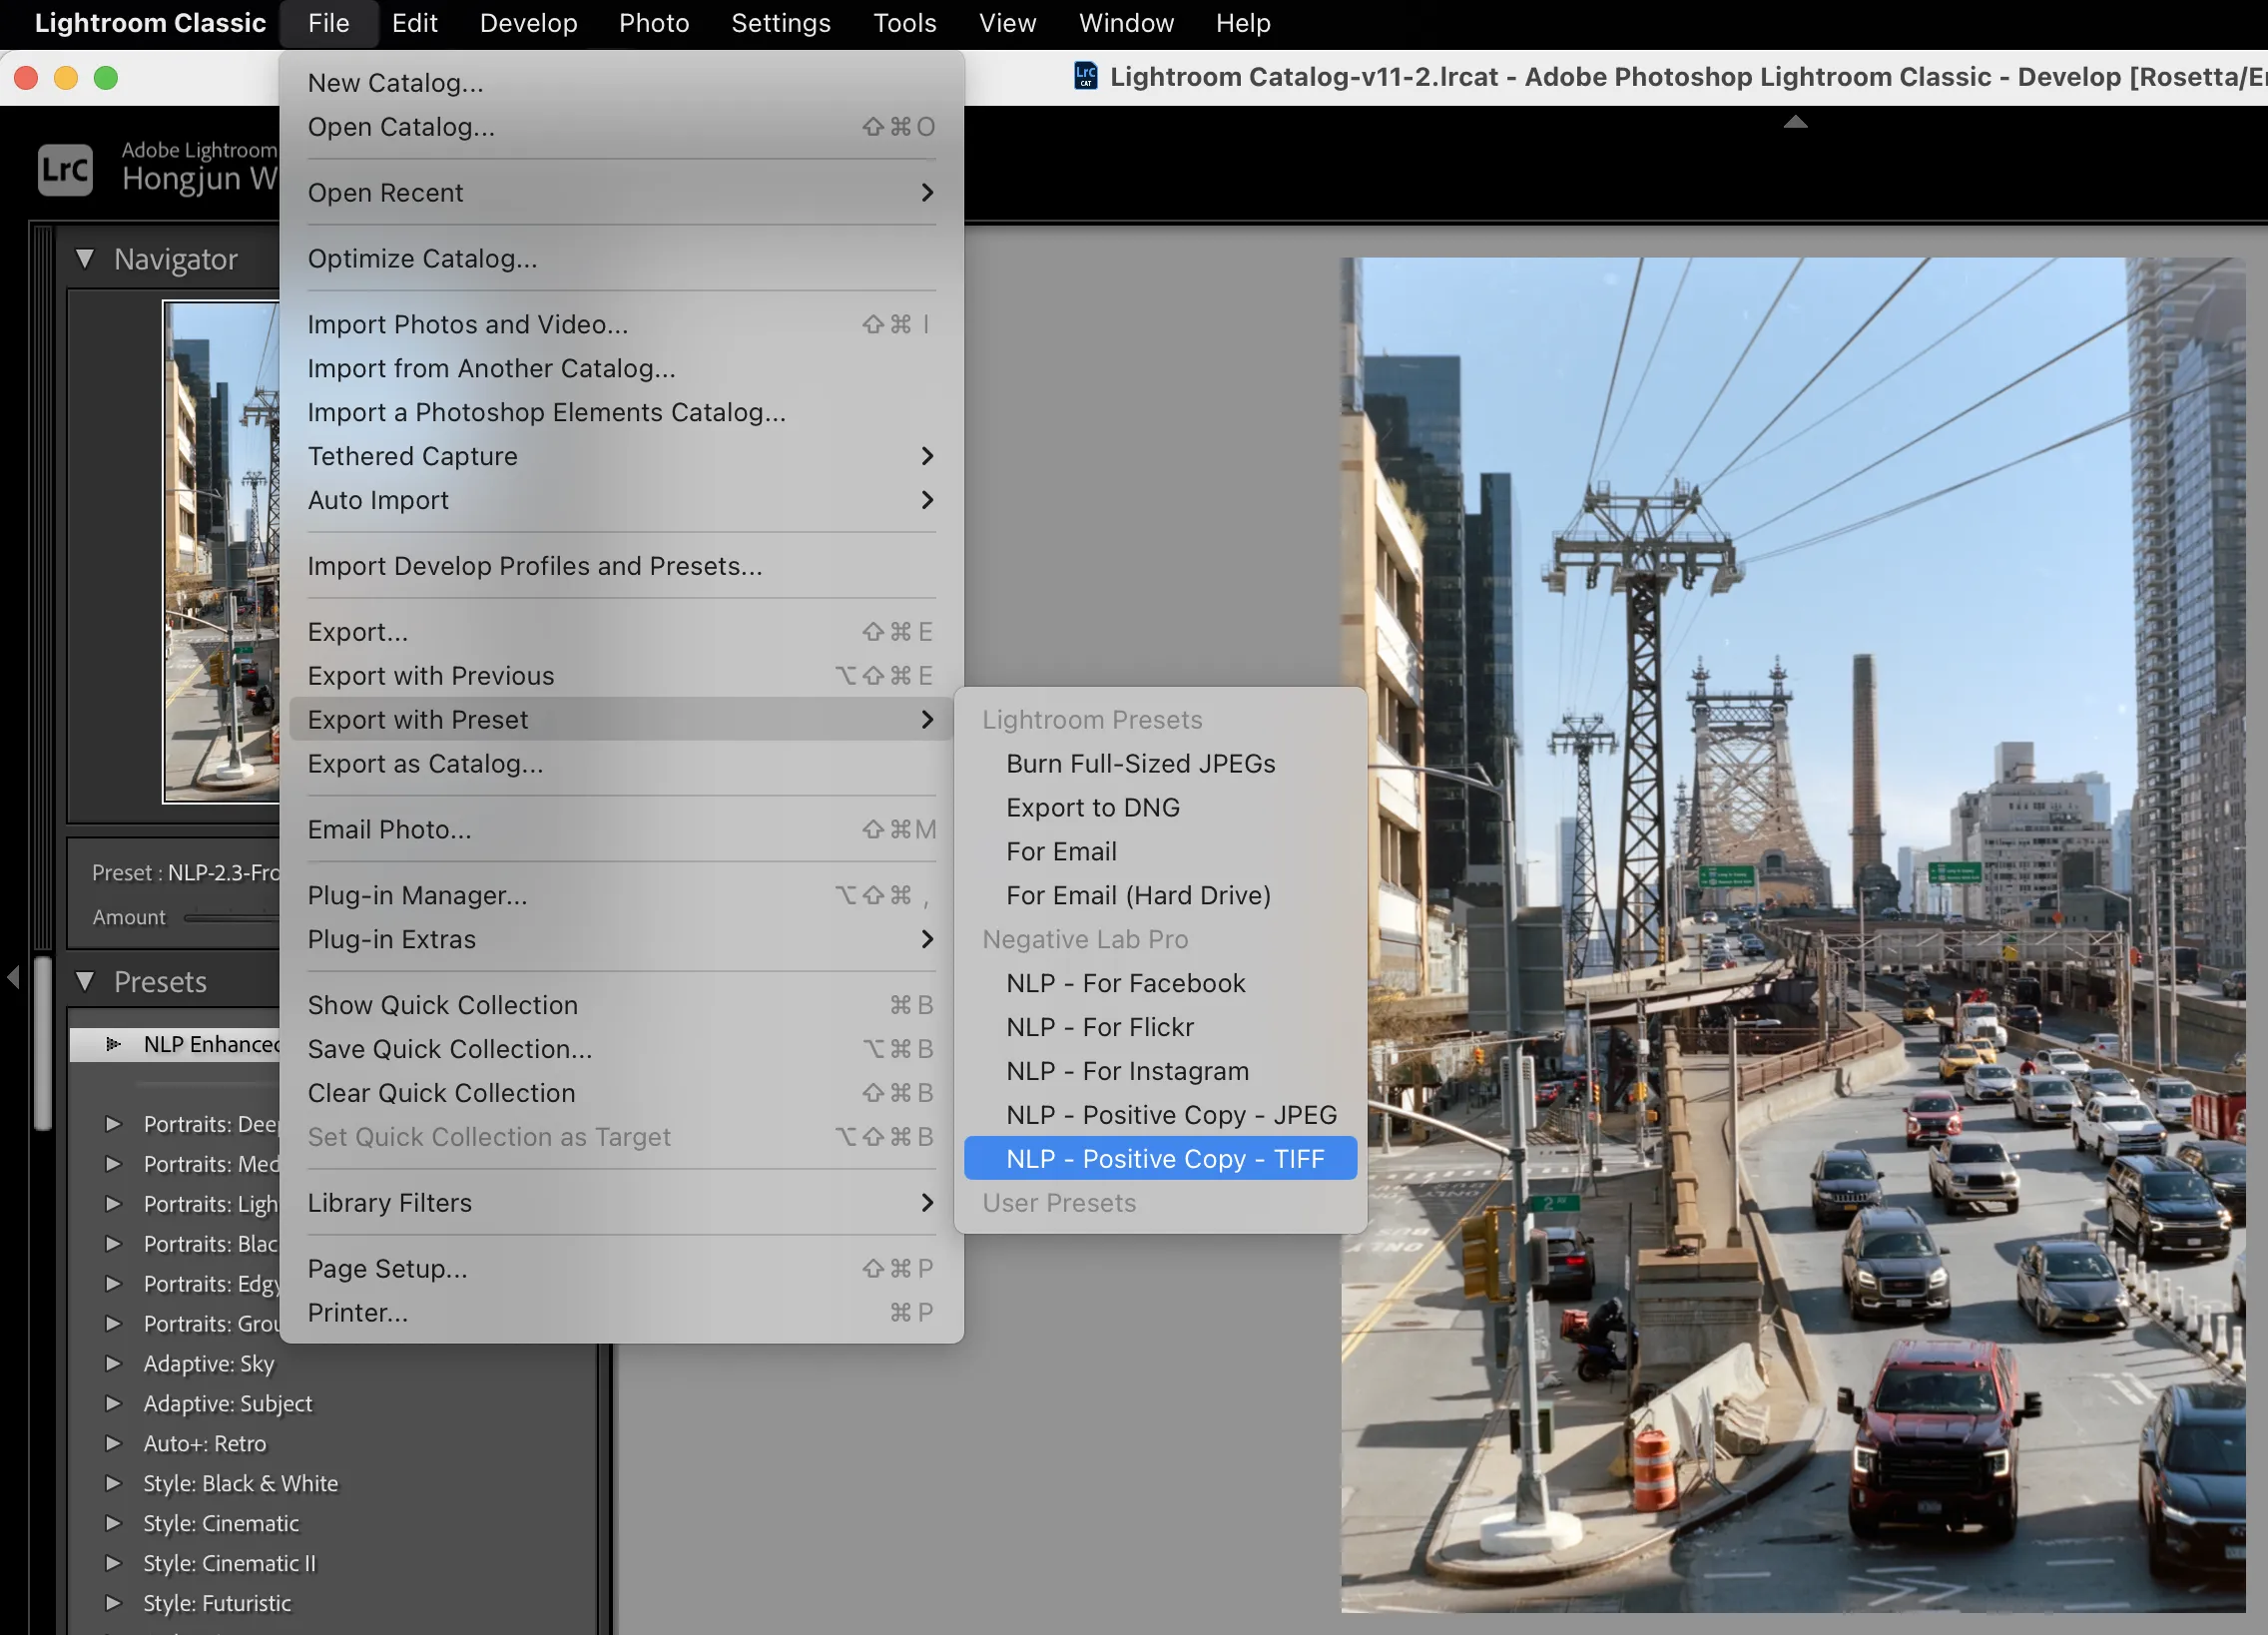
If you followed the previous steps carefully, the result should be pretty good. Time to export this image so we can retouch it in Photoshop. Go to the menu bar, File - Export with Preset - Negative Lab Pro - NLP - Positive Copy - TIFF and export the positive as a TIF file.
Retouching
I use Photoshop to retouch, and you can of course use any photo retouching software you like.
I normally just retouch the remaining dust on the film and light spots, here is a short guide.
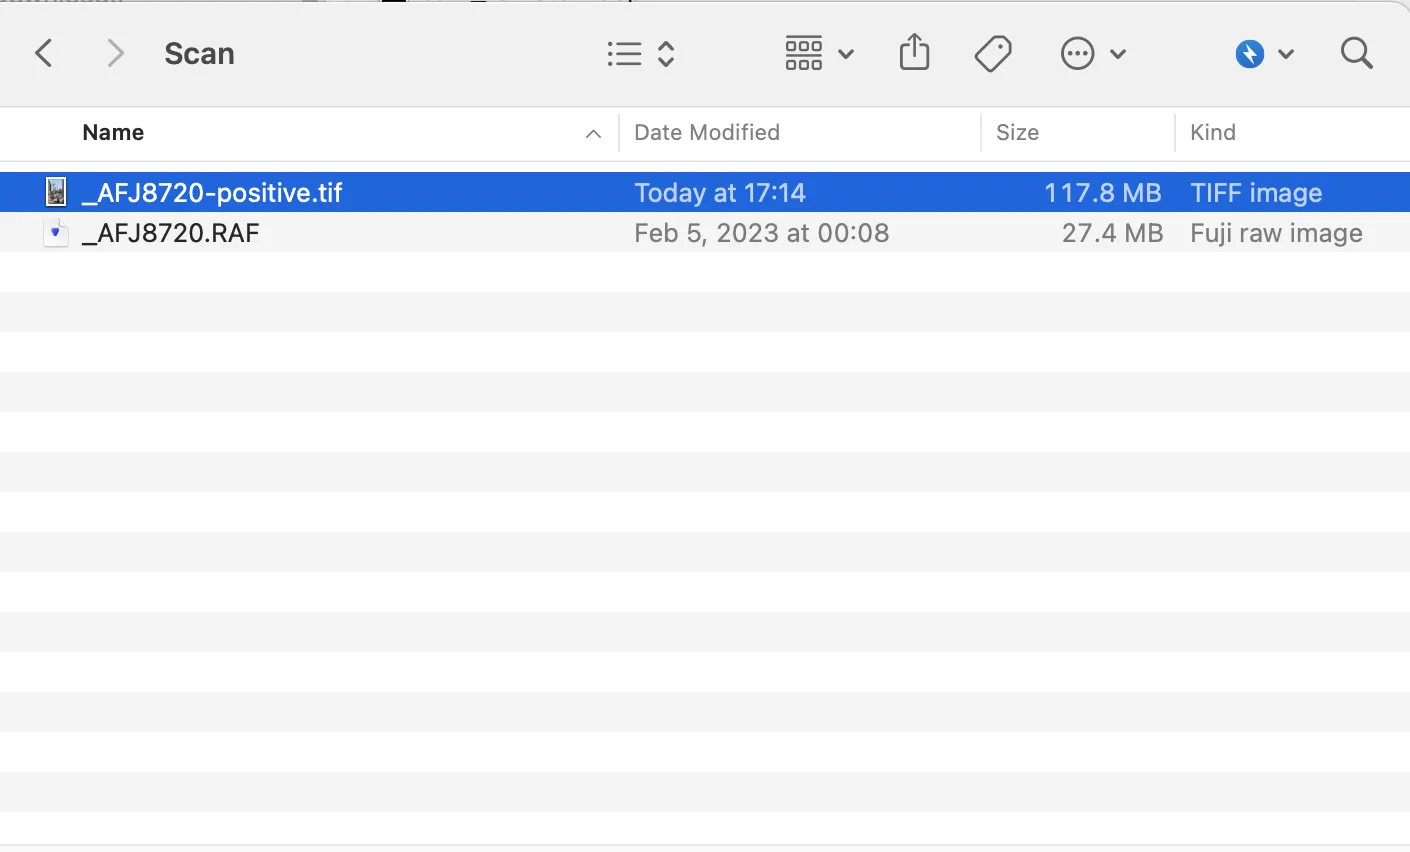
Open the folder that contains your negative, and you can see a new file called IMAGE_NAME-positive.tif is created. Use Photoshop to open this image.
Find the Spot Healing Brush Tool and select the tool to make it active.
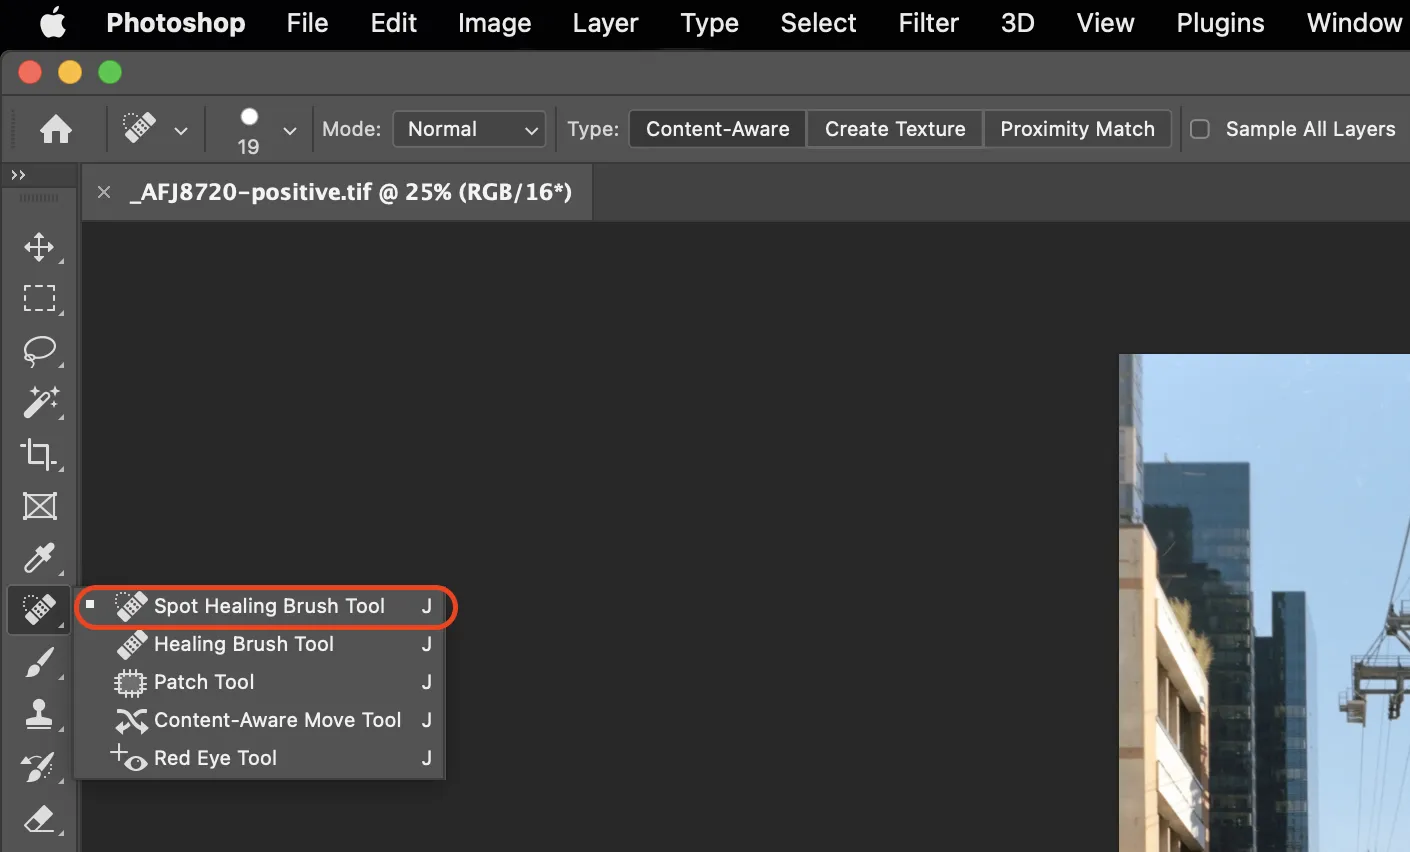
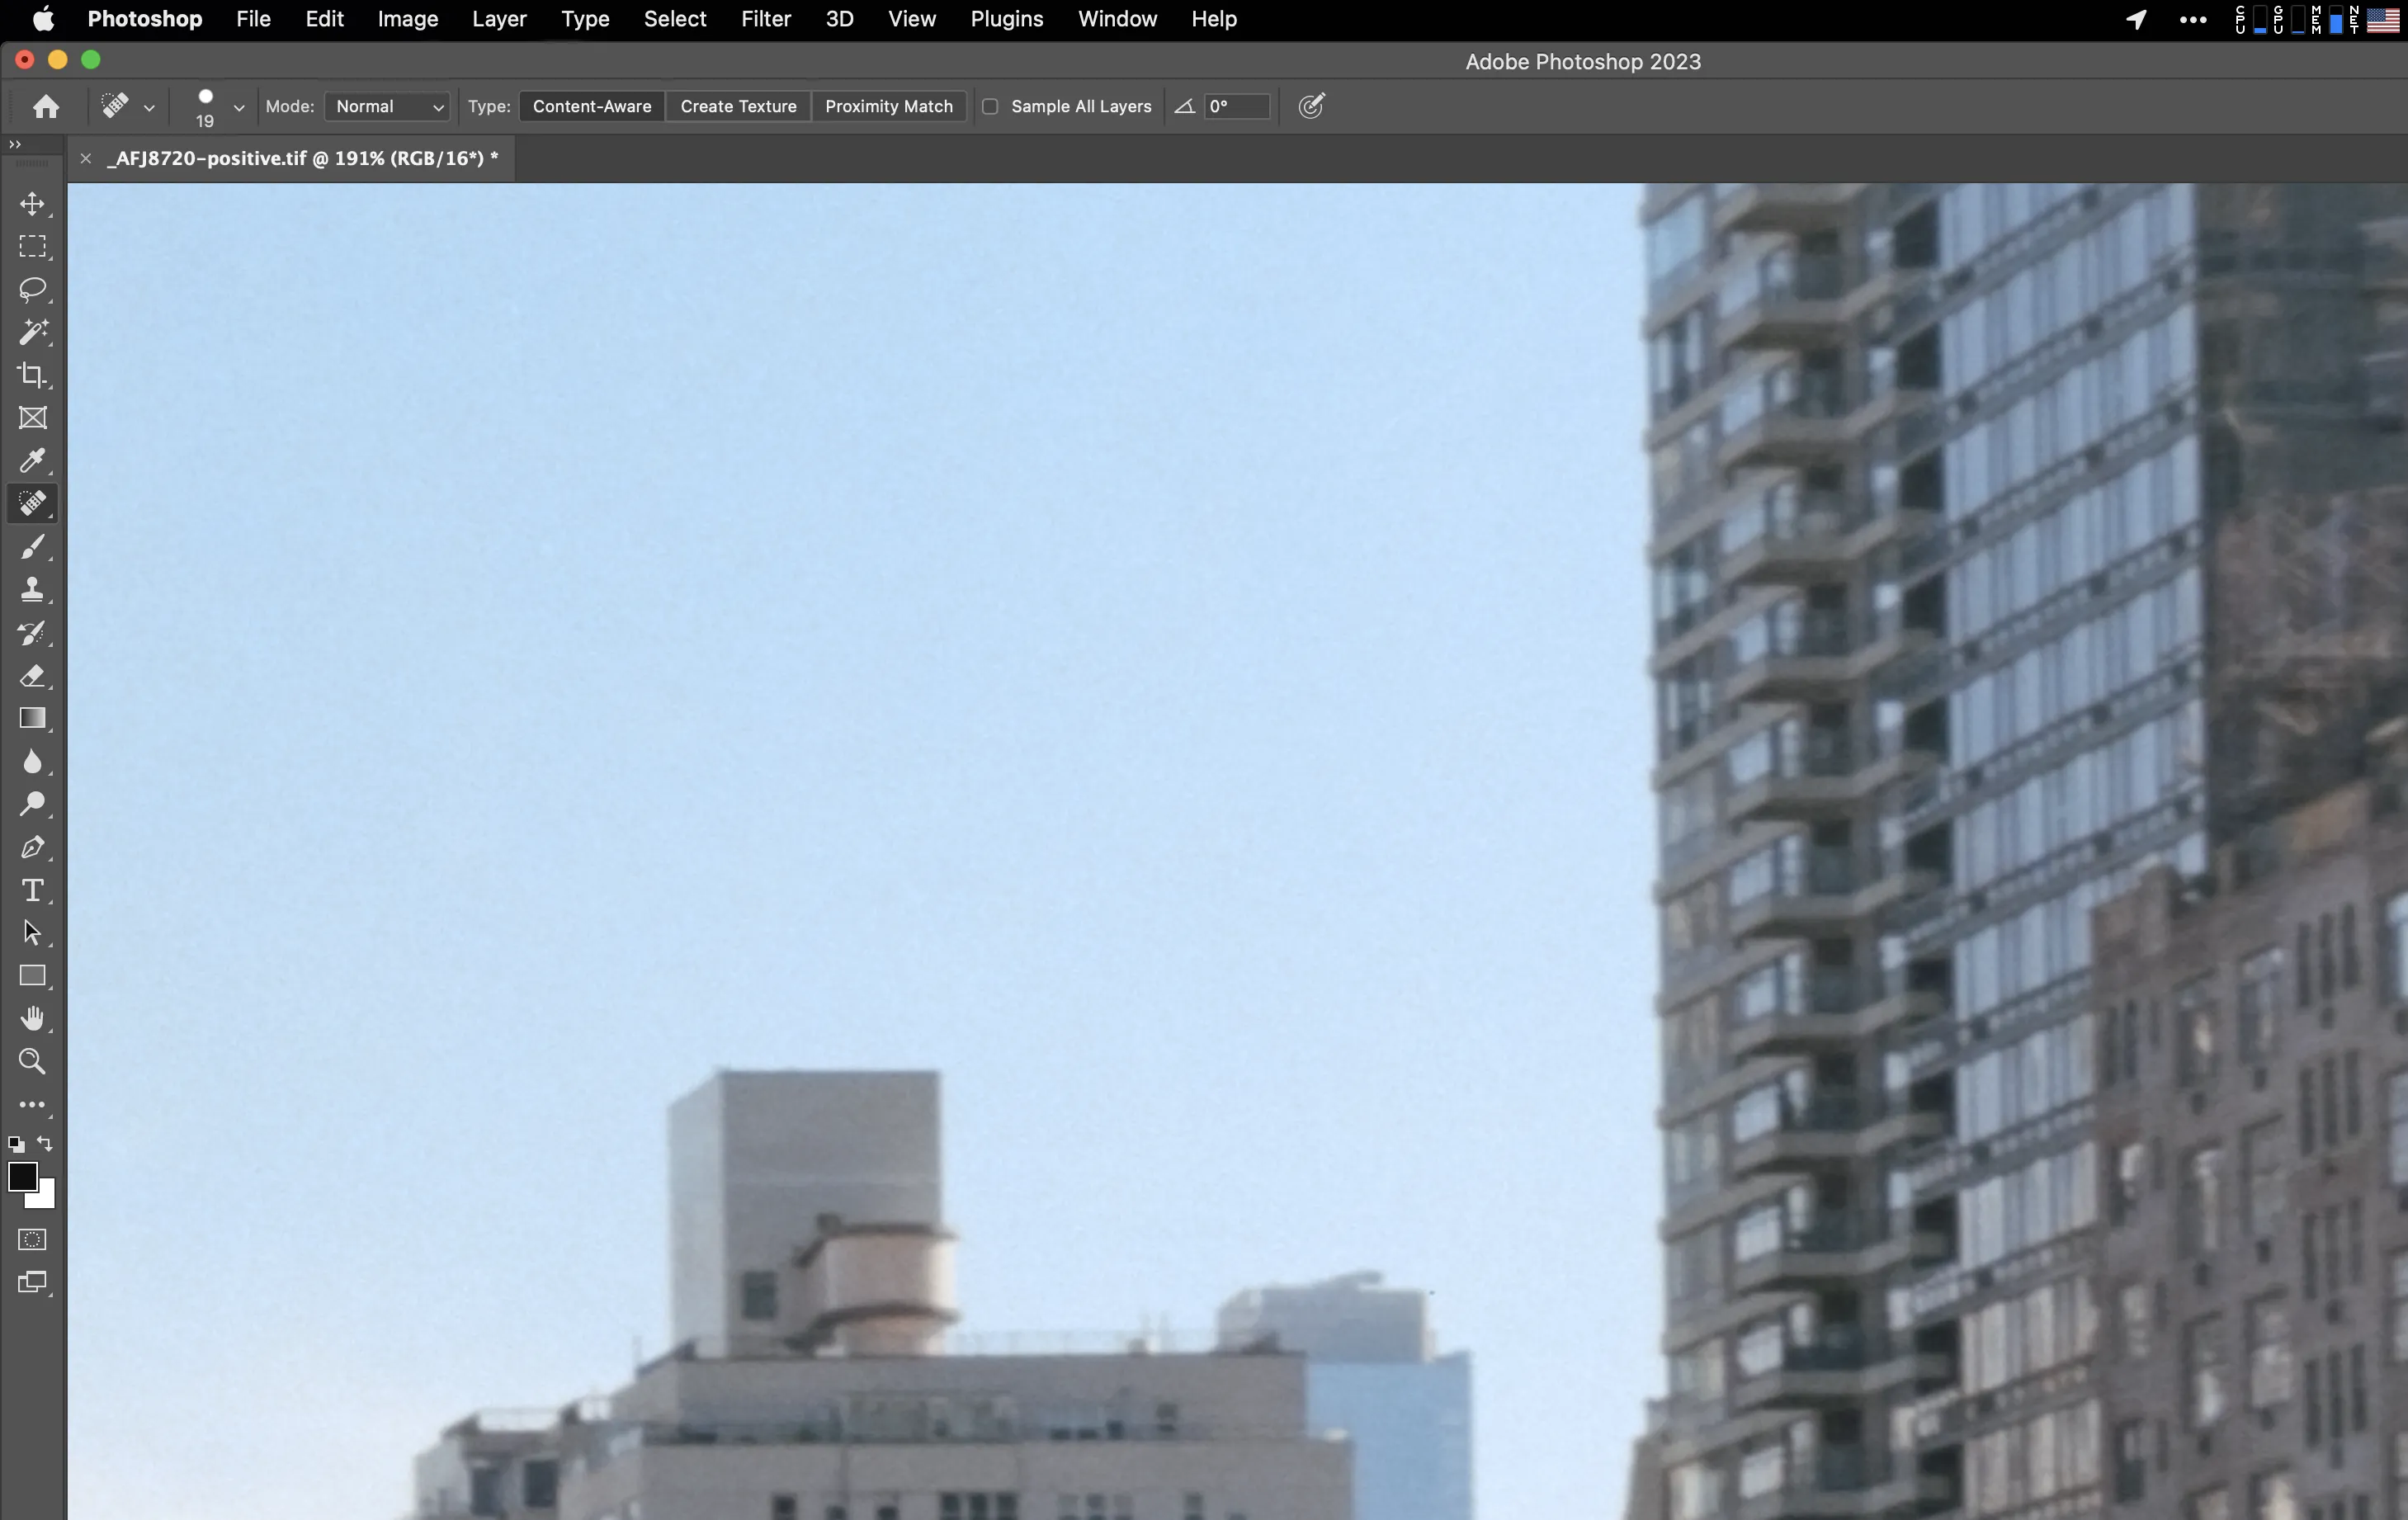
Zooming into the photo, I can see a trace of dust and some light spots on the photo.

Use the spot healing brush tool and paint onto the defects. You can use the "[" and "]" to adjust the size of the brush.
Of course, there are much more you can do in Photoshop to make your photo look even better, but that is out of the scope of this guide.
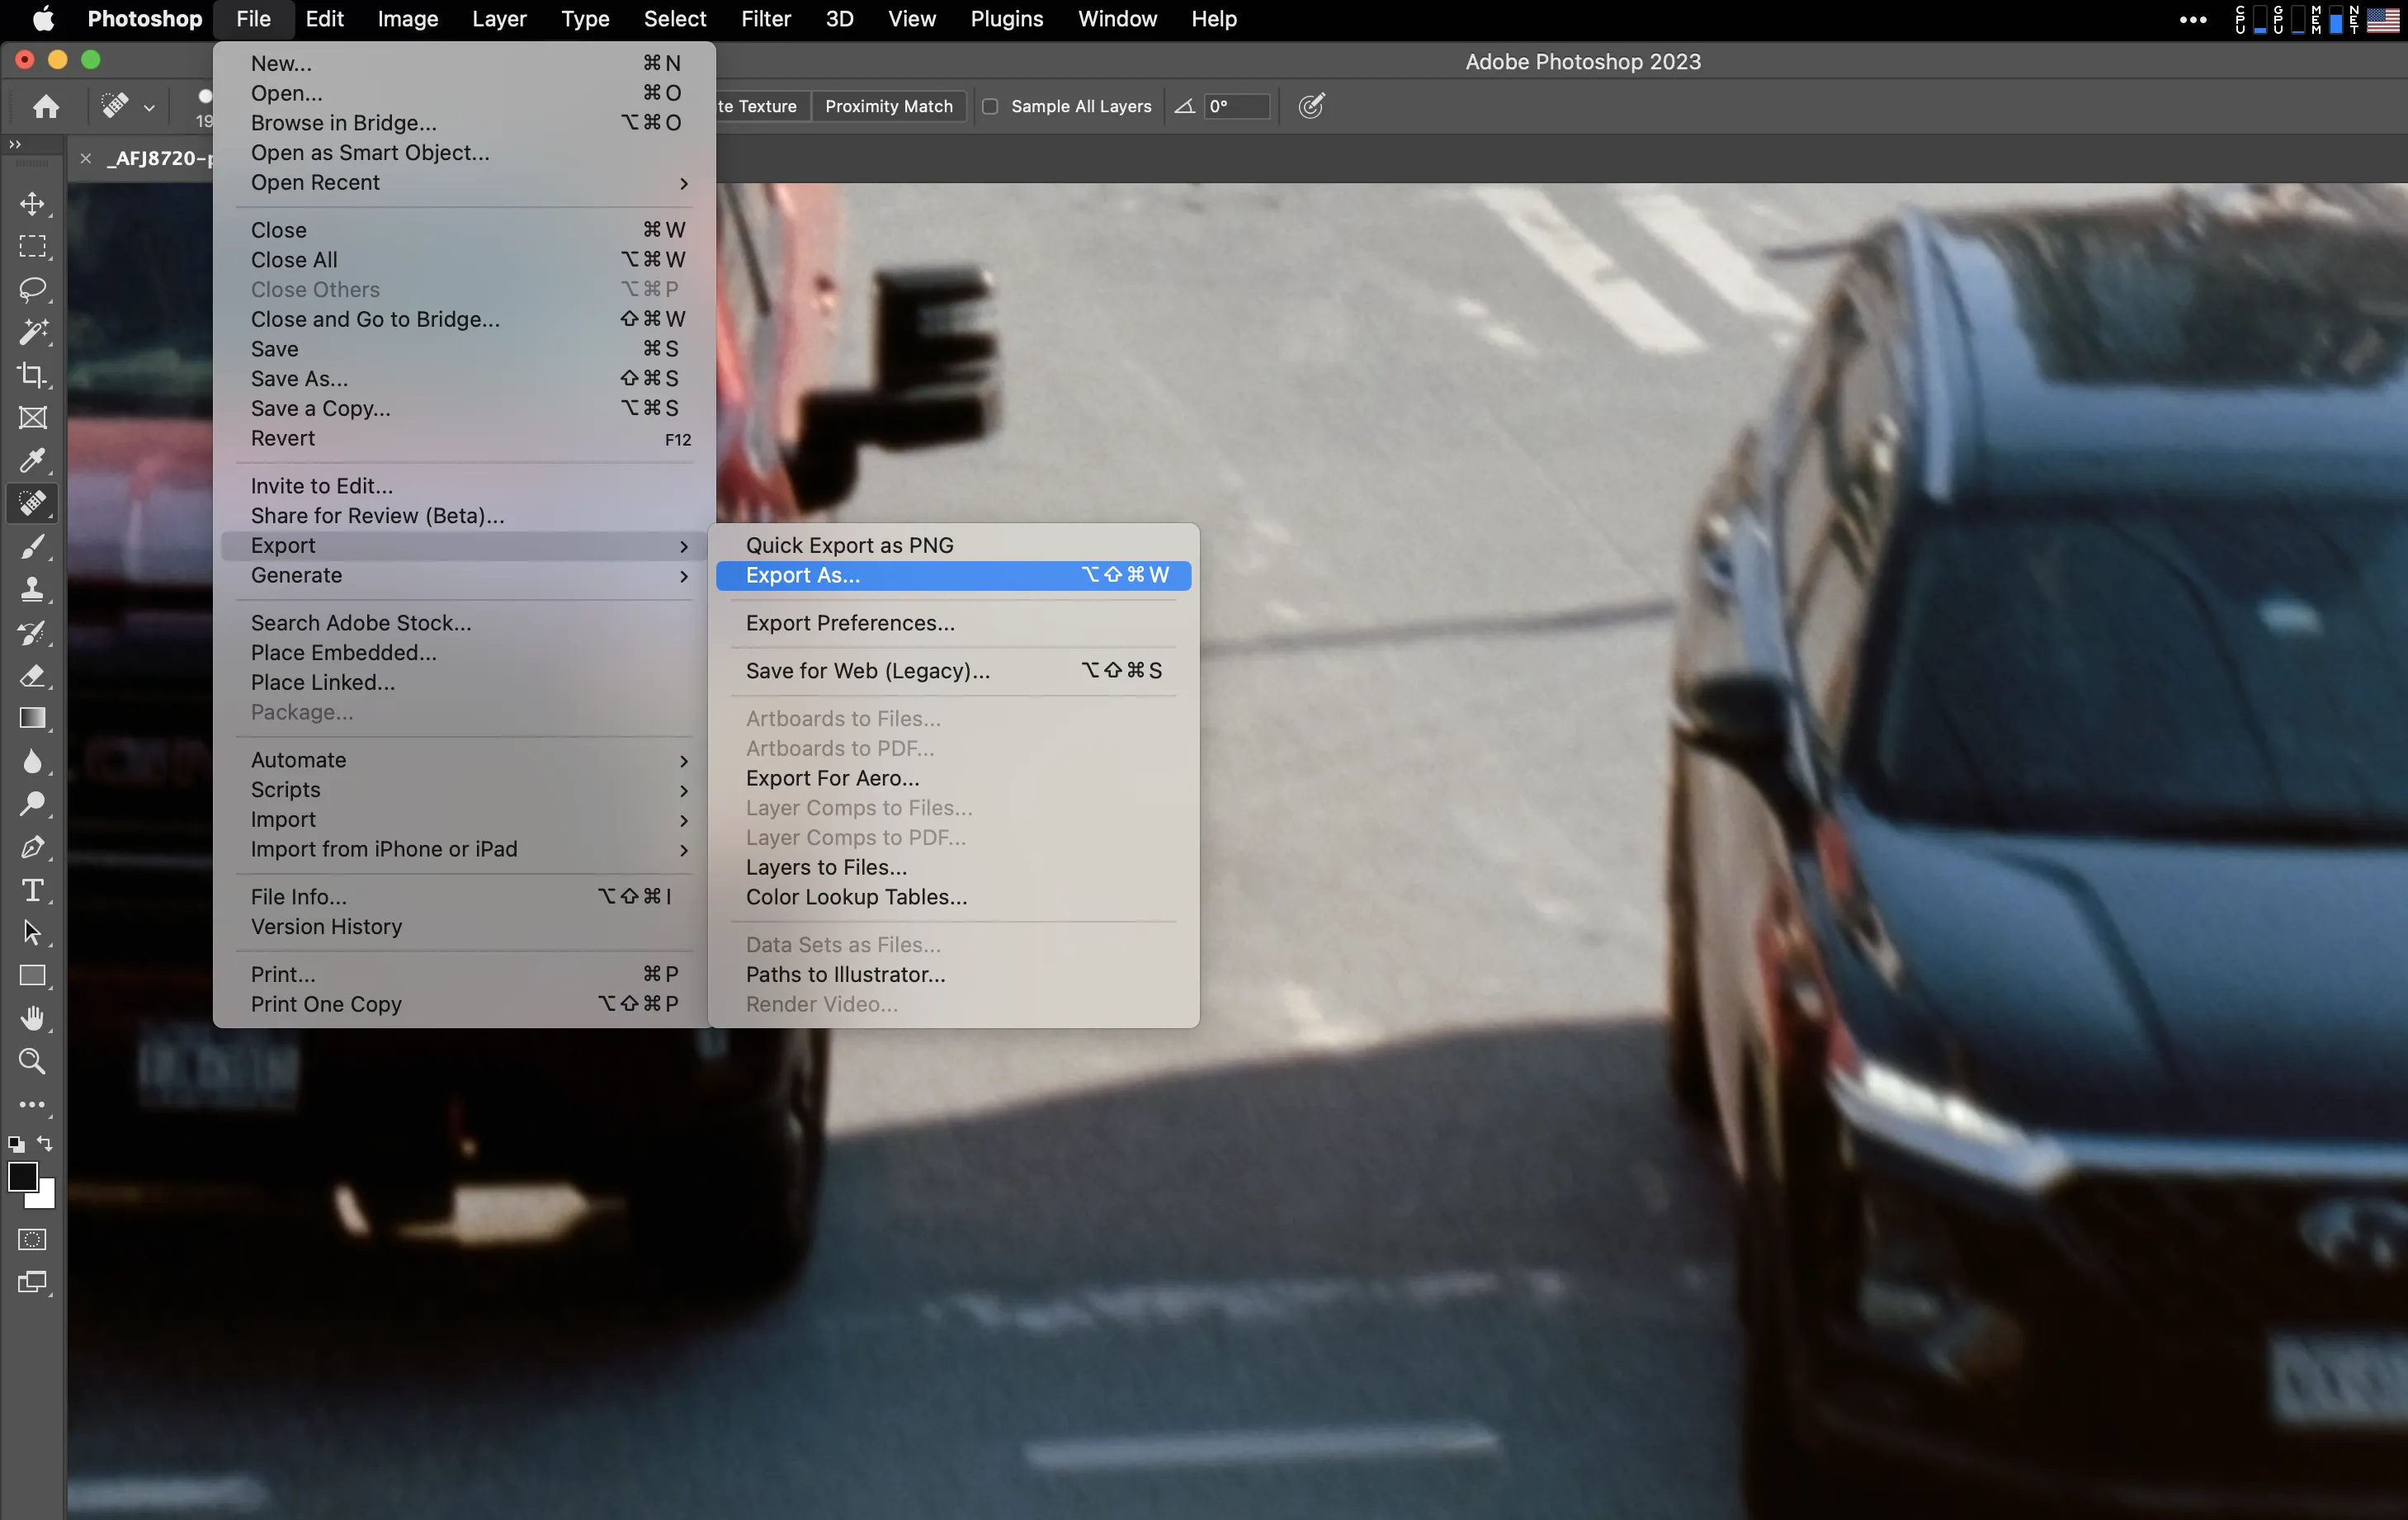
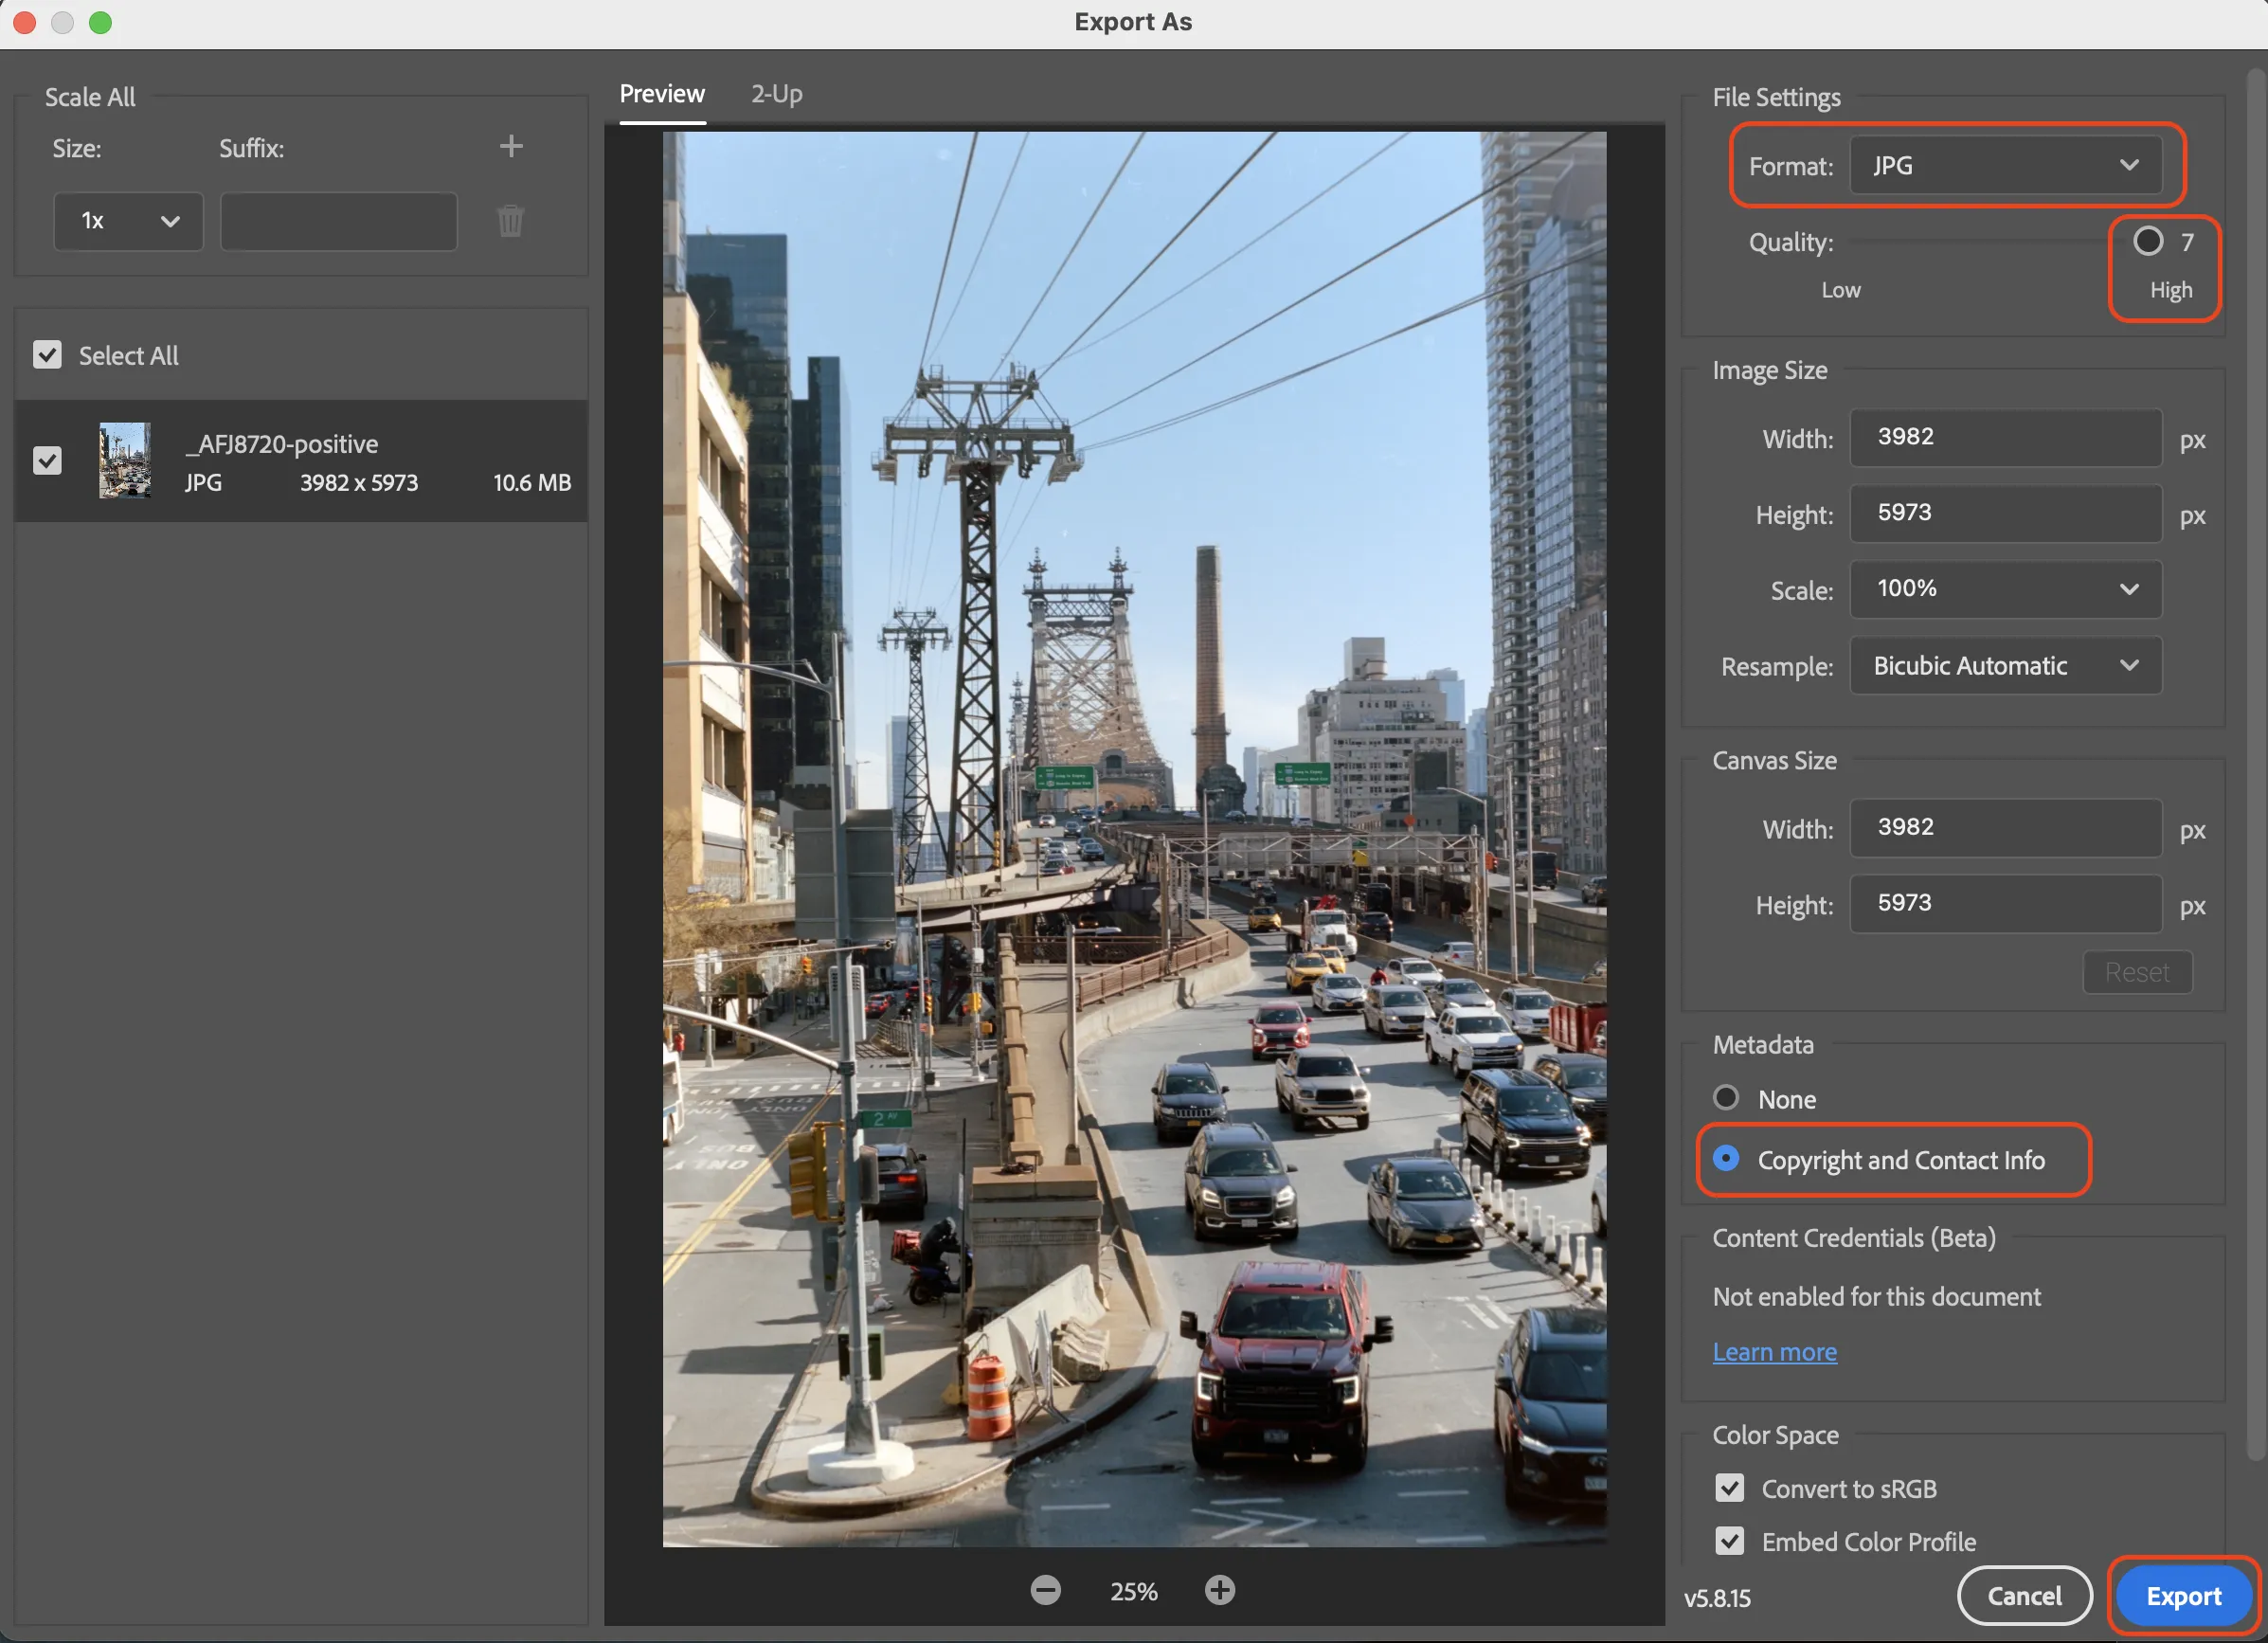
Once you are happy with the result, go ahead and use File - Export - Export As to export your photo into a JPG.
These are my recommended settings for exporting into JPG.
Done! At this point, the photo has turned from a physical negative to a digital image.
Postprocessing
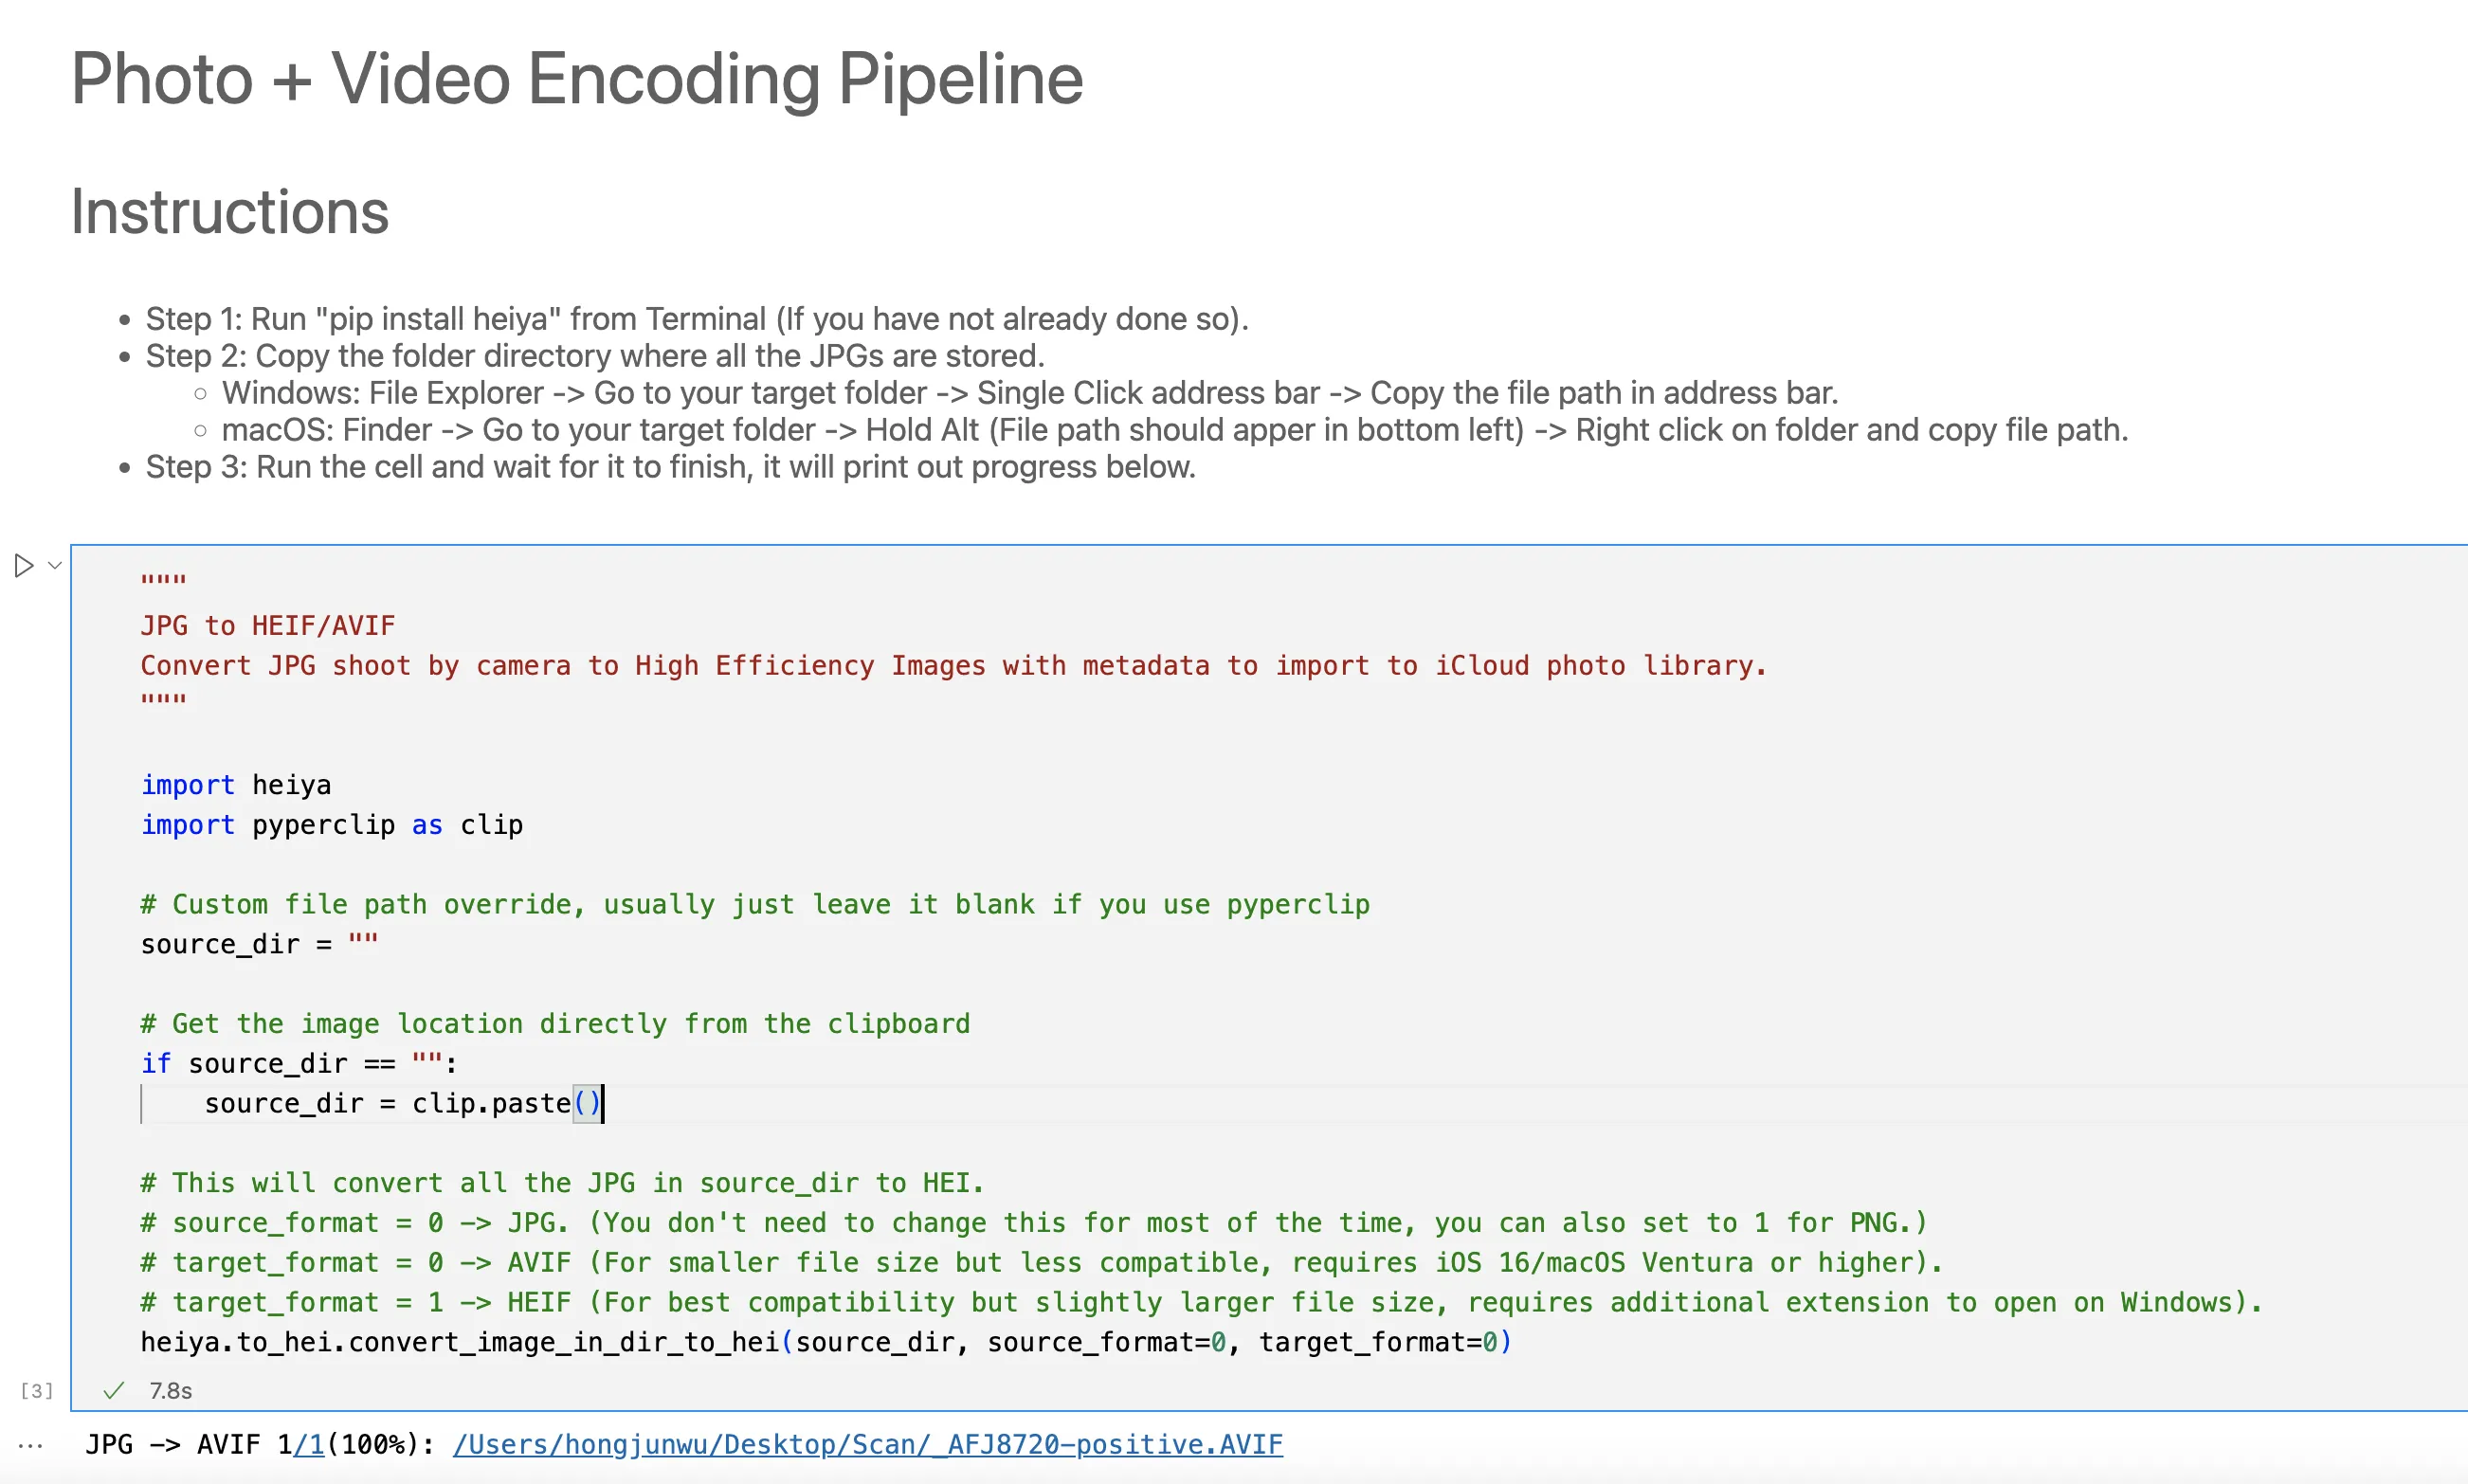
This is optional, but if you are looking into uploading these photos into iCloud, I developed another tool to make these images up to 100x smaller.
Heiya is an open source tool I wrote to transcode JPG into HEIC/AVIF format which is more modern and much smaller. If you are interested, please check out the install guide and documentation for Heiya, which I deliberately wrote up:
In short, copy the folder path (On macOS, hold the Option key in Finder) into your clipboard.
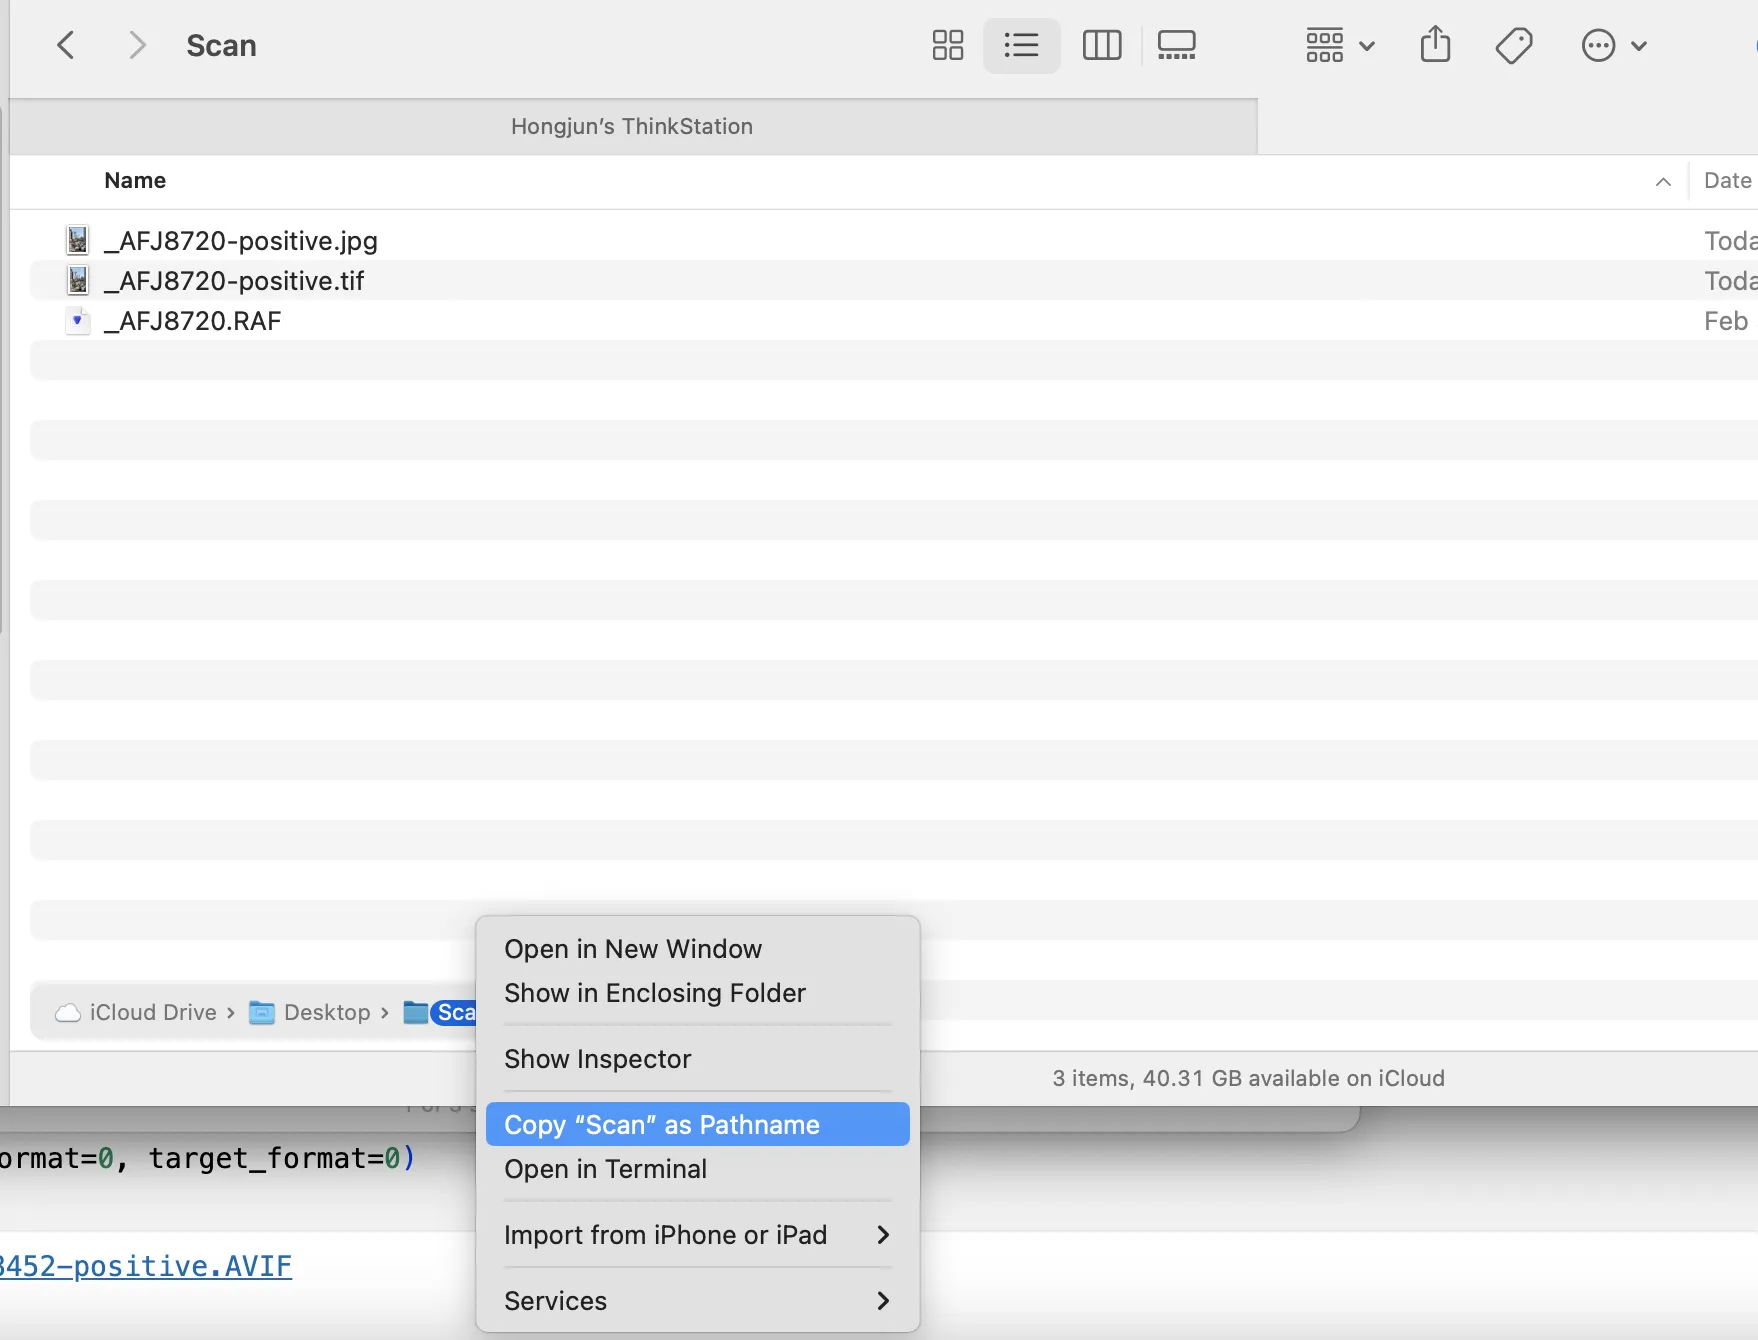
And run the first cell in pipeline.ipynb (More info in the Heiya documentation linked above).
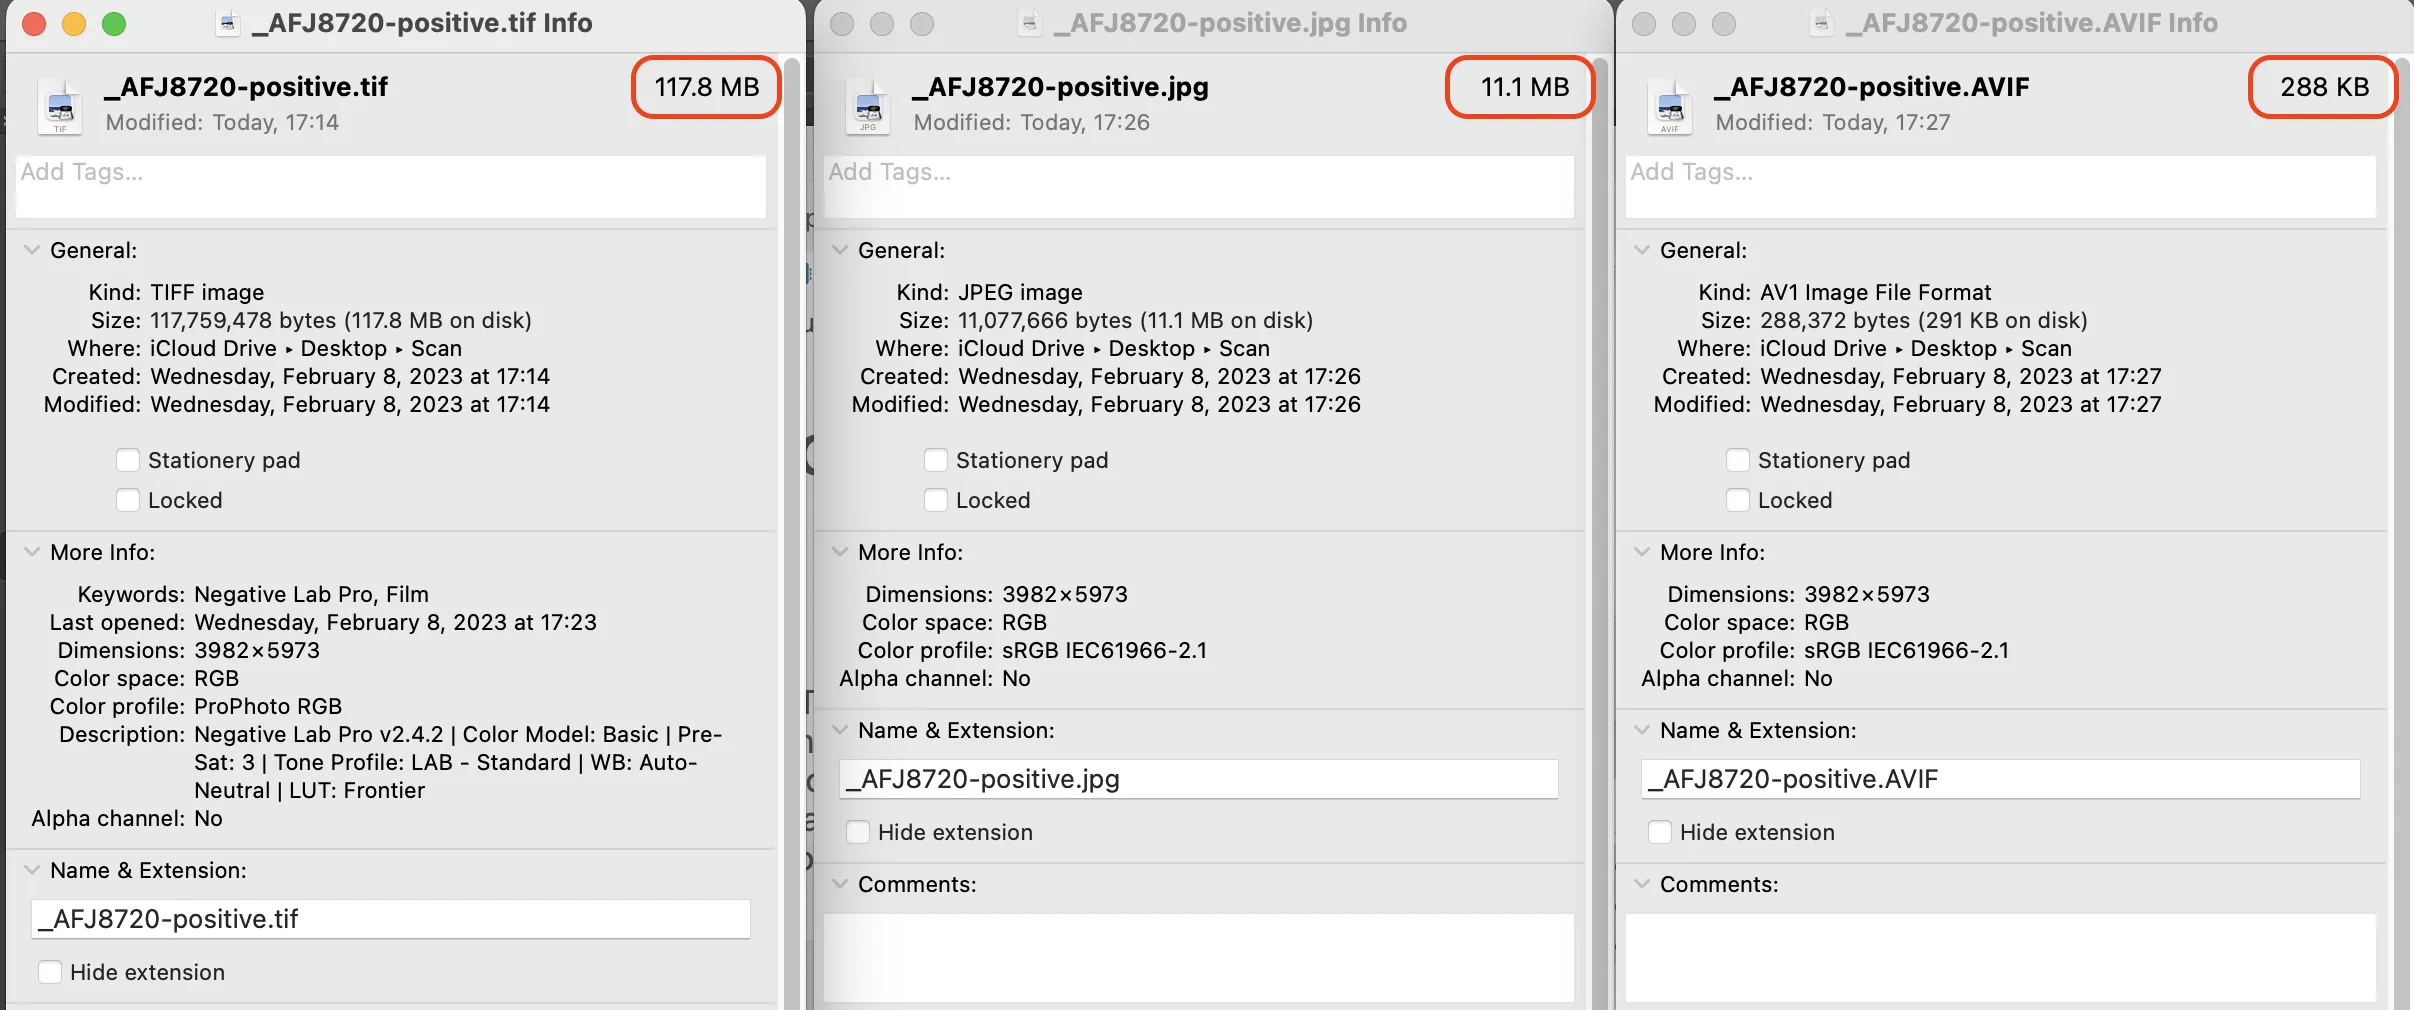
Finally, a file size comaprison between the TIF, JPG, and AVIF file. What a difference! The AVIF file is so much more efficient and if you have the newest iOS/iPadOS/macOS on your devices it should work like a charm.


