Setting up Atega using RubyMine.
The last post, although named (5), doesn’t really have anything to do with (1) to (4). You can skip (5) and pick up from (6) if you wish.
(To be continued)
Gathering Resources
In order for everything to work, go ahead and download VSCode, Git, and Ruby Installer. Note during the installation if any of the software ask you to add them to PATH make sure you tick the box to add them to PATH.
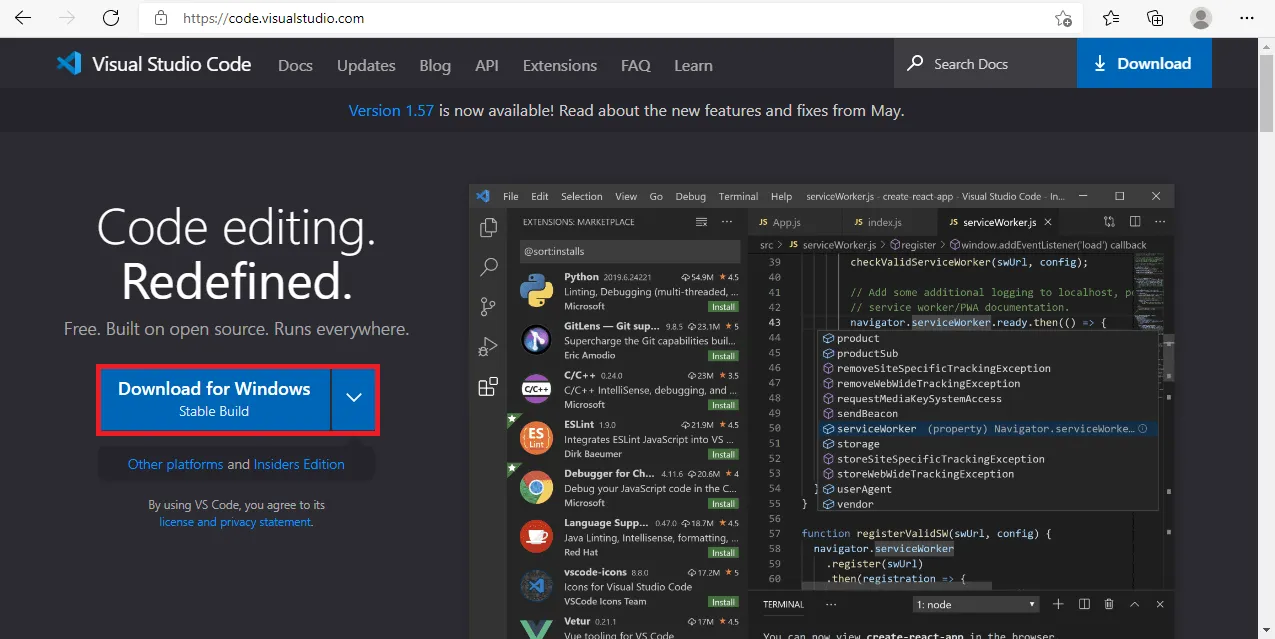 Install VSCode
 Install Git
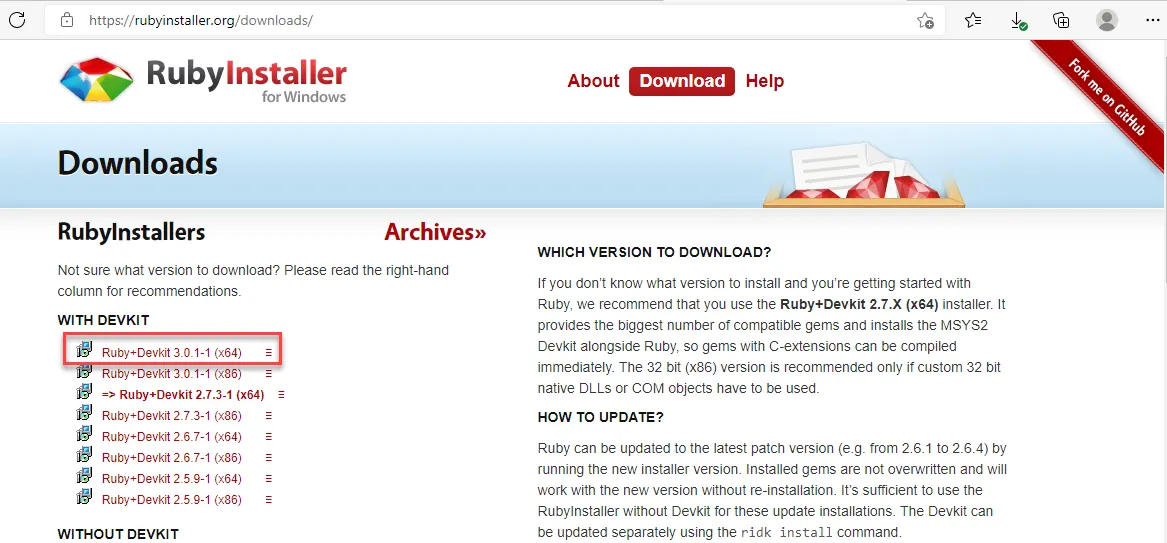 Install Ruby Installer
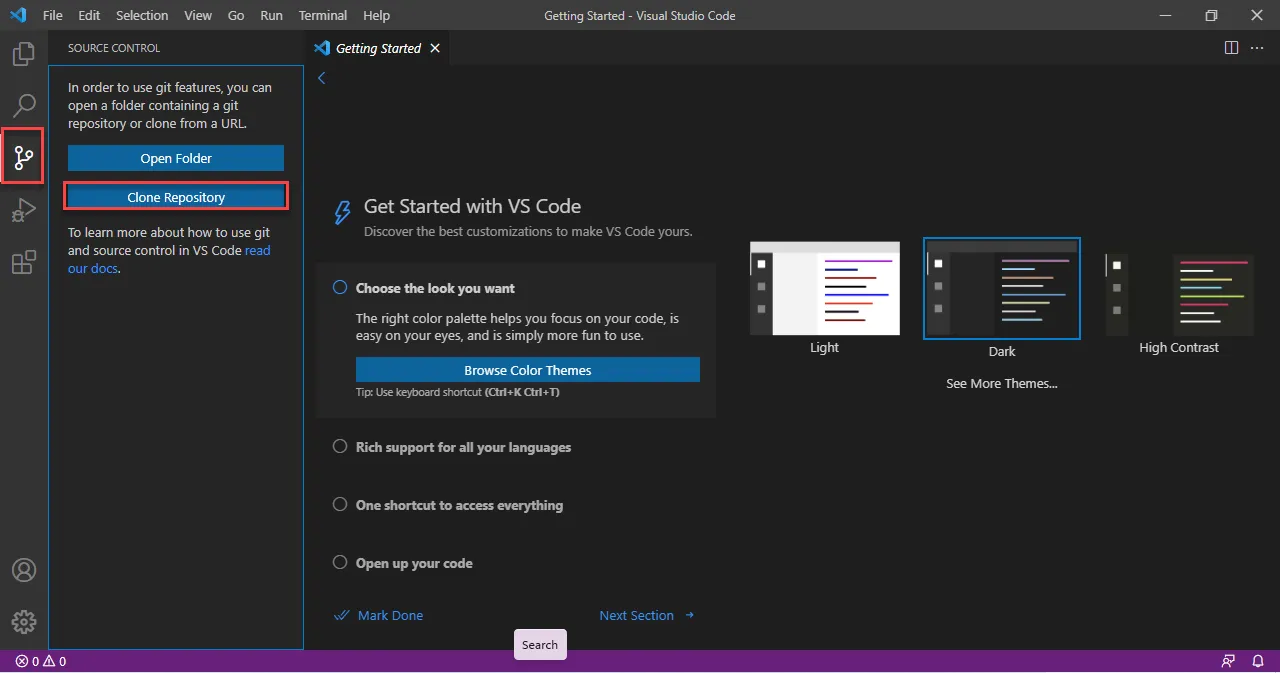
Clone Repository
Once you have everything installed, go ahead to VSCode to clone the repository (Or, for people who need to setup a repository from scratch, create a repository and drag everything from Carte repo into your local repo).
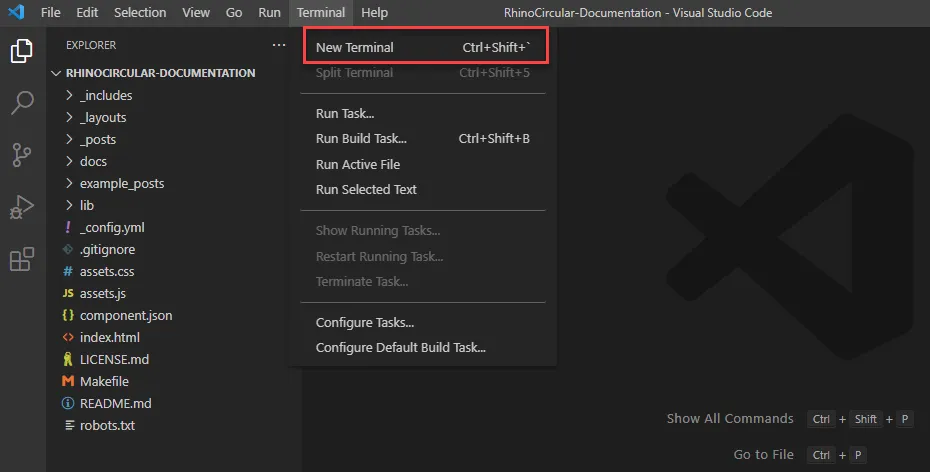
Start Terminal
With the project cloned (Or created) to your local machine, navigate to the top of VSCode, and open up terminal. You should see a terminal with the directory of the project popping up at the bottom of VSCode.
Installing Supporting Packages
Now that we have the terminal open, it is time for us to install some additional packages so we can get jekyll running.
Simply type (or copy) the following to terminal and hit enter:
gem install webrick
gem install jekyll bundler
 Expected output when installing Webrick
 Expected output when installing Jekyll
Live previewing the website as you write
One advantage of spending time tackling jekyll with Ruby is that it automatically rebuilds your site as you write it, so you can instantly see what happens when you type.
Jekyll does this by hosting the website on “localhost” (aka the special ip address 127.0.0.1 with port #4000). Think of it as hosting a website that only your current machine (hence the name “localhost”) can access.
All you need to do, is type in the following command into the terminal:
bundle exec jekyll serve --watch
Hopefully, the terminal cam produce the following output:
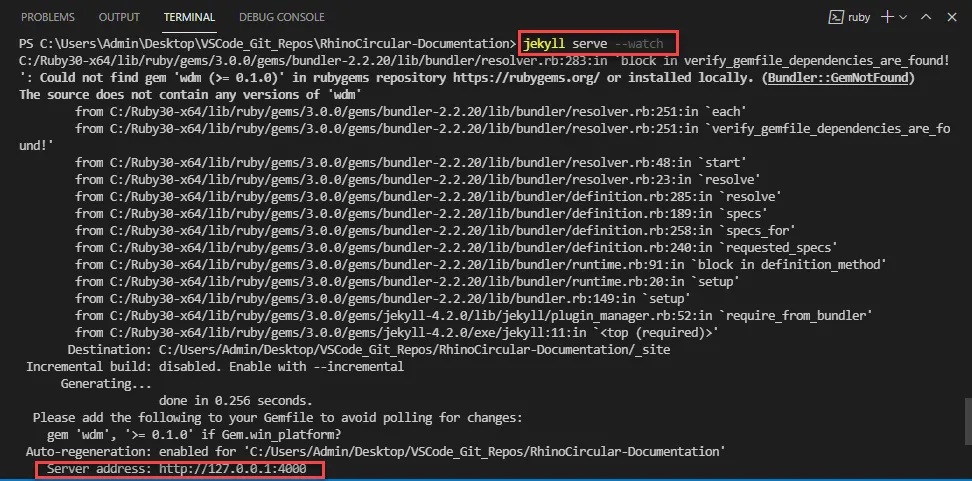 Expected output when starting localhost
What is it actually doing? It is taking all the markdown documents and images and generate a website under ./_site, which then gets hosted in localhost.
Note that ./_site is a temporary directory and can be used for testing only. In most cases if you are setting up a site from scratch, you should add this folder into ./gitignore so git doesn’t update this directory in every commit, reducing the number of files that are actually changing.
Now you can open up the “Server Address” in the terminal by either ctrl + LMB click(VSCode) or typing in http://127.0.0.1:4000/ in your favorite browser.
Each page in your jekyll website is located under ./_pages in your project folder. Try change some words, save the markdown file, and refresh your webpage. The webpage should automatically be updated.
Note that not everything in the repo is automatically rebuilt, one of the most notable example is the ./_config.yml that controls many important values about the website, including the title.
In order for an updated _config.yml to take effect, you need to stop the server and restart it using the command mentioned above.
And hopefully, you can see your website up and running. To stop the server from auto-generating, simply press ctrl+c and hit y when prompted.
You are welcome.
Ready to publish? Just one more line of command.
At this point, the site runs perfectly on your computer, but nowhere else. Even if you got everything in Github pages setup correctly, your github page won’t update properly.
Why? Turns out, github pages can only detect pages in ONE of three places:
- The root of the repository.
- A folder called
./docsat the root of the repository. - A separate branch named
gh_pagesin your repository.
In our scenario, I find it most beneficial to go with the second option.
If you are setting up a site from scratch, you should go change the setting of your repository in Github under pages.
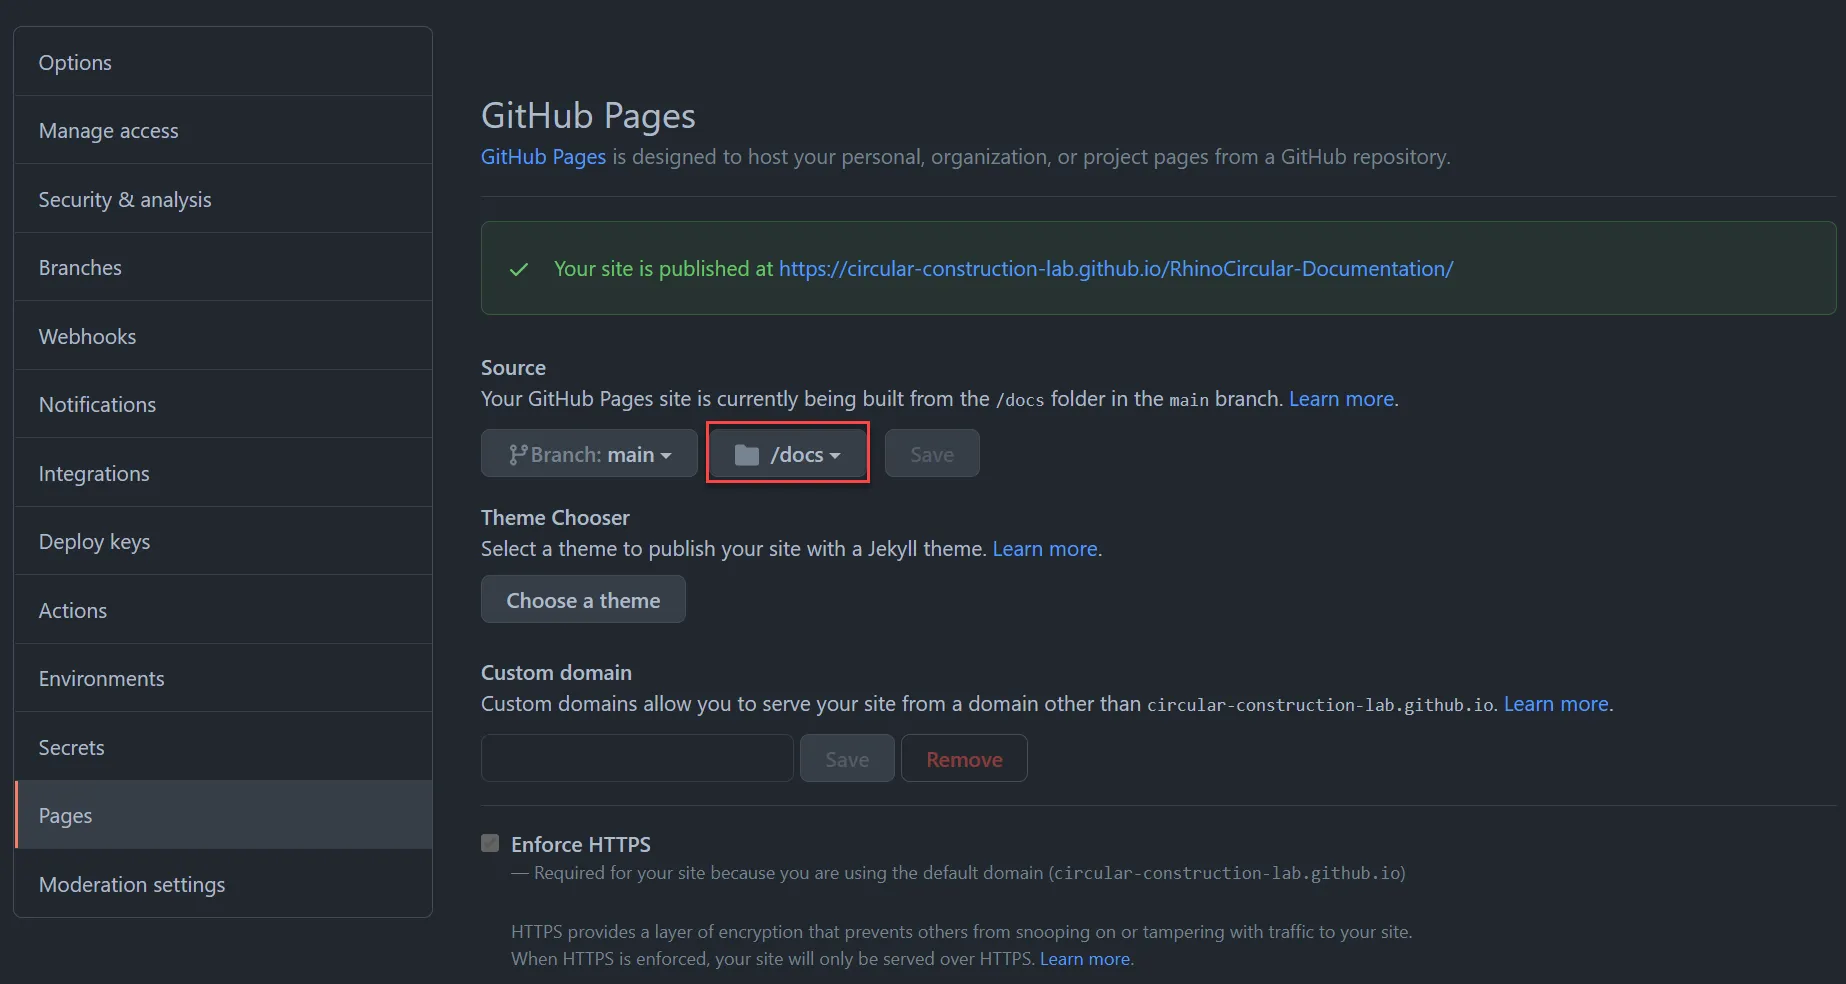 Expected GitHub Pages setting
Now github pages will search for a static website under a folder named ./docs.
But wait! I don’t have ./docs in my repo!
Don’t panic, we haven’t generated our static site yet. Let’s do that now, shall we?
Copy this line of command and throw it into the terminal!
bundle exec jekyll build --destination docs/
Jekyll should start generate your website. You can now see it in your repository under ./docs.
 Expected generate site output
Now, commit your changes, push it to github, enjoy a cup of coffee, and your site will be ready for anyone who has internet access to enjoy. Neat!
Troubleshooting
If everything goes smoothly from the beginning to the end of this post, good job for you for following everything, and good job for me for writing human understandable documentation. That is sometimes hard to achieve in the era of texting short messages, phew!
Here are a couple common issues that might get in your way, maybe you missed a step? (no big deal!)
Jekyll not installed
 jekyll_not_installed error
Solution: You don’t have Jekyll installed in your environment. Simply run gem install jekyll bundler in your terminal.
Webrick error
Interestingly, Ruby 3 removed one of the components that Ruby 2 included in the package. Therefore it can cause some troubles. You might see this:
 Webrick error
This can happen for two reasons:
- You don’t have webrick installed in your environment.
- Simply run
gem install webrickin your terminal.
- Simply run
- Your repository requires webrick to run properly, but you don’t have it in your
./gemfile.- Open the
./gemfilein the root of your repository, and all this line:gem "webrick", "~> 1.7".
- Open the
Good luck!


